Showing posts with label Drop Zone: Southern France. Show all posts

Sunday, 13 April 2025

State of Play: Drop Zone: Southern France (The War Room Ten Wargame Challenge #3)


A rather scattered initial drop. 


My brother-in-law couldn’t make it for a game last night.* I’d set up a new arrival, Drop Zone: Southern France (Worthington Publishing, 2025 – you can find an unboxing here) for our first playthrough. Since it was already laid out and ready to go (and looking so inviting), I thought, why not? I’d got it to the table a couple of days ago, but just to punch out the counters and push a few around, seeing how the different elements worked. I’ve been looking forward to a proper game, so I took the opportunity to get a game in.

I decided to double-hand it. The game comes with solitaire rules – two pages of seven -point font on a PAC – which I’ve read through and look workable, but for a first time out I’d rather play both sides as fairly as I can to get a feel for the whole game, all the moving parts.

Set-up for play; German garrisons and mobile units, along with British
and American para-drops. Ready to go.
 
 Set-up

The initial set-up places the Axis forces in predetermined locations on the board. Most of these are garrisons defending Objective locations – towns, hills, and road junctions, and some mobile units. The garrisons – nineteen in all – can only defend and don’t have any movement value (they’re there to stay put and fight to the last man). The other German units at start are mostly infantry with one mechanised reconnaissance company. These are placed, one unit at a time, with a simple dice-roll mechanism; the intended drop-points are marked on the map, each numbered to correspond with a paratrooper battalion. But nobody ever lands where they’re supposed to. To place each unit, you roll two six-sided dice. The white dice dictates the direction (the six hexes around the drop-point, while the red result indicates how far in that direction the unit ends up (result halved, rounded up). This can make for some significant scattering of a battalion. It will also go to making each game a different challenge from the last.

The on-board drop guide. the white die indicates the drift direction, while the red die
dictates the distance form the landing target (d3, or half the result, rounding up).

After the preparation stages are complete, turn one starts with a preordained order of play; from the second turn on, faction order is decided by chit draw. I laid out the activation chits on the board in their proper order, and we were good to go.

Pre-drop set-up card.

It’s worth noting that set up takes a little while; I knew it would, and I did some preparation ahead. Like other Worthington games, Drop Zone comes with a counter tray with troughs for the counters and open bays for the dice. When I punched and stowed the markers, I grouped them into sets; all of the garrison counters in one channel, the initial para-drop counters in another, then the two side’s reinforcements, grouped by their arrival brackets. While not perfect, this probably saved at least a half hour of set-up time, maybe forty minutes, that wasn’t spent sorting and grouping the counter from a cold start.

Turn 1

Both sides begin the game with whatever is already on the board. Turn 1 starts with the German factions’ activations. There are only five mobile units in play at this time, so this didn’t take long. First to be activated were the KGr Schwerin (dark grey). Pfannkuche’s “Alarm” contingent, based in Draguignan, dashed south and brought battle to DeBray’s Free French company outside of Trans en Provence. When the paratroop units are initially placed, they are set face down, with just a parachute symbol showing. You never know what you’re going to get. They are revealed when contact is made, or on being ordered by the owning player.

Trouble in Trans en Provence.

If DeBray’s FFI company had been an American company, the American side would have been able to reconstitute the unit at one step in the next turn by spending a Reinforcement Point. As it was, these troops were lost (or at least disordered, and some probably joined their local compatriots in securing the Trans en Provence when the garrison was defeated.

In Les Arcs, about seven kilometres to the south of Trans en Provence, the 204-S “Alarm” contingent under Jahnke’s command headed to the neighbouring town of Roche Rousse, only to engage with McKinley’s F Company, (6 Serial), and not survive the altercation. The two “Alarm” companies were what the name suggests; these were scratch contingents pulled together from the non-combatant troops located at divisional HQs anyone from clerical staff to cooks who could carry a rifle were dragooned into defensive, sometimes offensive, service.

Jahnke's folly.

The second faction to activate was the 128 Reserve Division forces. The 242 Recce and 2 Company, 8 Pioneer Battalion were reluctant to leave the crucial hubs of Le Muy and RJ 7/43 respectively. Retaining Le Muy and the 128 Headquarters at Draguignan was the best hope the Germans had of prolonging the battle and slowing the Allied advance, and crucial for keeping channels open for reinforcements. The closest enemy units (thus far unidentified), were in heavily wooded areas, which would reduce the German units’ effectiveness. Better to wait for the Tommys to attack their defensive positions for the defensive bonuses.

Attack they did. The American units of the 509th PRCT (Parachute Battalion Combat Team) were next to activate. In their turn the PRCT made relatively short work of a handful of garrisons, efficiently taking Les Arcs, Trans en Provence, and Roche Rousse in their first turn.

A brave and foolish effort by combined British and Free French forces,
probably trying to out-do each other.

The British 2 Independent Parachute Brigade Group (2 IPBG) acquitted themselves honourably, managing to seize St Michel and Le Motte, and positioning themselves well for assaults on Le Mitan, Clastron and Road Junction 562/264. Their big failure was an ill-advised assault on the reinforced RJ 7/43, which cost two understrength units against the garrison force and Lober’s Pathfinders (they were able to reconstruct one back to one-step with a reinforcement point in the next turn, but it really was a stupid move, and something of a high water mark for the Germans).

Reinforcements and assets. I find the rounded bottom ramekins reduce wear and tear
on any chits or markers that require a random drawer.

Turn 2

The way reinforcements work in Drop Zone is pretty neat. Both sides receive reinforcements each turn after the first. The Allies get three British and three American companies in their reserve mix; at the start of turn 2, the sets are each placed in their own draw cups (I used concave ramekins, one is drawn from each, then placed at their respective entry-points (marker by a letter in the top left hand corner, which will correspond to a road entry hex on the map edge) at the start of turn 2, another each at the start of turn 3 and the remaining units on turn 4. There’s a similar mechanic for the German reinforcements. The chit draw thing is also done for the two sides’ assets. These are one-off bonuses that can help a side in a given combat situation, such as off-board artillery or an air-strike in support of the attacking or defending force. Neither side gets all of these, and most can only be used by one or the other faction in a side.

Activation order for Turn 2. I used the red poker chips to mark the units that had been
taken out of the game but were eligible for reconstitution using Reinforcement Points.

From the second turn on, four circular Faction chits are placed in an opaque container (there is a lot of chit drawing from here on in), and drawn one at a time, a new draw after each current faction has completed their activity. As it was just me, I ignored this and drew them all, placing them in order on the track, probably saving me a few minutes overall. The order was to be PBCT, 128 Res-Div, 2 IPBG, and KGr Schwerin.

From the second turn on, each faction gets a couple of Reinforcement Points, as dictated by the chart on the Turn Track. These can be used to resurrect fallen single-step units or bolstering single-step units to their second step (I imagined that for the paratroopers, at least, this represented latecomers regrouping with their units – this was an issue on the first D-Day, with some soldiers not rejoining their home units for a week or more after their drop). Having taken Trans en Provence, the Ninth Battalion reorganised and split up, with Fraisier’s A company setting a road-block to the north of the town against German reinforcements, DuBray doing the same thing on the road heading west, and La Chaussee’s C Company pulling off an unlikely coup, taking the town of Valbourges to the east single-handedly. In the south-east, and against the odds, Seigel and Tofany’s companies managed to take Hill 212 with minimal losses. This was to be indicative of my rolls for the Germans almost across the board. The Allies suffered losses, but the Germans could not seem to hang on to a single challenged objective, or to retake a captured one.

It is probably a bit gamey, but it makes sense to bolster the units that are most likely to see combat on that turn or the next, especially in crucial placements. With more German replacements on their way Americans were reinforced around Les Arcs and Le Muy, while the British, who had met stiff resistance in the Eastern sector, reinforced around Le Mitan and the crucial forest Road Junctions 47/43 and 7/43.  

Despite the danger the British reinforcements - in the shape of Blackwood’s D Company, 5 Scots set to come in from the east, later that turn – the loss of Le Nuy as a check to Allied advances was the greater danger. 128 Command shifted the Pioneers south of Le Muy to shore up the town’s defence and apply pressure to the FFI ad hoc garrison on Hill 212, while the 242 Recce Battalion had a lossless exchange with Seigel’s paratroopers.

Reinforcements come onto the board at full strength regardless of faction. So, on their activation the 2 IPBG raised Fitzroy-Smith’s A Company, 10 Serial, back to a single step and withdrew north to reinforce the attack on RJ 47/43. Neither target would be crucial to the final result, but the northern junction may be crucial in delaying German reinforcements in later turns. Blackwood in turn entered from the east along N7 highway and in an exchange of factors, took RJ 7/43.

The 128 Res-DIv attempts to retake Hill 212.

In their turn, the 128 Reserve took the fight to the Fourth Battalion, which had managed to take Hill 212 just hours earlier with what forces they had at their disposal. With the threat to RJ Lober’s Pioneers and the 282 Armored Reconisance battalion drove hard on a reinforced A company under Siegel, and came off the worse for wear, the 282 losing a step.

By the end of the second turn, the Allies had steamrolled the German defenders, taking nearly all of their D-Day objectives, as well as a disproportionate number of D-Day+1 targets. I checked the German dice to make sure they all had the right number of scoring faces. This was unusual for me; normally I roll badly regardless of which side I’m playing. But the Allies hadn’t won yet. There were still a couple of hold-outs, including the tough nut of Le Muy to contend with

Turn 3

There are two Victory Checks in Drop Zone; these take place at the end of turn 3 and the lasty turn. If the game plays through to turn 6, scoring comes down to a point-tally. At the end of turn three, the Allied player checks the taken objectives. If he has secured all of the D-Day objectives (numbered in a red box) plus at least two D-Day+1 (numbered yellow box) objectives. If the Allies don’t gain a sudden death victory by meeting these conditions, the game plays out to the full six rounds (to the evening of D-Day+1), and a winner is declared by comparing the point-value total of objectives captured, minus the value of the objectives still held by the Germans.

McKinley's boys overpower Matte's 11 Company.

The turn order for this round was KGr Schwerin, 2 IPBG,  PBCT, and128 Res-Div. The KGr simply didn’t have much on the board to work with. Their one full strength unit available was Schaub’s “Assault” company of the 189 Division – actually an ad hoc “Alarm” company, but maybe given the name to boost morale – against the battle-tested F Company under McKinley, checking the road to Les Arcs. This didn’t go so well for the Germans, F Company remaining unmoved.

The exchange between McKinley's ant Matte's companies. Open terrain, and no
applicable assets for either, so straight strength rolls. McKinley rolls two Infantry
symbols - clear hits. Matte rolls two FFI symbols, which, had McKinley instead
been an FFI paratrooper unit or a garrison, would have been enough to take
them out twice over, but have no effect against the hardened infantry.

KGr’s last gasp was a Hail Mary in the form of Tornow’s 2 Company, 1/239, which attacked Le Motte from the woods for a slight advantage. If successful, the attack on Le Muy would bave some of the sting taken out, having deprived the Allies of a sudden death victory, but ultimately Tornow’s brave men could not dislodge the FFI garrison in the town.

By the end of the second round, the allies held all the first-day objectives (marked with a red box) except for Le Muy. I really didn’t anticipate a sudden death victory for the Allies over the first two turns, especially given the spread of the initial para-drop for some of the battalions; the sticking point was always likely to be Le Muy, with its reinforced garrison and hosted recce unit. It was only at the beginning of turn three that I realised it could be possible. But the seizure of Le Mitan (barely) and Le Serres in the previous turn allowed British units to swarm down the 25 motorway and encircle Le Muy. When they were successful, there was no point finishing the round. There was no way for the German forces to retake any of the red objectives and turn the tide. Operation Dragoon was a brilliant success, with relatively low casualties.


The final board state. All D-Day (Red) objectives captured/controlled, as well as a couple
of D-Day+1 (Yellow) objectives, qualifying for an Allied sudden death victory.
Note the Le Muy garrison marker next to the road half-way between Trans
en Provence and Les Arcs; that was left there by accident.
What can I say? It was getting late.

Verisimilitude

Drop Zone captures a small but crucial episode in the Allied invasion of Europe. The scale of the game is intimate, and it manages to convey a sense of urgency on the side of the Allies and desperation for the Axis. Due to the low reinforcement numbers, most fights in the game are between reduced companies, so it’s not outside the realm of realism when an altercation results in neither combatant remaining in a functional state at the end (rather than both sides being wiped out to a man). This happened at least twice in this game.

Little details in the game enrich the experience of play. In the cases where it was possible to ascertain, the units – mostly companies – are named on the top of the counter for the captain who lead it. This kind of detail elevates the game from a diversion to a rich experience.

Mistakes were made

Looking back on it, the Even running just to the three turns, it was starting to get late. I did a lot of rules back-and-forth in, to make sure I was doing everything correctly, but neglected some fundamental things. While I was aware of the Asset draw in the second and third turn, I didn’t take full advantage of them for either side. Use of an asset token in the defence of Le Muy may have proven to be a deciding factor, or conversely, may have given Tornow’s company the edge it needed to retake La Motte, denying the Allies a clean victory and forcing the game into the second day.

I was getting tired by the third turn – I didn’t start the actual play until after 9:00pm, and on reflection, this would be why I slipped up and neglected to draw the Germans’ second round of assets. I don’t think the remaining asset chits would have turned the tide, but it might have given the Axis side more options to prolong the game, bringing more German reinforcements to bear, possibly armour. I with my limited experience with the game and analysis of the situation, it's in the German player’s interest to ensure the game runs to all six turns. As the German player, I spread myself too thinly, rather than trying to defend of retake a couple of key locations (just one would deny an allied sudden death victory; two or three might make the difference in the final point calculation).

The other mistake I made was putting the two Allied faction reinforcement pools into a single container drawing unevenly – two American reinforcements in turn two, and one each in turn 3, rather than one nationality each in each turn (the last two would have come out in the fourth turn). This almost certainly contributed to the Allies’ success in securing a secondary objective at Junction 562/254. A small thing in the greater scheme, but I’ll be more careful next time around.

 One last thing to note. Some eagle-eyed readers may have notices this before I managed to, but in my haste setting up I managed to transpose most of serials (battalions) 4 and 9 during the drop sequence and only now noticed my error. There’s only one thing for it; I’ll need to play another game of Drop Zone, and soon.

-----

Like 1944: Battle of the Bulge (Worthington Publishing, 2020), Drop Zone promises to be a game to puzzle over. And like the earlier game, it encourages the judicious use of tactics and concentration of firepower. But, just as it plays out for the Germans in BotB, if the Allied forces spend all their time in manoeuvre, setting up the perfect 3-1 ratio offence, they’ll run out of opportunities to seize all the objectives they need to carry the game. Sometimes they will just have work with unfavourable odds and pray for a miracle.

As I’ve said elsewhere in the blog, Drop Zone: Southern France has been one of my most anticipated games for a couple of years now. I can say unreservedly that it does not disappoint.


* I began writing this the next day, but in truth it’s taken me nearly a week to write up, partly due to the detail I’ve put into describing the play. I wanted to convey the richness of the narrative that this game produces, along with a sense of the frenetic action of play. I hope folks enjoy this, and maybe think about grabbing a copy.


Saturday, 29 March 2025

Stripped Down for Parts: Drop Zone: Southern France


Oh, happy day! This week saw the arrival of one of my most anticipated games of 2025. To be honest, I’ve been anticipating this one since 2019. It’s had a storied history leading up to its publication, but now it’s here and it was worth the wait.

Designer Dan Fournie’s Drop Zone: Southern France (Worthington Publishing, 2025) is a new game from Mike and Grant Wiley of Worthington Publishing. This game has had a long gestation (I wrote a potted history of its development here (number 12 on the list, at the end of the post), so I won’t go into that again now. I may revisit the story in a little more detail when I get to doing a review.

This isn’t Mr Fournie’s first game with Worthington. He contributed 414BC: Siege of Syracuse (Worthington Publishing, 2022 – review here) to Worthington’s Great Sieges series and founded a loose series of World War II games with 1944: Battle of the Bulge (Worthington Publishing, 2020 – review here), and 1944: D-Day to the Rhine (Worthington Publishing, 2022), and that’s just the ones I own.


To be honest, I felt a little disappointed when I first saw a picture of the box cover online. It just seemed inadequate somehow. I’m not sure what I was hoping for, but this wasn’t it. I feel like a hypocrite for saying it, because I’ve been on record here and elsewhere saying a game shouldn’t be judged on its cover art. I think it feels more personal for me because I’ve been looking forward to this one for so long.

Now I have a copy in front of me, I like it a little more, but I feel like it’s a bit of a missed opportunity. I’m not sure what would have been a better cover, but I’m sure there’s something out there that would have been more compelling, and more acutely associated with Operation Rugby, the air-drop component of Dragoon (the cover art is a montage, and elements could have easily been drawn from the June D-Day action, or, even more likely, training jumps). It also doesn’t acknowledge the participation of glider-borne troops, who arguably suffered greater risks making it safely to the ground without the bonus pay given to the silk jockeys. This, of course, in no way detracts from the game itself, which I’ll get to in a moment. And when it’s all said and done, you don’t play the cover.

The box-back. No complaints about this.

Turning to the back of the box, we’re given a sample of the map and counter art, and the specialised dice that drive the game. The dice have symbols corresponding to unit types, and the Allied and Axis dice have different configurations as well as different colours, uniform grey for the Axis player, and (ironically) Prussian blue for the Allies. Anyone who has played either of Mr Fourie’s two 1944 games will be familiar with these.

The description on the box back briefly details the scope and historical context of the game. As with the early-morning airborne raids in Normandy six or so weeks earlier, the purpose of Rugby was for Allied troops to secure key road junctions to spoil a German armoured response to the amphibious landings taking place later that morning on France’s Mediterranean coastline, a few dozen miles away to the south. It was a bold plan, hampered by a dense fog on the drop morning, that had the effect of distributing the task force over a broader spread than was first intended.

The box description reveals the game action covers a 48-hour period, the crucial first two days of the First Airborne Task Force (1ABTF) in Southern France. The 1ABTF was an ad hoc force made up of American and British units, this allows what is essentially a two-sided game to be shared by three or four players.

The informational graphic key that is happily an industry standard these days informs us that the rules difficulty for Drop Zone is Low (2 out of 5), while the solitaire suitability is very high (5 out of 5; the game comes with a double-sided Player’s Aid Card outlining the rules and guidelines for solitaire play, but I’m getting ahead of myself). It stipulates the aforementioned 1-4 players, and that the recommended age for players is fourteen and up. As always with Worthington games, the play duration is set in terms of “Victory within 2 hours.” As I, and others, have pointed out in the past, Worthington is the most reliable of game companies for play duration (Legion Wargames probably comes a near second).

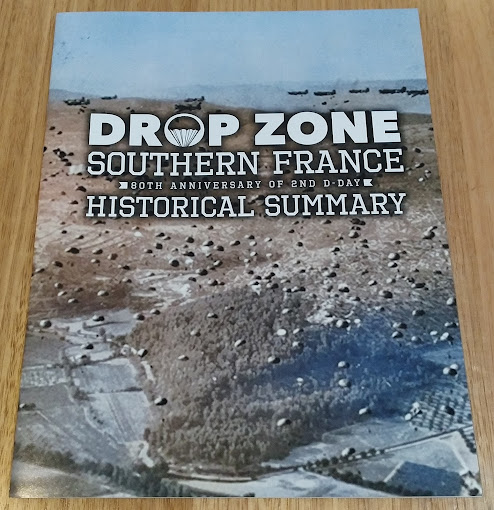
The Historical Summary booklet. Worth it's weight in gold to the history buff. 

The first thing to greet you upon lifting the box-top is the Historical Summary. Last year (the year the release was funded on Kickstarter) was the eightieth anniversary of both the Normandy landings – Operation Overlord – and Operation Dragoon. This is a subject that is close to the designer’s heart; Dan Fournie’s father, Corporal Arthur I. Fournie, fought in the 460th Parachute Field Artillery Battalion during the operation.

The Historical Overview is broken into sections covering the planning and execution of Operation Dragoon, and an overview of the operations on the ground over the first two days (D-Day and D-Day+1), as well as appendices on the force structure of the Airborne Task Force, the Free French and Allied Special Forces, and the histories of the various units involved in the Operation. There is probably nothing here that a motivated researcher couldn’t find for themselves given the time and inclination, but to have it presented here in a 24-page booklet to dip into between games is a boon and rounds out the whole package nicely.

A Rulebook. Trust me, there are two of these in the box.

Worthington have been including two copies of rules in their games at least since the Martin Wallace-designed Lincoln (PSC/Worthington Publishing, 2018); I wish more companies would follow this example, at least in the case of lower-page-count rules. The rulebook is printed on good, low-gloss stock, and runs to twelve pages (though it is only numbers to ten; the cover and verso are oddly ignored in the pagination).

The rules are clear, concise (just ten pages, including scenario details) and helpfully illustrated. There are two scenarios, each running the full six turns. The first is the historical scenario, reflecting the conditions and dispositions of the Allied and Axis forces involved in those first two days of fighting. The second scenario increases the challenge for the Allies by incorporating the 11th Panzer Division, the “Ghost Division,” which had been ordered to the area, but on August 15th was still 160 kilometres from the drop zone. The Alternative scenario should make for an interesting “what-if” situation, and doubles the replayability of the game.

As I've mentioned, there is a dedicated solitaire-play mode for Drop Zone. This is alluded to in the rules, but the rules appear on a separate Player Aid Card, which we’ll get to in due course. The back page of the rulebook features a list of abbreviations featured in the game. A lot of rules layout folks would have made this the second or third section in the rulebook, right after the Components part. Whoever decided to put this on the last page deserves a special commendation;  Drop Zone is replete with abbreviations, and having the list there instead of another copy of the sequence of play has already saved me many minutes of page flicking and a ton of wear an tear on the booklet.


The play area for the game is a sturdy mounted board of the quality we’ve come to expect from Worthington. The map represents the area of the initial air drop in Provence, roughly a dozen miles inland from the landing beaches. The map and counters are all the work of José Ramón Faura, and in both cases, they are exemplary in their balance of appearance and utility. The map is really nice to look at, with the terrain features clearly defined against a pale tawny-green base for the clear hexes. There can be no doubt which areas are forested, but the hex-grid – larger than one might expect to accommodate the larger unit counters – are not lodt in the trees. The play area is eighteen by twenty-one hexes, which at first blush may seem small, but should accommodate the lower unit count and brief turn cycle, and add to the claustrophobic nature of the action over the two-day period.

Incorporated into the map-board are the Victory Point track – a pendulum track, but rather than keeping track of fluctuations in the score, the total points accrued by the Allied player is tallied at the end of turns three and six (if no sudden death victory has been awarded at the first tally) – and a Turn Track loaded with supporting details such as each players Assets drawn and each faction’s reinforcement points for that turn.

Much of the crucial game information has been applied directly to the map, but in ways that are no more obtrusive than the hex boundaries. Towns marked with a white number in a red box are D-Day objectives for the Allies. The values of the towns held by the Allied forces at the end of Turn Three (the close of the first day) are added up and this number will decide if that side reaches their sudden death victory requirement. If not, at the end of Turn Six (the close of D-Day+1), the tally of objectives with Yellow-boxed numbers held by the allies is added, and the tally of the red-boxed not in Allied hands is subtracted from the total to discern the final score and who will claim victory.

One more thing. It's worth noting that the board laid out nearly perfectly flat first time out of the box. It's a small thing, but it kind of made my day.

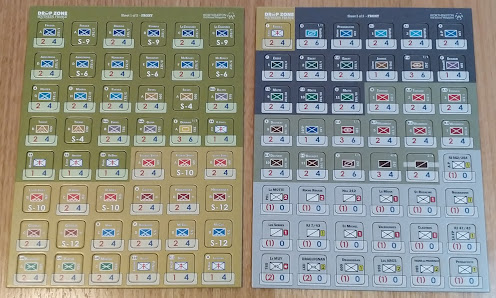
Companies of heroes: units of different stripes - American (green), British (khaki),
German (dark and uniform grey) and German garrison (immobile) units (pale grey).

Drop Zone’s counters are one inch (nearly 26mm) pre-rounded counters. These are well laid out and clearly readable. Infantry units have four movement points per turn (except for Garrison units, which are stuck where they are), while motorised units have six. The strength value is indicative of how many dice a given unit will roll in combat. Several nationalities are represented in the unit mix, including US, British and Free French formations, as well as the Germans.

Even more units, and the game markers and Asset tokens.

Along with the counters, there are a number of circular counters that fill various game needs. Two are the Turn and Victory Point markers (in blue, to stand out on their respective tracks), six draw tokens for the chit-pull activation each turn (there are two separate sets for the two scenarios for the German player) and twenty-six Asset markers. I don’t like to go too deeply into game mechanics in an unboxing, but this is worth noting. From turn 2, each player gets to draw Assets that they can use in that or subsequent turns to gain a situational advantage, such as air support or indirect artillery fire in an attack, Initiative tokens (for the Allies only) which can be played instead of drawing an initiative chit from the draw cup, to allow that faction (British or American) to  or (for the Axis player only) a Regroup token that allows the player two more Reinforcement Points for a given round. For a simple and relatively short game, there is an awful lot going on here.

The Terrain Effects Chart and Sequence of Play. The other side of this PAC
has a detailed Combat rundown.

The game comes with a single General Player’s Aid Card. This PAC includes a Terrain Effects Chart and detailed Sequence of Play on the front, with detailed Combat rules on the back. Personally, I would have liked to see a duplicate included, but it’s a minor beef, especially considering the number card sheets included in the game, each with its own functions. The Terrain rules won’t be difficult for anybody familiar with hex-and-counter wargames, and the sequence of play will become second nature after a couple of turns – this shouldn’t be a taxing game.

 The Historical Scenario Reinforcement cards (Allied (above) and Axis). Note the
spaces for the Asset tokens. Not all of these are available in both scenarios.

And the Alternative Scenario Reinforcement cards.

There are two reinforcement cards, one each for the Allied and Axis players, that each do double duty with the historical scenario details on the card’s front and the second scenario on the verso. The idea is to place the reinforcement units counters on the appropriate card, and bring them in to the game on the appropriate turn. It can feel tedious to have to sort through the counters setting up the game, but the benefits when actually playing can’t be overstated.

Para-drop set-up card.

The fourth PAC (to be honest, I’m not sure what order these are supposed to be in, but It was the fourth one I examined in any detail) has instructions for the Allied para-drop set-up, which incorporates a measure of randomness befitting something like dropping troops behind enemy lines. In the early morning of the 15th, a thick fog carpeted the entire drop zone, making it difficult for pilots to pinpoint allocated drop points, let alone the sticks of troopers to have any hope of a cohesive entry into the warzone. Origin hexes are allocated on the board for each of the five paratrooper battalions, based on the operational plan. The Allied player can arrange the units on the PAC in their respective groupings and, in their turn, place them face-down (anonymous parachute-side up) on the board.

When placing the company-strength units that make up each battalion, the Allied player rolls two dice, one of which till prescribe the direction of that unit’s drift from the planned landing location, while the second die result will dictate the distance in hexes from that point (1-3 hexes away). These are placed one at a time, and if one para company would land on another based on the initial roll (a one-in-eighteen chance, so unlikely but not outside of the realms of possibility), a second direction roll is made (and presumably a third, until the unit lands on a clear space). This card will help to keep this part of the set-up moving briskly.

The verso of the Para-drop card, Alternative scenario VP and Turn Tracks.

As mentioned, the reverse of the Para-Drop setup card is an Alternative Victory Point Track and Alternative Turn Track for the Alternative game. This makes sense; the Alternative game adds strength in units to the Axis player, while the Allied units on the ground remain unchanged (the Allies to have increased access to air support through their asset draw to somewhat compensate for the imbalance). The Alternative turn track adjusts the parameters for each side’s potential victory, while the Alternative Turn Track offers adjusted details for drawing assets and allocating Reinforcement Points for each side.

The Solitaire rules fit on two sides of a PAC, but some sacrifices had to be
made in font size. Reading glasses required.. 

As befitting a modern wargame, Drop Zone has a solitaire mode of play. The solitaire rules for the game are offered on a single double-sided PAC. I think solitaire play will be enriched by the chit draw activation mechanic. I haven’t studied the solitaire guidelines in any detail yet; I’m hoping to get the game to the table in the coming week, and I’ll play the traditional two-handed game to get to know the ways of it before trying it out on a second player, but I will run through a couple of solo games using these rules before I engage in reviewing the game. I can report that, at first glance, the rules seem straight forward and common-sensical.

Hermetically sealed dice-sets, in an enclosed tray, for that belt-and-braces approach
to dice security.

For several years now, Worthington games have been coming with a counter tray for a while now. There are several configurations, depending on the game. This one comes with troughs for the counters and two cavities, one each for the two sets of dice – no fraternisation between the sets. The Allied dice are cast in a fetching blue, the Axis dice in a uniform grey. The game also includes two pipped six-siders, a red and a white.

The specialised dice will be familiar to those who have played either of Mr Fournie’s 1944 games. There are two or three types of symbols on each, and a hierarchy of units hit on the roll of a given symbol that I won’t go into here (I’ll talk about this in my first Drop Zone AAR – stay tuned). The dice are good rollers, though the blank faces seem to come up disproportionately often for me, but I think that more my dice mojo than any fault of the bones.

-----

So, that about covers Drop Zone: Southern France. I’ve enjoyed all of Dan Fournie’s games I've played – I would have likely enjoyed a lot more if I’d gone down the Great Battles of History rabbit hole. This game is now on the top of my to-be-played stack, so, I anticipate offering at least some initial thoughts in the next couple of weeks.


Tuesday, 12 March 2024

Review: 1944: Battle of the Bulge


The Battle of the Bulge, as the German Ardennes offensive of December 1944 has come to be known, would arguably be the most frequently gamed battle* (i.e., action limited in geography and duration) of the Second World War, certainly one of the most thoroughly researched.  The German army’s desperate counterattack and the subsequent rally and repulse by the Allied forces in the last weeks of 1944, was first represented in game form in 1965 with Battle of the Bulge (Avalon Hill, 1965).


Bucking the trend of borrowing a title from a Bulge history for his game, Dan Fournie’s 1944: Battle of the Bulge (Worthington Publishing, 2020) draws a suggestive line to back to Larry Pinsky and Thomas Shaw’s original wargame. 1944:BotB (please forgive the awkward abbreviation) is a division-level hex-and-counter wargame covering the period from the 16th to the 25th of December, 1944.

Appearance

1944:BotB comes in a sturdy 2” box in a nice matt finish, with muted grey cover art. On the back is a brief description of the game and the box-contents, and some details suggesting the games difficulty and solitaire suitability are both around two out of five. I’d concur with this estimation; rules-wise, this is not a hard game to pick up (though there is often a gap between learning how to play and learning how to win). As for solitaire play, 1944:BotB is definitely solo-able – I’ve done just that a couple of times – but it wouldn’t be a game I reach for first for a solitaire experience.

The game, resplendent (I've been experimenting .with playing on
my wife's sewing table to keep the dinner table clear.

The first thing you notice when you set up 1944: Battle of the Bulge is the map. 22’ x 34” and mounted, it’s a slightly schematised rendering of the Ardennes region (compared to, say, the Avalon Hill Bulge map), concentrating on the road network that was so crucial to the action. Personally, I like the map; I think it is effective as a play-area, the terrain types are easy to differentiate from hex to hex (these will affect movement and combat, and they’re not always clear (no pun intended) in other games’ maps). The colour palette is toned down, but evocative and effective. Towns, bridges, and entry-points – all crucial features for game-play – are clearly defined.

While game has a low counter density, the action plays out in a fairly constricted space. The entire space is criss-crossed with a network of roads and trails connecting towns and cities, and it’s along these paths that the meat of the game takes place. But I’m getting ahead of myself.

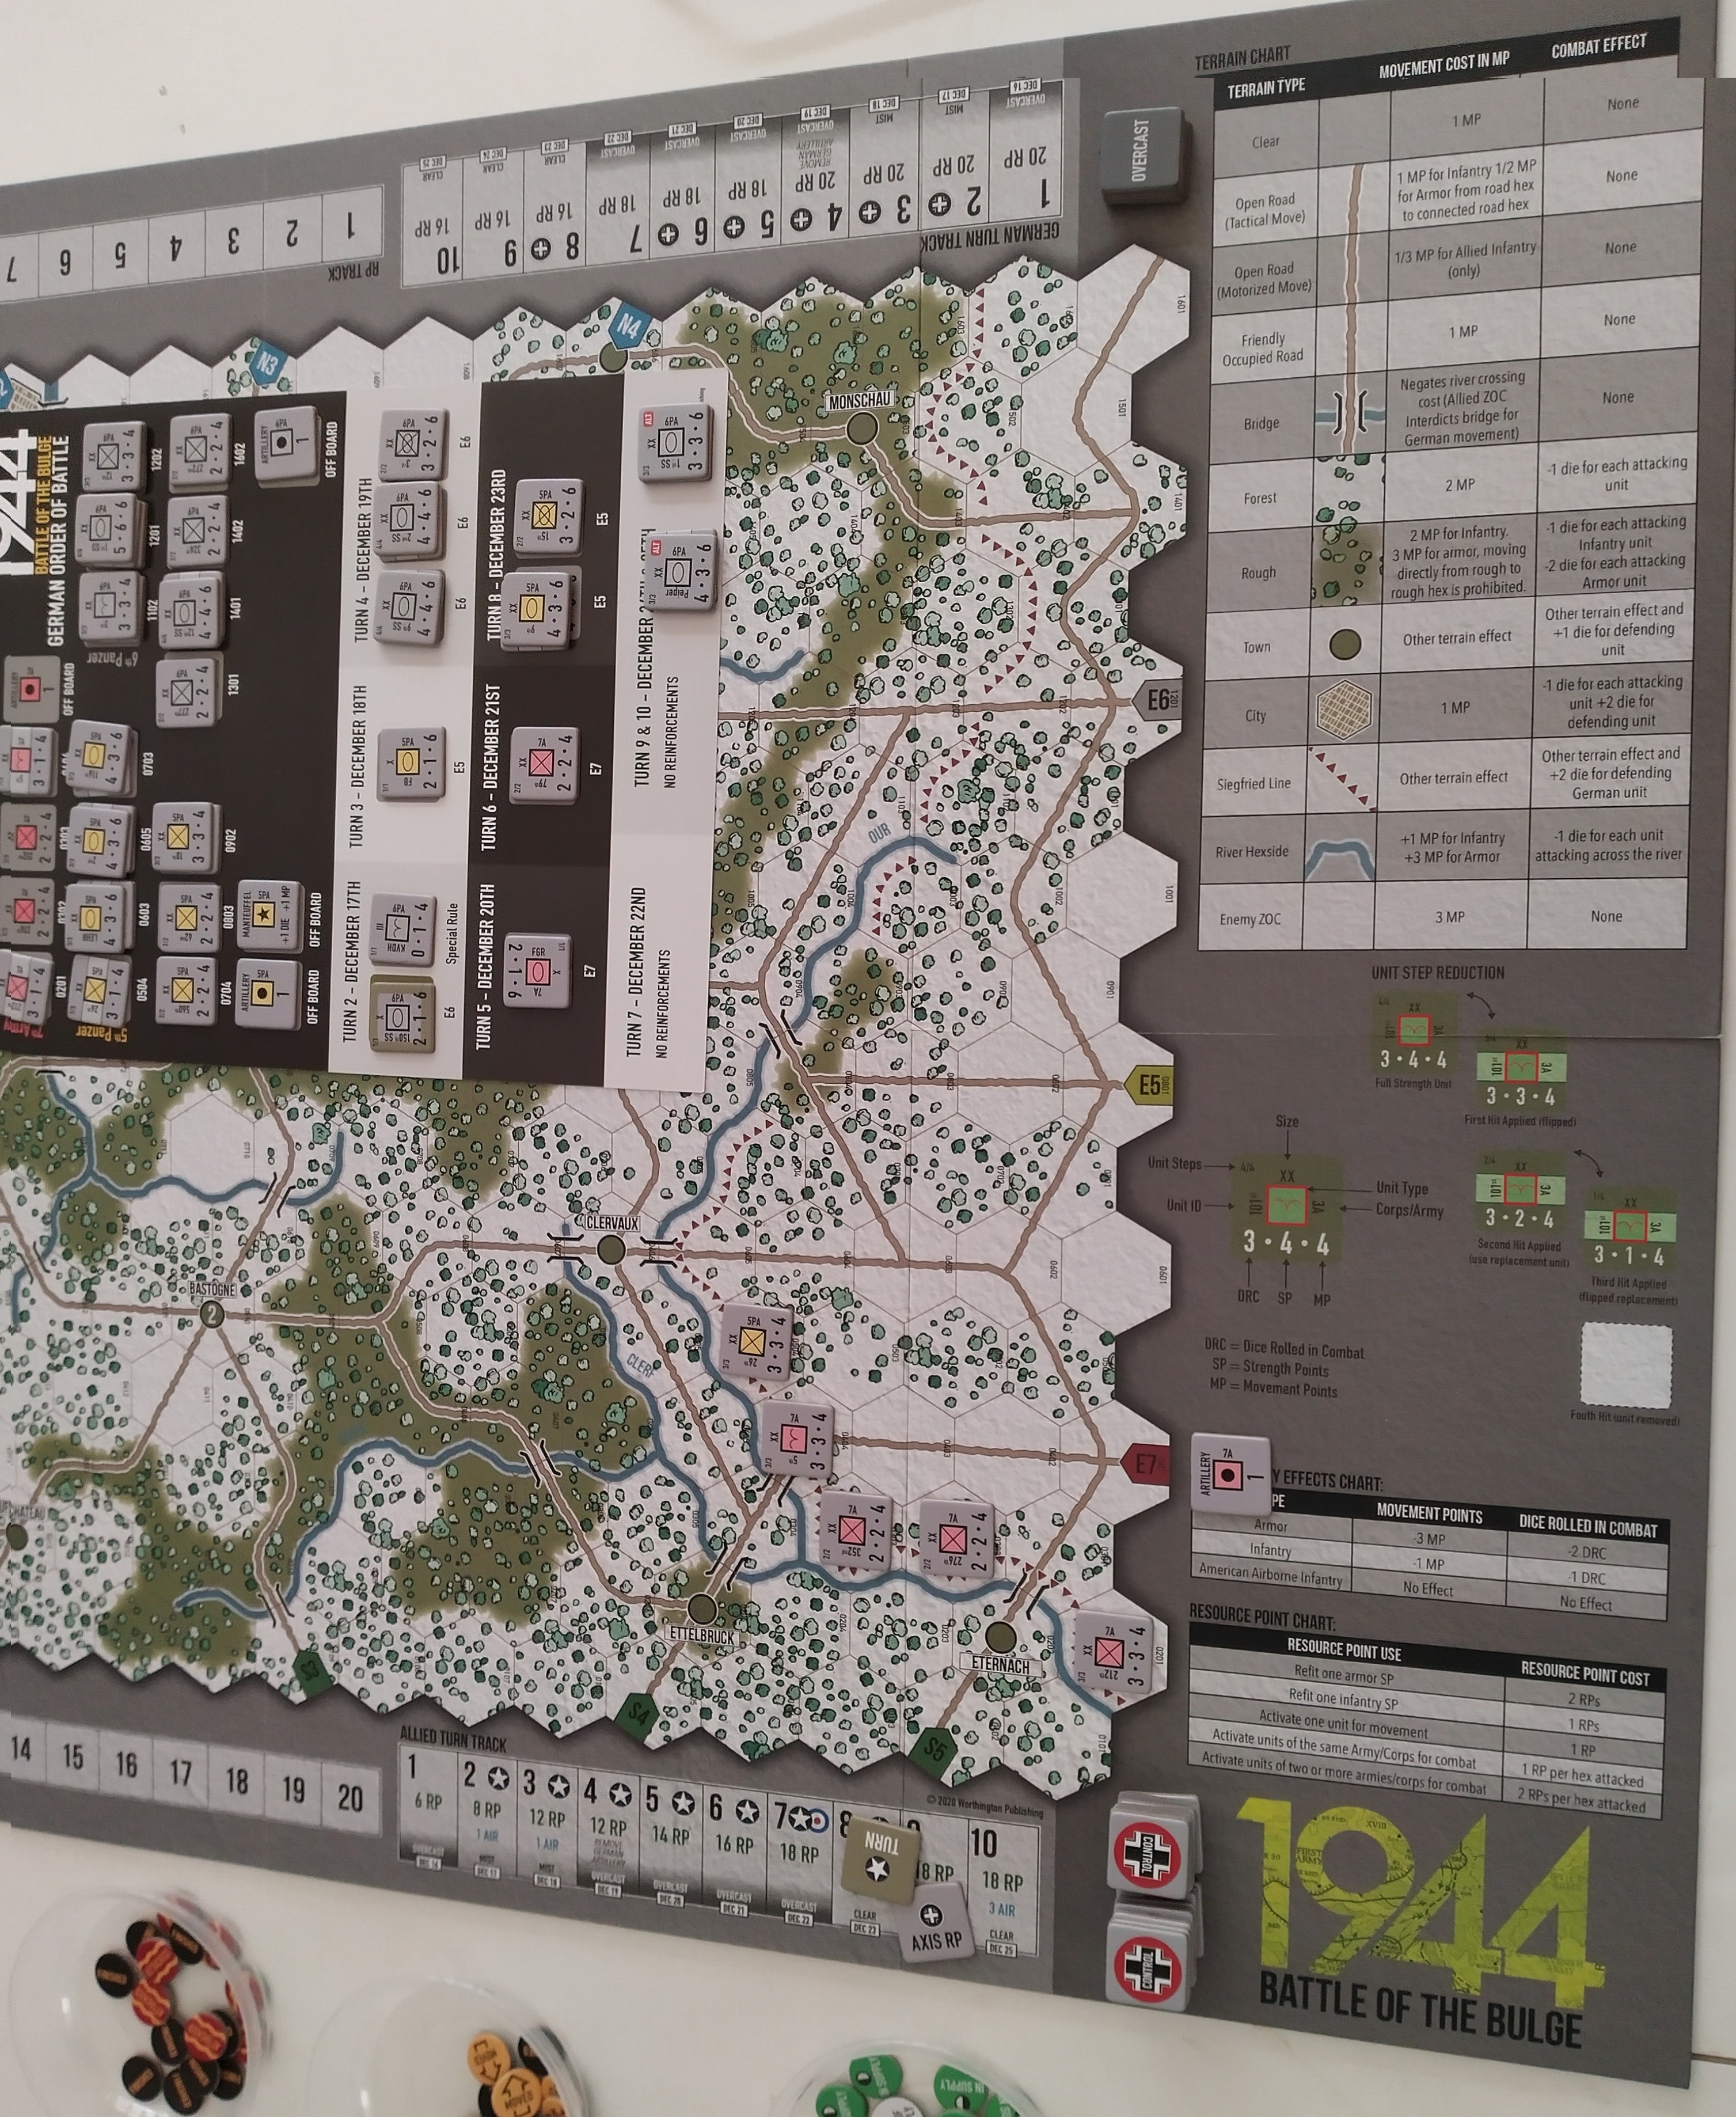
The game doesn’t have any player aids (except for the two order of battle cards that I’ll come back to soon), but it doesn’t need them; everything you need to play the game – Turn and Resource Point tracks, a Terrain Effects Chart, and a handy step-loss guide for the multiple counter units – it all presented on the mounted map-board.

The counters are large, pre-rounded easy-punch tokens on good-quality, heavy cardstock, and with good registration. These are a joy to use, easy to read and to manipulate on the board, as are the much smaller circular status markers for recording which units have moved or fired, and which are in or out of supply. The package is completed with a handful of bright red custom dice, and one lonesome pipped d6 for rolling some effects. Everything about the game says sturdy and built to last.

December 16th (set-up at Turn 1), It all begins at the Siegfried Line.

Play

1944:BotB, like I think all Worthington games now, comes with a custom counter tray with gutters wide enough to accommodate the (not quite) 1" counters. This is a blessing and a curse. There is much more gutter space than is adequate for the counters that accompany the game. Because I have to store my games edge-ways, there is inevitably some shifting of counters within the gutters. I’ve put a lot of thought into this, but I still haven’t come across the best way to store the counters in the gutters without resorting to elastic bands to keep them in order. Here’s the reason why keeping the counters in order is a good thing.

Each side has an Order of Appearance card where you can set out all of the counters (with the multi-counter units in descending order), then place the starting counters as guided by the notes on the OoA card. Because of the movement of counters between plays, what should be a ten-or-so minute takes up the better part of half and hour. This is not a criticism of the game or the publisher – the fact that the Wylies provide a counter-tray at all is laudable and far exceeds what we expect from the industry. It’s one of those minor irritations that by no means reflects on the game play.

Allies Order of Battle (note the alternative split-division
7th and 10th Armor, bottom).

The rulebook comes to twelve pages, of which the first seven are core rules (the eighth is a full-page terrain Effects chart; this is replicated on the board). The next three pages are given over to Optional Rules (such as variable weather (historical weather conditions are given on the turn track) and German fuel shortages), and the Variable Objective cards. The final page-and-a-bit offers illustrated examples of movement combat and supply-tracing.

A lot of 1944:BotB will feel familiar to regular wargamers; movement is regulated by a hex-grid and modified by terrain types, units exert Zones of Control, damage taken by a unit is handled by step-loss, and drawing a line of supply for individual units is crucial for movement and combat, but only necessary when that bit it activated. One thing I haven’t seen all that often is the option to move to a target then attack, or to attack an adjacent unit, and then move. Markers are provided as mnemonic devices to keep track of which units have fought but have yet to move, or vice versa. This opens up whole vistas of tactical options to the unwary player.

German infantry, Para and armor divisions, including the notorious 150th SS
(using captured Shermans and American uniforms (edged green).

The box assures us that victory is attainable in two hours or less, and the game runs smoothly enough that this should be the case, but I’be bever played a game that didn’t come out closer to three hours because of the mixture of possibilities and constraints at play in eery turn of the game.

Anyone who’s played a Holdfast series game from Worthington will be familiar with the concept of Resource Points. Resource Points are the game’s currency, and like any currency, they are limited; the balance of RP changes over the course of the battle; at the beginning the Germans have the initiative, and they carry that momentum into the first three or four turns; their Resource Points amount to 20 for the first three turns, then begin to ebb from the fourth, at 18, while the Allies begin with just 6 RP and slowly build up from there. This proves t be an elegant way to impose the strictures the Germans were operating under, while reflecting the Allied command being caught off-guard and struggling to overcome their own inertia in the early days.

Resource Points can be spent in a number of ways. They can be used to bolster damaged units at a rate of one per step for Infantry and two per for mechanised. Activating a unit to move costs one RP. As does initiating combat, but here’s the interesting thing; attacking a single target with multiple units from the same formation (units from both sides have colour-coded affiliations for combat and tracing supply) will still only cost one RP.

Elements of the German Seventh Army tie up troublesome remnants of
the US Third army proving difficult to dislodge.

1944: Battle of the Bulge uses custom dice to resolve combat. In a fight, each side adds the fighting strength of the unit(s) involved, the attacker will add any additional support – a leader attending will add one die, artillery support will add another – and subtract any defensive bonuses the defender’s terrain offers. Both sides roll and the results are considered to be simultaneous (though even with the number of custom dice provided, sometimes you’re going to have to take tuns). Each custom die has four blank faces and two with symbols, one with an infantry cross, and the other with an oval representing armour. Each face rolled is a hit, and the owning player gets to distribute the hits he takes, but armour hits have to go on armoured units if they can. Armour on both sides took a hammering in the Ardennes, and this simple rule reflects that eloquently.

Variable Objective cards.

Another nice touch that extends the replayability of 1844:BotB is the inclusion of Variable Objective Cards. There are four of these, one representing the historical objective, while the other three offer “what-if” options for other strategic goals that were considered or at least floated in the planning rooms of the OKW. The German player can choose a card or pick one at random, and it will fall to the Allied player to decipher what the German’s ultimate goal is by where he prioritises his efforts. Lots of room for feints and big plays.

The roads are key to victory in 1944:BotB; you track your supply (and ensure your units’ combat effectiveness) by roads. Cross-country movement is possible – more so for infantry units and mechanised – but in a game lasting a mere ten tuns, the board can already seem very long when you’re trying to reach the other end without trudging through dense forest and snow. Moreover, a German victory is almost certainly going to rely on Victory Points from captured towns. It’s not impossible to gain a sudden-death win by exiting a full-strength German armoured unit off the map at a preordained point – I’ve seen it happen just once – but it’s nearly impossible, and requires a combination of spectacularly good rolls from the German player and abysmally poor ones from the Allies; not something you can rely on in a pinch. The more Control markers the German player can lay down during the game, the better their chances for a win.

The Moved and Attacked markers each feature a Finished backing: when
the second action is performed, you can flip the existing marker to note
the unit as done.

Appraisal

This blog is called A Fast Game is a Good Game because the current circumstances in my life dictate a need for games that offer a fulfilling experience in a few hours. Most of my play opportunities fall on a school night, so two-and-a-half to three hours is kind of my sweet-spot for a game (at this stage – retirement may change that some). Obviously I’m not the only one in this situation, because games like 1944:BotB are still getting published and remain popular.

In recent years Worthington Publishing has carved out a niche in the wargaming landscape, filling a desire for good quality games that play out in a limited time but that still deliver a satisfying play experience. I’ve said here before that I’ve never been disappointed by a Worthington game I’ve come across remarks on Facebook and elsewhere that Worthington games are too simple to be good wargames. I’m left wondering if the folks that make these kind of comments have ever played a Worthington wargame. I get that some people don’t like block games (like the Blue and Gray series, the Holdfast series, just about anything by Columbia), or they don’t like low counter density games, or they think a game can't be worth their while if it doesn't consume twenty or more hours of their lives. That's okay; wargaming is a broad church, and people can find succor where they may. I know what works for me.

The board features a Terrain Effects Chart, RP spend-costs and other useful tools.

1944:BtoB owes something to the Holdfast series of games. Its spiritual antecedent is Drop Zone: Sothern France (Worthington Publishing, ~2024), a game Fournie had in development with GMT for a while. About Operation: Rugby, the spearpoint of Operation: Dragoon – the second French landing on the Mediterranean coast in August of 1944. At this stage, it was intended to be a block game, reminiscent of Holdfast: Tunisia (Worthington Publishing,  and others. For reasons undivulged, it was taken off the P500 list, but not before Drop Zone had evolved from a block game to a multi-counter unit representation game. This allowed for some units to have five or even six steps, instead of the mere four a block would allow.

The DNA of Drop Zone is conspicuous in 1944:BotB, and in its – not quite sister, more cousin game, 1944: D-Day to the Rhine (Worthington Publishing, 2022). After hints of a release in 2021 and 2022 (to no avail). It seems that Worthington is firmer on getting Drop Zone to print – or at least to a Kickstarter campaign – in 2024. One can hope.

In the upset of the season, the 9th SS exits entry-point N2
 through Liege for a sudden death victory.

But back to the game at hand. 1944: Battle of the Bulge received a second printing, coinciding with the release of 1944: D-Day to the Rhine. It’s a popular game by small-press standards. I’ve tried to catalogue the reasons for that popularity here. To wit, it’s a solid, relatively fast-playing game (if you can minimise the analysis paralysis), that is enjoyable and leaves you thinking about what you could have done differently. It’s a that rewards repeated plays, and offers lessons in logistics, co-ordination of units and marshalling of forces that someone new to wargames can carry to other, deeper or more intricate games. In short, this one’s a keeper.


* If we were talking theatres, I’m sure the Eastern Front would edge out the Western Front for most frequently portrayed in a game, though I my collection I think they’d hit around the same number. That might be worth exploring sometime.


Blog Note: a recent arrival

   I’ve been a little quiet on A Fast Game of late due to a combination of circumstances; my wife’s aunt and uncle are over from England at ...