Showing posts with label Eagles of France Series. Show all posts

Friday, 13 December 2024

Stripped Down for Parts: Waterloo, 1815: Fallen Eagles II


Walter Vejdovsky’s Eagles of France rules first appeared in Waterloo,1815: Fallen Eagles (Hexasim, 2015), a game released in time for the 200th anniversary of the climactic battle. Since this release, we’ve seen Austerlitz 1805: Rising Eagles (Hexasim, 2016), Ligny 1815: Last Eagles (Hexasim, 2017), and Quatre Bras 1815: Last Eagles (Hexasim, 2019). The last two games can be combined into a single campaign game of the altercations immediately preceding the Battle of Waterloo (or la bataille de Mont Saint-Jean, depending on who you ask).

A couple of years ago, Hexasim released a second edition of the first game in the series, named (in line with long wargaming convention and tradition) Waterloo 1815: Fallen Eagles II (Hexasim, 2022[ hereon in I’ll just refer to the game as Fallen Eagles II). Through a confluence of means (some available credit in my PayPal account) and opportunity (a still shrink-wrapped copy available at an online second-hand dealer), I have now come into possession of this edition, my first Eagles of France game. Here is a look at what’s gone into this game, with a few comments of my own.


The cover illustration for the second edition revives the portrait from the first (with a slightly higher colour), of a solder of the Imperial Guard (the Old Guard, or grognards, were the only soldiers in the Grand Armée granted permission to wear facial hair). The box is self is on the lighter side – closer to MMP card weight than GMT boxes – but is still sturdy, firm in coupling with the base, and does its job admirably. All in all, the presentation is enticing, but still gives the impression of a serious wargame.


The box back teases at what is to come inside. It presents the full Mont-Saint-Jean map with a row of sample counters of leaders and units above and below the map at roughly actual scale. The description details that this is the is the second edition of Waterloo, 1815, mentioning the improvements to the game – better representation of the geography of the battlefield (the landscape has been radically altered in the last 200 or so years), and the revised and more accurate Order of Battle for this edition. The blurb is prefixed with a British flag, indicating that this is an English-language edition of the game. Unlike some European publishers, Hexasim produces games in single language options, which can be frustrating when the English version has sold out, but I’m not going to criticise their business model as it obviously works for them.

Interestingly, Hexasim rates the game’s difficulty as 4-5 out of 9, something you don’t often see, but I think here it’s to denote the escalation in the in complexity from the first scenario – the French assault on Chateau d’Hougoumont – to fourth and main scenario, the Battle of Mont-Saint-Jean.

Unusually, no age-appropriate advice is offered here. From what I’ve seen of the game and rules, I think the standard fourteen years, or an engaged thirteen-year-old, should be able to handle the game, if not immediately grasp the tactical nuances. But I’ve always believed the best way to learn a game is to lose to a more experienced player a couple of times.


Fallen Eagles II comes with two booklets, an Eagles of Frace series rulebook, and a game-specific playbook. These are printed on a nice low-gloss paper-stock, in a pleasant font slightly smaller than I would have preferred - about nine-point – bit still comfortable to read without reaching for my glasses.

The Rulebook is 24 pages in length. One page is given over to a full cover, featuring an etching entitled Napoleon invading Poland, 1806 (alas, I haven’t been able to track down the artist, but the work looks broadly cotemporaneous with the event depicted). Most of a page is given over to a thorough Table of Contents. The essential rules are covered across nineteen helpfully illustrated pages, with the last couple of pages detailing the Special Rules (those not directly involving setting orders, movement or combat; Morale, Special Events resulting from combat, Leaser casualties, changing weather conditions, Fog of War (limited inspection of your opponent’s stacks, and Reinforcements are all covered in this section. These aren’t “optional rules”, per se, but You could play an initial game or two setting aside some or all of them, especially with the shorter scenarios, if you wanted to concentrate on getting the core rules squared away first.


The Eagles of France series has been in print for going on a decade. The current iteration is version 2.3, dated October 2022 – and with four titles released (well, I’d say five, as this second edition of Fallen Eagles, with its redrafted maps and revised Orders of Battle, surely warrants its own place), a lot of teething problems will have been ironed out with successive titles.


The Playbook also comes in at 24 pages. It too has a full-page cover. I’m okay with this, but I understand why some might prefer to have a Table of Contents (the Playbook doesn’t have one).

A single column on the first page covers the exclusive rules for Fallen Eagles II. The next three and a half pages detail the four scenarios. The Eagles of France games use a small deck of cards in a fairly novel way. I’ll come back to the tactical cards, but I’ll mention here that two pages are devoted to the Alternate History cards. These are essentially optional rules cards, six in all, to mix up the scenarios from their historical parameters (like the No Rain! card, that allows for an earlier starting time – chosen randomly – to the main battle, but also an earlier arrival of Blücher’s Russian reinforcements).


The remainder of the Playbook presents a four-page Example of Play (really a couple of contrived situations, but quite useful in demonstrating how the rules interact), Two pages of Designer’s Notes, another two of Player’s Notes, and a short but intriguing Bibliography of resources consulted in the preparation of this edition.

Player Aid Cards (and there are a few of them)

Player Aid Cards, front (Fire Table) and back (Melee Table).
A player's best friend in combat.

All of the Player Aid cards are printed on the same weight card with a light satin finish that minimises reflection under overhead lights. The primary cards are a pair of battle PACs, featuring the necessary tables and modifiers for Fire combat on one side and Melee combat on the reverse. It’s a small thing, but I’m always a little disappointed when a game only features a single combat resolution PAC to be shared between the players. These cards are both readable and easy to navigate. The information isn’t as all crowded, but it well laid out and, on the Fire Table side, incorporates a Random Special Events table, triggered by a roll of two on the Fire Table or by an even-numbered result on the Melee Table.

The Unit Identification Chart and Turn Track (my one point of consternation in
an otherwise brilliant package),

A turn in the Eagles of France system is one hour in length. While the turns on the universal Turn Track begin at 6:00am, the earliest scenario durations begin at 11:00am, when the historical Battle of Waterloo began. This was because heavy rain on the 17th had left the roads impassable for cannon; Napoleon delayed his manoeuvres to allow the paths time to firm up enough to draw up his artillery. The extended turn track length is all to do with the

Terrain Effects Chart. There are two of these. No, really.

Which brings me to one of the few complaints I have about the game so far in my exploration. Fallen Eagles II features two Terrain Effects Charts. These are arguably as integral to the experience as the combat PACs in a game so focussed manoeuvre, but the decision was made to print one of these on the verso of the universal Turn Track. It’s a small thing, but for the sake of one more sheet of cardstock, we would have had a more perfect game.

The remaining TEC is provided on the verso of a Unit Identification Chart. This takes the unit information spelt out early in the rulebook covering the unit counters and lays it all out – slightly enlarged – in a useful infographic format that, until I get used to identifying the seven separate unit nationalities making up the Belle Alliance, will get a lot of use at the table.

As mentioned above, the game comes with two Terrain Effects Charts, but one is effectively unavailable for at least the grand scenario; one may be able to manage tracking a three or four turn scenario by other means. I don’t expect a better result would have been to print them on the back of Order of Battle charts; the Hougoumont scenario map is to be found on the back of the French OoB for the la bataille de Mont-Saint-Jean (the French name for the Battle of Waterloo, because... well, they're French), which does make sense as, if playing one, you will have no need for the other.

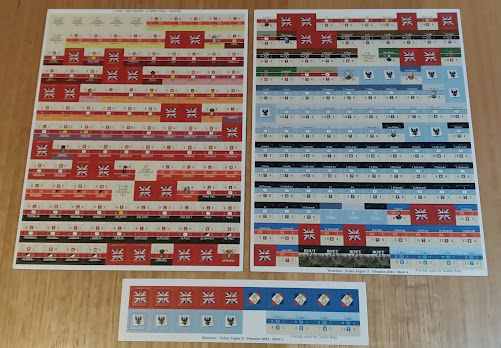
D'Erlon's Assault and Plancenoit Order of Battle cards.

Mont-Saint-Jean scenario -   Allied Order of Battle cards.

Mont-Saint-Jean scenario - French Order of Battle card.

Each scenario has its own Order of Battle set up card or cards, except for the Hougoumont scenario, which is small enough in scope and forces to incorporate the OoB into the board graphics. The OoB cards are useful in laying out all the units before positioning them on the board. These are provided for scenarios 2-4; Scenarios 2 and 3, D’Arlon’s Assault and Plancenoit respectively, each have a single sheet accommodating both sides’ forces, while the Mont-Saint-Jean scenario has three; two for la Belle Alliance and one for the French. It might feel like double-handling to lay out your units on the OoB card, only to move them when sorted to the playing area, but I think it saves time to pre-sort them, and it will guarantee that no units are truant from the battle when you need them most.

D'Erlon's Assault and Plancenoit Set-up maps.


Mont-Saint-Jean Set-up map (verso of the D'Erlon/Plancenoit map).

The combined Set-Up guide is a bi-fold PAC that offers a formation set-up guide (in miniature) for the Mont-Saint-Jean scenario outside of the fold, across both panels, and the D’Erlon and Plancenoit scenarios inside of the fold, one panel each. I personally would have reversed this; if the two smaller scenarios were demonstrated on the outside, the card would only have to have been opened for the one scenario for which it must be laid open anyway, but that’s a minor quibble and no indictment on the game. These set-up maps indicate which areas a given scenario’s starting elements should start in. Some latitude is offered to the players within these areas for the placement of individual units.

Order Boards, one for each player. This is where your plans
first make contact with the enemy
.

At the beginning of the game the formations available to each side are given orders by their commander (that side’s player), and at the start of subsequent turns these orders may be changed or discharged and fresh orders given. These are plotted out on the Orders Chart. If a formation is given and order to go to a certain location, it must use its activation to make its way to that location. If it’s given a Defence Order, it will take a defensive stance until ordered otherwise. Much of war is about scarcity of resources, and this is no exception. Each scenario will dictate how many or few orders may be changed in a single turn. Sometimes a formation may have to continue to move to a location that’s no longer tenable or remain in a defensive posture when they would be of more use harassing the enemy’s flank because of poor communications. It’s a nice touch.

Maps

Scenario 1: Hougoumont map. This looks like an excellent introduction to the system,
or a good fast-playing scenario if you’re short on time and/or space.

Scenario 2: D’Erlon’s Assault map.

Scenario 3: Plancenoit map (verso to D’Erlon’s Assault).

It’s the maps where the graphic beauty of the game really stands out. They are a nearly a water-colour wash of greens, with subtle but distinct changes for differences in elevation, steep inclines and various trees and foliage. Woods, hedge hex-sides, orchids, gardens and even tree-lined roads are rendered beautifully, as are gradual and steep slopes, sunken roads, roads trails and villages. The blending shades of green set off the vibrant counters to best effect.

Scenario 4: Mont-Saint-Jean map. Apologies for the glare.
For scale, the table the map is laying on is near to exactly four feet wide..

The main scenario is played out on a two-sheet play-area (joining at a long edge with about a ½ inch overlap) that takes in all the important territory at a scale of round 200 and something metres per hex. The series hex-scale varies from 200-250 metres short angle diameter (perpendicularly from side to side); given the turns are one hour in duration, the variation in distance is of less consequence than, say the Vive l’Empereur rules, where turns cover twenty minutes of game time).

For paper maps, the two sheets making up the Mont-Saint-Jean battlefield lay remarkably flat right out of the box with just a little smoothing out. Nonetheless, I think I would still use plexi over the sheets, j

Counters

Counter Sheets 1 and 2. 

Counter sheets 3 and 4 and mini-counter sheet 5. The more observant may notice
sheet 3 is actually upside down. It was late, and these were the last components shot.
I'll try to do better next time.


The Eagles of France counters are clearly contenders – to my mind at least – the nicest-looking counters of any game at this scale (to be fair, I haven’t got my hands on a copy of Battles of Napoleon: Volume I – Eylau 1807 (Sound of Drums, 2024) yet, so there’s that). They are pre-rounded and nice to punch out, with very good registration. For the amount of information crammed into each counter, they are surprisingly readable.

Some of the information conveyed is chromatic’ the unit counters are split into three bands. The thinner top band offers the unit’s name against a coloured band which representing the formation to which the unit belongs, while the middle band’s colour denotes the formation’s nationality. I know this isn’t unique – other games use coloured stripes to denote formations at a glance – but to my mind, the Eagles of France counters do it best, with a clear diversity of colours and a thin dividing line between the sections to present the information more clearly.

The top segment offers the name of the unit, while the centre section presents the formation name (left), a NATO symbol (everything in the game is infantry, cavalry, heavy cavalry – denoted by bi-coloured symbol sections – or artillery), and the formation’s brigade or division designation (right). The bottom section is always presented in a pleasant ecru, and presents the functional information for the unit, with Unit Size (in lieu of a Strength rating), its Quality Factor (analogous to a Morale rating), and Movement points. Nearly all infantry units are rated 4, while most Light infantry get an extra movement point. Most cavalry units get 8 movement points, horse artillery get 6 while foot artillery come in at 3 points (those cannons are heavy).

While we’re talking about movement, I like how the Eagles of France rules handle road movement. Instead of tying it to a unit’s movement factor – say, half movement rounding down or an extra half point movement for movement on roads and one third on trails, Mr Vejdovsky has adopted a simple one size fits all; if all movement in a turn is conducted on a path, the unit can move an extra two hexes, regardless of terrain; no accounting necessary.

Formation leader’s counters have less factors, but are presented in the same fashion as their subordinate units. Along with the name of their formation, they include an Initiative Factor (bottom left) and a Leadership Factor. The overall leaders are backed with a solid national colour; these are not tied to any formation. All the leader counters also incorporate a tiny portrait of the man in question, which I think is a nice touch.

Fallen Eagles II comes with four sheets of counters, plus a two-row sheetlet holding dome extras. The counters are pre-rounded easy-punch chits mounted on white-core card stock, and are about 5/8” in size. It’s worth mentioning that four replacement counters for the Quatre-Bras game are included here.

The rest

Box, dice and a slim deck of very nice cards. 

As mentioned earlier, Fallen Eagles II comes with a slim deck of cards comprised of twelve Tactics Cards and six Alternative History Cards. I’ve already addressed the Alternate History cards, so I’ll go into a little more detail about the Tactics cards here.

At the beginning of the game, the Tactics cards are laid out for view of both players. Then, starting with the French player, each take turns taking one of the cards until all have been collected. At the beginning of each turn the two sides have the option (again, starting with the French player) to pay a card whose effects will have play for that round.

The Alternative History cards, bring some variation in the pattern of the scenarios. These are of course optional but will increase the replayability of the scenarios by shifting the parameters of the historical situation; for example, bringing forward the starting time of the battle of Waterloo by two, three or more hours/turns, but also bringing forward the arrival time of Blucher’s forces. I’ve never been as interested in “what if” historical games, and I think I’d be happy to play the unadulterated historical for some time, but it’s nice to know they’re there.

The game also comes with two dice. They are of a nice weight and quite serviceable. I’ve never been one to insist on special embossed dice or such, so I think they’re fine. I’m sure they will betray me  at a crucial moment their own time.

---------

I’ve been coveting the Eagles of France games since before the announcement of the Fallen Eagles reprint. Nobody would be surprised to hear that the experience of ging through Fallen Eagles II and familiarising myself with the rules and components has merely fanned my desire to grab the others in the series. Austerlitz, which had also be long out of print, has also been reprinted just recently, and there is a rumour that another venerable French game manufacturer, Fellowship of Simulations, will produce the next volume in the series, covering the major battles of Napoleon's 1812 campaign. One can only hope.


Saturday, 27 January 2024

Review: Napoléon 1806


Napoléon 1806: La Campagne de Prusse (Shakos, 2019) is the first game in the Conquerors series by designer Denis Sauvage and French game publisher Shakos. Since it was released, two more games in the series, Napoleon 1807: la Campagne de Pologne (Shakos, 2021) and Napoleon1815: Waterloo (Shakos, 2022), Rumour has it the next Conquerors game in the series will be Napoléon 1870 (pertaining to Napoléon III and the Franco-Prussian War – one can only hope).


Napoléon 1806 is also the third game completed from my own 6x6 challenge. After six runs at this game, I’m still not sure I can speak with any real authority about it without making it seem somehow less than it is. It’s true, it’s the most rudimentary of the three games; 1807 offers a multitude of scenarios compared to 1806’s two, while 1815 brings the option of a third player to the mix (again, with a higher number of scenarios). In case I forget later, in the tall grass of the review, I’ll mention now that 1806 is an absolute gem of a game, a finely wrought puzzle, a balancing act, and a game that will reward repeat plays with new insights.


Appearance

The production values in Napoléon 1806 are as good as the best-produced games I own. Nicolas Treil’s artwork is at once evocative of the subject and the era, and quite beautiful in its own right. All the action and a lot of the activity takes place on the 24"x24" mounted game map, and presented to appear like a Napoleonic-era map, complete with spyglass, compass, and map-creases. The movement is point to point, the distance between points representing around five or six miles. The map also contains the game’s turn track, scoring-track, and a placeholder for a weather event card, which I’ll come back to.


While Napoléon 1806 is technically a block game, it takes a quite different approach than the Columbia or Worthington block games you may be familiar with. Rather than having a unit’s status represented by pips on the block which you rotate to indicate its current health, a unit’s status in a Conquerors series game is recorded on a separate, concealed board. This board lists all of that side’s marshals, each with his own track to indicate the strength and health of his troops. Each marshal has a corresponding block on the Board with that leader’s name and portrait, and any special abilities he brings to the table (this information is replicated, slightly more readably, on the tracking board).

Napoleon and his marshals, with pennants and retreat markers in the foreground.

The blocks themselves are coloured in an appropriate dark blue for the French and grey for the Prussians. Every block has an eagle on its reverse, opponent-facing side, French Eagle and thunderbolts and Prussian crowned eagle (the Alliance blocks in Napoléon 1807 feature the Russian double-headed eagle on appropriately green blocks). The intention is that during play, when a block had been activated – regardless of whether the formation had managed to act during its activation – it would be turned upside-down, so the little arrowhead at the top of the eagle would point downward and make it clear to both sides it had been activated that turn. By our second game we found ourselves placing them face-down instead to more clearly indicate activation.

French Order of Battle

With it’s separate Tracking boards, referred to in the game as Orders of Battle, coloured blocks – two colours for each side to distinguish infantry and attached cavalry – and orange cylinders, as well as the wooden playing pieces and track tokens, you could be forgiven for mistaking Napoléon at first glance for Euro-style resource management game. Part of the game’s charm is its emphasis on tactile experience, and it does indeed have an aspect of resource management in maintaining the operational efficiency of your forces while pushing them to the limits of their endurance. The blocks feel weighty and move ponderously along the paths. Every loss of a block or gained exhaustion cylinder is a visceral reminder of the precarious state of your army. Other wooden components are also provided, standing pennants on poles to indicate the control of citadels (or to provide the enemy with a visual reminder of their target destinations), and little arrows to be used as a mnemonic for the direction of retreat for an attacking force.

The Prussian Order of Battle after a narrow victory by the French.

The game leans heavily on the use of symbols and illustrations to convey the meaning of rules and actions in play. The shields for the force tracking boards are usefully decorated with the game’s symbology, succinctly explaining what can and cannot be performed at each step of the action. Everything in the game is at once decorous and informative, an elegant synthesis of design and communication.

The game comes with a box-sized, four-page Quickstart booklet which will (after stickering up the block for play) will allow you to get straight into play. The quickstart guide strips the game back to its essentials (movement and combat), offering a good grounding in how to play, but leaving enough meat on the carcass to still provide a challenging experience. If you are looking for a fast game, you might be happy enough to stick to the quickstart rules for your first couple of goes. Even at three turns, the first couple of games are probably going to run to about 45 minutes to an hour.

The Quickstart rules set-up guide.

The Rulebook s 24 pages in length, printed on good gloss paper-stock. It’s been produced in full colour and with copious illustrations, and with a pleasant, buff background that is merciful on the eyes. The first thirteen pages cover the “Rules for the Recruit”. This is the meat and potatoes of the game, covering in a little more detail what has been sketched out in the Quickplay rules, but incorporating the start-of-turn card draw, the use of Actions, Rain and other hindrances, and a few more details that enrich the play experience. The remaining pages introduce the “Rules for the Grognard”, optional rules spelling out the free-placement guidelines and the use of the Cavalry Vedettes blocks, “Rules for the Marshal” which cover tournament play, some notes on the card events and actions, and a brief (three-page) history of the campaign, interspersed with designer’s notes.

Every aspect of the production is of excellent quality, from the wooden components to the poker-weight cards in the two decks. My only grumble (given my age and history, I’m entitled to one from time to time) would be that the Order of Battle cards, while a pleasing weight of card (about 2.5mm thickness) have developed a slight camber and don’t lay perfectly flat, but while the use of a thinner card would have rectified this, it wouldn’t have been sturdy enough to ensure the shield stays in place around the board. For that, it’s an inconvenience I’m prepared to put up with.


Davout and Soult engage Blucher, Tauentzien and Ruchel in a moving attack (at the
cost of one combat result card. If the battle had taken place in the woods(the green-
coloured areas, top-right), the defenders would have gained an extra card. 


Play

For such a gamey-looking game, Napoléon 1806 offers a satisfying simulation of l’Empereur’s Prussian campaign. You’re not going to get the granularity of a regimental-level simulation (à la Hexasim’s Eagles of France series), but the game achieves what it sets out to do.

Victory in Napoléon 1806 can be secured in a number of ways. The scoring is kept on a pendulum table, starting at ten. Twenty points on the board will secure a French Victory immediately; in the unlikely event the Prussians can beat down on the French hard enough to get the score to zero, they will win. After seven rounds (a fortnight in game time) if the French haven’t secured victory, it’s a default win to the Prussians – the home team must hold out long enough for international support to arrive. A sudden death victory can be won by one side controlling all four citadels at the beginning of their turn. The Prussians start with three – Eufurt, Halle and Leipzig, while the French begin with Bamburg as their home base. On the remote chance that one side kills/captures the others leader, that will also result a sudden death victory,

Napoléon 1806 runs on its cards. Each side has its own deck of thirty-six cards, much like Combat Commander (GMT Games, 2006), and like that game, cards fill in for several roles, including dice damage applied in combat. Each card has a points value printed in the corner (1-5 for the Prussians, 1-6 for the French). These points are used for both determining initiative and establishing how far an ordered unit can move, if at all. The cards provide mandatory events and tactical options, and determine the amount of damage inflicted on the enemy in combat.

Bernadotte and Soult harass Halle and Leipzig as Napoleon considers his next move.

At the beginning of a turn, the players simultaneously draw cards from their draw deck and compare the number, with the highest point-value winning the initiative for that turn (meaning that player goes first, with the French winning ties). Then the players draw three cards each for their hands. There is no hand-size limit in the Conquerors series, so a player can end up with more cards in their hand than in their deck if they’re not careful. Cards in hand can be used for their Actions, usually small perks that can offer an edge in combat or movement when played at the appropriate time.

There are two types of Actions, before play Actions – assuming you have some in your hand, you can play one of these at the beginning of each turn, before any action has taken place. (they’re marked with a light blue title banner at the top) – and in-turn Actions – these are the ones you may play before combat, gain and extra step of movement, or to shrug off some exhaustion (marked with a green banner). Some Cards actually have Automatic Events instead of Actions; these are marked with a Red banner, and if you draw one of more of these at the start of the turn, you need to play it immediately. Some are punitive (such as preventing one of your formations from acting in that turn), but most are Rain events; there is a place-holder box on the map for a Rain card, below the Turn track, to remind the players of the change in conditions. Rain effects movement and exhaustion for everyone for the turn. At the end of the turn, the Rain card is removed and goes into the appropriate player’s discard pile.

A lucky play that paid off.

In a turn, starting with the established initiative holder, each side will take turns “conducting an operation”. This involves choosing a corps or a stack of units, declaring what you would like the to do, then drawing a card from your draw deck to see if chance and fate agree with your intention. Most often, the order will be to move, either to a fixed position, or along a path as far as the points will allow the formation to go. The currency is one point will allow one unit to move one space. If you’re moving two units together, the first point is spent coordinating the two units, then every point after may be spent on movement. Three units in a stack, you’ll need a 3-point card draw to move them just one space. There will be reasons at various times to have units moving together as one, but it going to take a toll on your manoeuvrability.

There’s also the matter of exhaustion. Units and even stacks can move up to three spaces without any ill-effects, but for each space above three the unit – or every unit in the stack – is going to take an exhaustion point. Exhaustion points are an abstraction of the wear and tear on an army on manoeuvre over an extended period of time. A little exhaustion is tolerable, but it can build up very quickly and sometimes unexpectedly.

With Halle and Leipzig in French hands, Napoleon takes Eufurt
for the game (a sudden death victory in Turn 6).

Below the Strength Points track for each leader/formation is an Exhaustion Points Track. Each time a unit takes an exhaustion hit, a little orange drum is added to this row. Say you draw a 5-point card and move Lannes five spaces because you want him to get past an intersection before a Prussian unit has a chance to cut him off; congratulations – you made it, but Lannes’ corps will now be two exhaustion points wearier. Two points aren’t that big a deal, but exhaustion accrues in other ways as well. If the turn has a Rain event, all movement will add one point of exhaustion to every unit moving, whether their card draw actually allows them to move or not (and added to that, it will cost an extra point to get those chaps moving, along with any stack penalties – Rain is as much an enemy as the opposition).

When you get into combat (which you will want to do, especially playing the French, as this is your best chance to shift the Victory Point marker in your favour) you will not want to be carrying to much exhaustion into battle because fighting is itself exhausting. Even if you win, your forces may come out of it with enough accrued exhaustion to push you up to the limit, which is nine points. A corps can carry up to eight points exhaustion, but if it goes over that for whatever reason, it is eliminated (there’s a handy little memento mori of this on the Exhaustion track – a little skull on the nineth position to say it’s over).

Kalckreuth creeping dangerously close to complete exhaustion.

This isn’t to say that once you’ve accrued exhaustion you’re stuck with it. At the end of each turn, any units that haven’t been activated (i.e., are still upright) can lose ALL their exhaustion. But that’s the cost, they can’t have done anything for that turn. And choosing not to activate a formation may not be a guarantee; if they happen to be attacked by an opposing force whale they are trying to sit quietly, they’ll be classed as having been activated, and they may well gain even more exhaustion into the bargain.

Combat resolution is tied to the cards as well. Each unit will bring one or two cards to the fight. Some leaders gain an extra card, some Actions may offer another (or lower the opposition’s card-count), and in some cases, environmental factors will come to play; defenders gain an extra card draw for wooded terrain or defending a walled citadel.

A rare strong defence for the Prussians (three hits, and nine exhaustion), though those
two Destroyed Bridges cards may have been more useful in his hand..

Combat is conducted simultaneously: after establishing how many cards each side gets to draw, each player draws that number of cards, laying them out face-up in front of them. The cards present the damage inflicted in a box in the lower left corner. Orange circles mark exhaustion points taken, while squares with crosses overlaid indicate the physical damage inflicted on the force’s collective strength. Damage and exhaustion is shared out over the participating formations as evenly as possible (at the discretion of the owning player), and if there is a mispatch in the physical damage dealt, the higher damage recipient retreats. Single engagements will rarely see units annihilated (except perhaps by exhaustion), but they can be brutal. The total damage to each side is compared, and the difference is added to or subtracted from the Victory point track, in favour of the victor.


Appraisal

Napoléon 1806 is an extraordinarily finely balanced game. The French are the more effective fighting force. They have eight formations to the Prussians nine (though Werternberg doesn’t enter the game until Turn 5), and five cavalry units to the Prussians’ two), reflecting Napoleon’s superior theatre intelligence and the independent command of his forces. The Prussians field weaker forces; the average strength across the French corps is a shade under 6.4 blocks, while the Prussians average at 5.3 blocks per corps). They are forced into a reactionary posture; to some degree they must respond to the intentions – real or implied – of the French. They don’t really have the option of taking the fight to the enemy wholesale. The French superiority in command in control is reflected in their deck spread:

But the Prussians are playing a waiting game; all they have to do is run out the clock to guarantee a default win – not one shrouded in glory, but not an ignominious loss either. It is incumbent on the French forces to engage the enemy and inflict losses, which will translate to points, and to take the Northern citadels, which means they have to cover a lot of terrain just to reach their objectives. Fast movement means a swift accrual of exhaustion points. A corps can shake off all of its accrued exhaustion points by remaining inactive for a turn, but that hands the Prussians another turn to reposition themselves into a better defensive state, or to block a crucial chokepoint. Or allows them to attack while you’re still carrying all that exhaustion.

Drawing three cards every turn potentially removes a lot of cards from circulation. Having useful Actions to play – like the Destroyed Bridge card for the Prussians – can make an outsized impact on the unfolding drama of the game.  But the cards with the most crucial actions are inevitably have point-values, and these will often have superior combat results as well. In such a finely-balanced game, maintain a balance between your holdings and your potential draw pool is crucial.

The final turn; Prussian victory after the French fail to gain distance swiftly enough.

On the face of it, Napoléon 1806 may seem like a one-trick pony. According to the box-description, the game has three scenarios, a short (three-turn) getting-to-know-you game for those either unfamiliar wargames or just new to this one, the full seven-turn historical campaign, and a free-set-up option for the campaign game (places available to the two armies to set up in are marked by a French or Prussian Eagle). In fact, the Quickstart rules and the rulebook (pg. 15) offer alternative set-ups for the three-turn game, so there are arguably four scenarios included.

But this is a game of hidden depths. The paths through Prussia are tricky; there is always a way around, but it may be prohibitively distant, or take you even further from your objective. The cards can be fickle and using the same 36-card deck for every activity will see you burning through it a few times in a game. It's a tough gig for the French - they have to cover a lot of ground, and negotiate a dozen or more choke-points, to get the bulk of their forces north to threaten and harass the Prussians three held citadels. Each is worth three or four points; that's not to be sneezed at when a ten-point lead will secure victory. But France's Achilles heel is Bamberg. If left unprotected, a Prussian formation and some lucky movement-point draws could snatch the city and victory from them before they've begun to prosecute their campaign.

But that doesn't mean it's a cakewalk for the Prussians. The enemy has their work cut out for them, but they are faster, hit harder, and their formations are better-equipped to prosecute martial action. The natural choke-points in the paths offer some advantage, but there are multiple paths north, and you can't adequately guard them all. If you can run down the clock (at seven turns) you will win a minor victory, but it can feel like a long seven turns as you lose ground and French corps manage to slip past your blockades. Nearly every game I've played of Napoleon 1806 has got to the end of the fifth turn with both sides still having a good chance of taking the win. With so many variables at play, nothing is ever a foregone conclusion.

I have some suspicions about prudent courses of action in the game, things that might work in particular circumstances within the game, but I don’t think it’s the kind of situation that allows a player to find one path to victory that works every single time. And that’s a good thing. Napoleon 1806 is a game that will challenge you with new problems and entice you with hereto unseen opportunities each time you come to it.


Blog note: A long absence and another milestone

      It’s been a week – strike that; it’s been ten days since I last posted. I try to get something up at least weekly (I aim for six or se...