Oh, happy day! This week saw the arrival of one of
my most anticipated games of 2025. To be honest, I’ve been anticipating this
one since 2019. It’s had a storied history leading up to its publication, but
now it’s here and it was worth the wait.
Designer Dan Fournie’s Drop Zone: Southern France (Worthington Publishing, 2025) is a new game from Mike and Grant Wiley
of Worthington Publishing. This game has had a long gestation (I wrote a potted
history of its development here (number 12 on the list, at the end of the post), so I won’t go into that
again now. I may revisit the story in a little more detail when I get to doing
a review.
This isn’t Mr Fournie’s first game with Worthington.
He contributed 414BC: Siege of Syracuse (Worthington Publishing, 2022 – review here) to
Worthington’s Great Sieges series and founded a loose series of World War II games
with 1944: Battle of the Bulge (Worthington Publishing, 2020 – review here), and 1944: D-Day to the Rhine (Worthington Publishing, 2022), and that’s just the
ones I own.

To be honest, I felt a little disappointed when I first saw a picture of the box cover online. It just seemed inadequate somehow. I’m not sure what I was hoping for, but this wasn’t it. I feel like a hypocrite for saying it, because I’ve been on record here and elsewhere saying a game shouldn’t be judged on its cover art. I think it feels more personal for me because I’ve been looking forward to this one for so long.
Now I have a copy in front of me, I like it a little
more, but I feel like it’s a bit of a missed opportunity. I’m not sure what
would have been a better cover, but I’m sure there’s something out there that
would have been more compelling, and more acutely associated with Operation Rugby,
the air-drop component of Dragoon (the cover art is a montage, and elements
could have easily been drawn from the June D-Day action, or, even more likely,
training jumps). It also doesn’t acknowledge the participation of glider-borne
troops, who arguably suffered greater risks making it safely to the ground
without the bonus pay given to the silk jockeys. This, of course, in no way
detracts from the game itself, which I’ll get to in a moment. And when it’s all
said and done, you don’t play the cover.
 |
| The box-back. No complaints about this. |
Turning to the back of the box, we’re given a sample of the map and counter art, and the specialised dice that drive the game. The dice have symbols corresponding to unit types, and the Allied and Axis dice have different configurations as well as different colours, uniform grey for the Axis player, and (ironically) Prussian blue for the Allies. Anyone who has played either of Mr Fourie’s two 1944 games will be familiar with these.
The description on the box back briefly details the
scope and historical context of the game. As with the early-morning airborne
raids in Normandy six or so weeks earlier, the purpose of Rugby was for Allied
troops to secure key road junctions to spoil a German armoured response to the
amphibious landings taking place later that morning on France’s Mediterranean
coastline, a few dozen miles away to the south. It was a bold plan, hampered by
a dense fog on the drop morning, that had the effect of distributing the task
force over a broader spread than was first intended.
The box description reveals the game action covers a
48-hour period, the crucial first two days of the First Airborne Task Force
(1ABTF) in Southern France. The 1ABTF was an ad hoc force made up of American
and British units, this allows what is essentially a two-sided game to be
shared by three or four players.
The informational graphic key that is happily an
industry standard these days informs us that the rules difficulty for Drop Zone
is Low (2 out of 5), while the solitaire suitability is very high (5 out of 5;
the game comes with a double-sided Player’s Aid Card outlining the rules and
guidelines for solitaire play, but I’m getting ahead of myself). It stipulates
the aforementioned 1-4 players, and that the recommended age for players is
fourteen and up. As always with Worthington games, the play duration is set in
terms of “Victory within 2 hours.” As I, and others, have pointed out in the
past, Worthington is the most reliable of game companies for play duration (Legion
Wargames probably comes a near second).
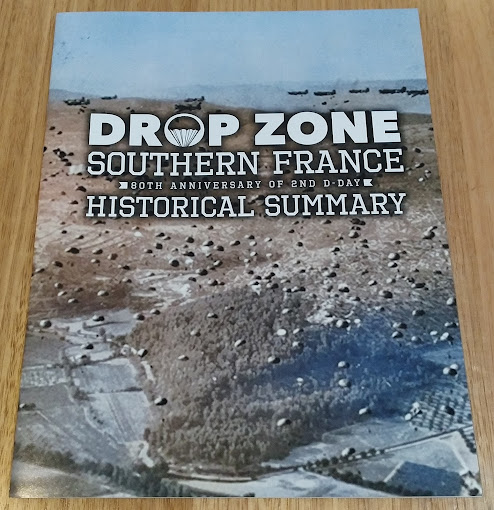 |
| The Historical Summary booklet. Worth it's weight in gold to the history buff. |
The first thing to greet you upon lifting the box-top is the Historical Summary. Last year (the year the release was funded on Kickstarter) was the eightieth anniversary of both the Normandy landings – Operation Overlord – and Operation Dragoon. This is a subject that is close to the designer’s heart; Dan Fournie’s father, Corporal Arthur I. Fournie, fought in the 460th Parachute Field Artillery Battalion during the operation.
The Historical Overview is broken into sections
covering the planning and execution of Operation Dragoon, and an overview of the
operations on the ground over the first two days (D-Day and D-Day+1), as well
as appendices on the force structure of the Airborne Task Force, the Free
French and Allied Special Forces, and the histories of the various units
involved in the Operation. There is probably nothing here that a motivated
researcher couldn’t find for themselves given the time and inclination, but to
have it presented here in a 24-page booklet to dip into between games is a boon
and rounds out the whole package nicely.
 |
| A Rulebook. Trust me, there are two of these in the box. |
Worthington have been including two copies of rules in their games at least since the Martin Wallace-designed Lincoln (PSC/Worthington Publishing, 2018); I wish more companies would follow this example, at least in the case of lower-page-count rules. The rulebook is printed on good, low-gloss stock, and runs to twelve pages (though it is only numbers to ten; the cover and verso are oddly ignored in the pagination).
The rules are clear, concise (just ten pages,
including scenario details) and helpfully illustrated. There are two scenarios,
each running the full six turns. The first is the historical scenario,
reflecting the conditions and dispositions of the Allied and Axis forces
involved in those first two days of fighting. The second scenario increases the
challenge for the Allies by incorporating the 11th Panzer Division,
the “Ghost Division,” which had been ordered to the area, but on August 15th
was still 160 kilometres from the drop zone. The Alternative scenario should
make for an interesting “what-if” situation, and doubles the replayability of
the game.
As I've mentioned, there is a dedicated solitaire-play mode for Drop Zone. This is alluded to in the rules, but the rules appear on a separate Player Aid Card, which we’ll get to in due course. The back page of the rulebook features a list of abbreviations featured in the game. A lot of rules layout folks would have made this the second or third section in the rulebook, right after the Components part. Whoever decided to put this on the last page deserves a special commendation; Drop Zone is replete with abbreviations, and having the list there instead of another copy of the sequence of play has already saved me many minutes of page flicking and a ton of wear an tear on the booklet.

The play area for the game is a sturdy mounted board of the quality we’ve come to expect from Worthington. The map represents the area of the initial air drop in Provence, roughly a dozen miles inland from the landing beaches. The map and counters are all the work of José Ramón Faura, and in both cases, they are exemplary in their balance of appearance and utility. The map is really nice to look at, with the terrain features clearly defined against a pale tawny-green base for the clear hexes. There can be no doubt which areas are forested, but the hex-grid – larger than one might expect to accommodate the larger unit counters – are not lodt in the trees. The play area is eighteen by twenty-one hexes, which at first blush may seem small, but should accommodate the lower unit count and brief turn cycle, and add to the claustrophobic nature of the action over the two-day period.
Incorporated into the map-board are the Victory
Point track – a pendulum track, but rather than keeping track of fluctuations
in the score, the total points accrued by the Allied player is tallied at the
end of turns three and six (if no sudden death victory has been awarded at the
first tally) – and a Turn Track loaded with supporting details such as each
players Assets drawn and each faction’s reinforcement points for that turn.
Much of the crucial game information has been
applied directly to the map, but in ways that are no more obtrusive than the
hex boundaries. Towns marked with a white number in a red box are D-Day
objectives for the Allies. The values of the towns held by the Allied forces at
the end of Turn Three (the close of the first day) are added up and this number
will decide if that side reaches their sudden death victory requirement. If
not, at the end of Turn Six (the close of D-Day+1), the tally of objectives
with Yellow-boxed numbers held by the allies is added, and the tally of the
red-boxed not in Allied hands is subtracted from the total to discern the final
score and who will claim victory.
One more thing. It's worth noting that the board laid out nearly perfectly flat first time out of the box. It's a small thing, but it kind of made my day.
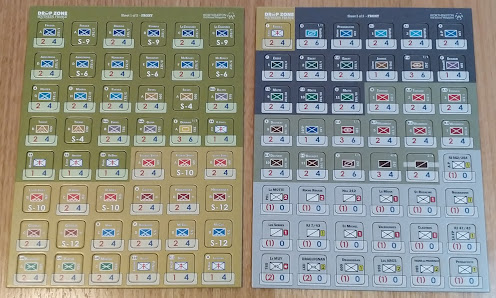 |
| Companies of heroes: units of different stripes - American (green), British (khaki), German (dark and uniform grey) and German garrison (immobile) units (pale grey). |
Drop Zone’s counters are one inch (nearly 26mm) pre-rounded
counters. These are well laid out and clearly readable. Infantry units have
four movement points per turn (except for Garrison units, which are stuck where
they are), while motorised units have six. The strength value is indicative of
how many dice a given unit will roll in combat. Several nationalities are
represented in the unit mix, including US, British and Free French formations,
as well as the Germans.
 |
| Even more units, and the game markers and Asset tokens. |
Along with the counters, there are a number of circular counters that fill various game needs. Two are the Turn and Victory Point markers (in blue, to stand out on their respective tracks), six draw tokens for the chit-pull activation each turn (there are two separate sets for the two scenarios for the German player) and twenty-six Asset markers. I don’t like to go too deeply into game mechanics in an unboxing, but this is worth noting. From turn 2, each player gets to draw Assets that they can use in that or subsequent turns to gain a situational advantage, such as air support or indirect artillery fire in an attack, Initiative tokens (for the Allies only) which can be played instead of drawing an initiative chit from the draw cup, to allow that faction (British or American) to or (for the Axis player only) a Regroup token that allows the player two more Reinforcement Points for a given round. For a simple and relatively short game, there is an awful lot going on here.
 |
| The Terrain Effects Chart and Sequence of Play. The other side of this PAC has a detailed Combat rundown. |
The game comes with a single General Player’s Aid Card. This PAC includes a Terrain Effects Chart and detailed Sequence of Play on the front, with detailed Combat rules on the back. Personally, I would have liked to see a duplicate included, but it’s a minor beef, especially considering the number card sheets included in the game, each with its own functions. The Terrain rules won’t be difficult for anybody familiar with hex-and-counter wargames, and the sequence of play will become second nature after a couple of turns – this shouldn’t be a taxing game.
 |
| The Historical Scenario Reinforcement cards (Allied (above) and Axis). Note the spaces for the Asset tokens. Not all of these are available in both scenarios. |
 |
| And the Alternative Scenario Reinforcement cards. |
There are two reinforcement cards, one each for the Allied and Axis players, that each do double duty with the historical scenario details on the card’s front and the second scenario on the verso. The idea is to place the reinforcement units counters on the appropriate card, and bring them in to the game on the appropriate turn. It can feel tedious to have to sort through the counters setting up the game, but the benefits when actually playing can’t be overstated.
 |
| Para-drop set-up card. |
The fourth PAC (to be honest, I’m not sure what
order these are supposed to be in, but It was the fourth one I examined in any
detail) has instructions for the Allied para-drop set-up, which incorporates a
measure of randomness befitting something like dropping troops behind enemy lines.
In the early morning of the 15th, a thick fog carpeted the entire
drop zone, making it difficult for pilots to pinpoint allocated drop points,
let alone the sticks of troopers to have any hope of a cohesive entry into the
warzone. Origin hexes are allocated on the board for each of the five paratrooper
battalions, based on the operational plan. The Allied player can arrange the units
on the PAC in their respective groupings and, in their turn, place them
face-down (anonymous parachute-side up) on the board.
When placing the company-strength units that make up each battalion, the Allied player rolls two dice, one of which till prescribe the direction of that unit’s drift from the planned landing location, while the second die result will dictate the distance in hexes from that point (1-3 hexes away). These are placed one at a time, and if one para company would land on another based on the initial roll (a one-in-eighteen chance, so unlikely but not outside of the realms of possibility), a second direction roll is made (and presumably a third, until the unit lands on a clear space). This card will help to keep this part of the set-up moving briskly.
 |
| The verso of the Para-drop card, Alternative scenario VP and Turn Tracks. |
 |
| The Solitaire rules fit on two sides of a PAC, but some sacrifices had to be made in font size. Reading glasses required.. |
As befitting a modern wargame, Drop Zone has a solitaire mode of play. The solitaire rules for the game are offered on a single double-sided PAC. I think solitaire play will be enriched by the chit draw activation mechanic. I haven’t studied the solitaire guidelines in any detail yet; I’m hoping to get the game to the table in the coming week, and I’ll play the traditional two-handed game to get to know the ways of it before trying it out on a second player, but I will run through a couple of solo games using these rules before I engage in reviewing the game. I can report that, at first glance, the rules seem straight forward and common-sensical.
 |
| Hermetically sealed dice-sets, in an enclosed tray, for that belt-and-braces approach to dice security. |
For several years now, Worthington games have been
coming with a counter tray for a while now. There are several configurations,
depending on the game. This one comes with troughs for the counters and two
cavities, one each for the two sets of dice – no fraternisation between the
sets. The Allied dice are cast in a fetching blue, the Axis dice in a uniform
grey. The game also includes two pipped six-siders, a red and a white.
The specialised dice will be familiar to those who
have played either of Mr Fournie’s 1944 games. There are two or three types of
symbols on each, and a hierarchy of units hit on the roll of a given symbol
that I won’t go into here (I’ll talk about this in my first Drop Zone AAR –
stay tuned). The dice are good rollers, though the blank faces seem to come up
disproportionately often for me, but I think that more my dice mojo than any
fault of the bones.
-----
So, that about covers Drop Zone: Southern France. I’ve
enjoyed all of Dan Fournie’s games I've played – I would have likely enjoyed a lot more if I’d
gone down the Great Battles of History rabbit hole. This game is now on the top of my
to-be-played stack, so, I anticipate offering at least some initial thoughts in
the next couple of weeks.


No comments:
Post a Comment