Showing posts with label Brothers at War 1862. Show all posts

Sunday, 11 February 2024

State of Play: Brothers at War: 1862


Charles S. Roberts Award nominee: Best American Civil War Game (2022)


I’ve been eager to get Brothers at War: 1862 (Compass Games, 2022) to the table since it arrived around the middle of last year. It’s a brigade-level command game covering four battles from the second year of the American Civil War that haven’t traditionally got much if any attention, especially at this level. The production quality is solid, map art is provided by the designer, Christopher Moeller (who also designed Napoleon’s Eagles: Storm in the East (Compass Games, 2020), and the upcoming Burning Banners (Compass Games, ~2024)). The maps are both gorgeous and functional, with lexes large enough to accommodate two of the .75” counters side-by-side.

The Fifth Virginia Cavalry choose the better part of valour.

I took Moeller’s advice for my first outing (a two-handed solo run) and set up the first scenario (numbered Scenario 5) for the Battle of Fox’s Gap (a narrow pass west of Turner’s Gap, and a minor but crucial action which was a pivotal part of the general unpleasantness at South Mountain). This scenario is an ideal introductory situation to get to know the rules. It has a low counter density overall, starting with just two full brigades and a cavalry brigade, and only adding a single brigade each for the US and the CSA as the action continues.

Brothers at War uses a chit-pull activation mechanism, making it especially friendly for solo play. Each unit begins with two tokens in the draw cup, along with two timer chits. When the second timer chit is drawn, the turn is over; the turn marker is shifted the next turn, and the drawn chits go back into the draw cup.

The object of the scenario is for the Union forces under Scammon to take (control) either Wise House or Hutzel Farm, and the Confederate player must prevent this from happening. At first blush, the situation would appear to be fairly one-sided, with Scammon’s three regiments spread out across the board (and his rather ordinary attached artillery some distance behind), while Garland has five regiments at his command, two of them already occupying Wise House, and a detached command of Stuart’s Cavalry under Rosser – mounted infantry and horse-drawn light cannon – screening the meandering western approach to Hutzel Farm. But Scammon’s regiments are not to be sneezed at.

Crook's 11th and 36th Ohio break form to cross into the walled paddocks.

I’ve played out the opening couple of rounds twice so far. The first game I played three rounds, to get the feel of how the rules worked, before getting down to a proper game. In both instances, Scammon was the first draw, and each time the 23rd Ohio moved quickly and effectively to engage Rosser’s unmounted screen. In both instances, the screen was pushed back (the first time it was nearly annihilated – not just disrupted – but there are provisions a player can take to keep their brigades intact). When Rosser got his chance, he pulled both his mounted infantry and his paltry cannon back along the wide-curving road to Hutzel Farm. Even combined, the light brigade is no match for the 23rd Ohio fighting in the open.

This game does a lot of things I’ve seen in other games, but it does them differently, and the overall effect is really quite good. The chit-pull activation adds a measure of drama to the back-and-forth of the action; nothing new, especially for ACW games (Herman Lutmann’s Blind Swords system springs to mind), but the inclusion of the timer chits ratchets up the tension a little. Each battle represented in BaW has its own bespoke Activation track. During a turn, each activation chit is placed on the track in the order drawn. If a timer chit is drawn and placed in a position on the track with a matching clock icon, another (third) timer chit is placed in the mix. Remember, on the second timer chit draw, the turn comes to an end. One turn in my full game only saw three on-board brigade activations (plus one free activation for Crook’s (Union) brigade, just coming on that turn, which began on the track), from an in-pot total of nine activation chits. This unreliability really adds to the “no plan survives contact with the enemy” vibe of the game.

Activation chits to be drawn.

The units do something interesting as well. Various regiments have differing strengths going into a fight. The steps aren’t captured on the pieces, though. Rather, the overall brigade strength is recorded off-board, on a brigade track. Each brigade has its own quota of Reserves, and these can act like hit-points for any of the regiments from that brigade. The counters have two sides, but these represent the disposition of the unit. For infantry, the sides are formed or unformed. Unformed units are much less restricted by terrain but field a slightly lower weight of lead in combat. The Cavalry units are either unmounted (fighting like light infantry, as was the doctrine of the time) or mounted, and artillery, of course, are unlimbered and capable of firing but not moving, or limbered (on the reverse side) and mobile but mute.

Brigade leadership is represented by a Brigade commander marker, bearing the name and a portrait of the commander and a coloured band, which is shared by all the units in their command for easy identification (not a new idea, but one more thing I like about this game). For all the individual regiments to be “in command” they have to be placed within four hexes of their leader marker. A leader can’t be targeted by the opposing side, and they can be repositioned after the regiments have all move/d acted to best fit the situation. If a regiment is out of range of their leader, they will need to perform a Command check at the beginning of their next activation. If they fail that, the unit is automatically disrupted and is limited in its actions until it is back within command. I can see there might be instances when it would be worth the gamble to purposely place a unit out of command and hope for the best, but I’d be hard-pressed to make that call.

Confrontation at the Wise House.

Early in the ruckus (and under threat of decimation from the 23rd Ohio) Rosser’s mounted troops pulled back to all the way to Hutzel Farm, which they may not have had to. On retrospect they could have had a couple of fall-back positions for defence in the unlikely event of the 23rd pushing ahead on the long road and trying to take Hutzel Farm, though the stone walls of bordering the farm’s fields would have lent he cavalry better cover. Wise House is the more obvious target, being closer to the starting point of the Union and there is a road leading to Hutzel Farm from Wise House, which the Confederate forces could use to reinforce Hutzel Farm if the Scammon had tried to circumvent Wise House in favour of the second target. And then there is the issue of Scammon keeping his forces in his command radius; not impossible, but a big ask, even for his seasoned troops.

Due to time constraints, I wound the scenario up after the seventh turn of nine. At that point a Union win seemed inevitable. G.B Anderson’s brigade was set to enter the fray in the next turn, but unless they received their second activation immediately after the first “free” activation, and maybe get a couple of timer chits in quick succession, it was unlikely they’d make enough haste to change the outcome. I called it as a likely but costly Union win.

An early round. Scammon received the first activation
in the first five consecutive turns.

I’m still getting to know the BaW system, and I’m certain I made a few mistakes on this first run, but at first blush, I really like how the narrative unfolds. Brothers aw War was the first game I settled on for my 5x3 challenge for 2024. I think the hard part will be stopping at just three games.


Saturday, 7 October 2023

Stripped down for parts: Brothers at War, 1862


Charles S. Roberts Award nominee: Best American Civil War Wargame


Brothers at War, 1862 (Compass Games, 2022) is, as the name would suggest, an American Civil War game. And I can already hear people mumbling, “Hmmm, another ACW game.” If it’s not your thing, feel free to stop reading now. Brothers at War, 1862 is a regimental-level hex-and-counter wargame by journeyman game designer, Christopher Moeller. Moeller is responsible for the Napoleon's Eagles: Storm in the East (Compass Games, 2020) and the upcoming Napoleon’s Eagles 2: The Hundred Days (Compass Games, 2022) and the subject of Compass Games’s first “proper” Kickstarter campaign, the fantasy-themed wargame Burning Banners: Rage of the Witch Queen (Compass,  2024) which is slated. 

Moeller has a day job as an artist for the Magic: the Gathering (Wizards of the Coast, 1993) behemoth. That’s all I’m going to say about that. I now realise that he was also the creator of the Iron Empires graphic novel series which I really enjoyed reading, and which got an RPG treatment in Burning Empires (Burning Wheel, 2006); and I'm now embarrassed that I hadn’t made the connection right off the bat.

Brothers at War, 1862 is a brigade command-level game, with a chit-pull activation mechanic. I'll cover that in the review. I’ve only come to chit-pull activation games in the last four or five years, but to my mind it makes for a much more dynamic game-play, especially for tactical games with an emphasis on manoeuvre. But I’m not here to discuss the design merits of the game; you’ll just have to come back for the review. Here I want to consider the apparatus of the game, the beauty and the magnitude of what comes in the box.

The box is of 2-inch depth and sturdy construction; Compass’s boxes – at least the ones I’ve been acquiring lately, are generally pretty substantive and have a good fit without becoming vacuum-seal tight.

I Like the box-art for Brothers at War, 1862. It’s evocative while staying kind of generic, which is fair, considering the geographical separation of the battles covered in the game*. The game covers four battles from the Civil War – Antietam, Fox’s Gap, Mill Springs and Valverde – and this is declared on the right hand of the box-cover, which features a drop-banner showing portraits of commanders crucial to the actions covered in Brothers at War, 1862.

The back of the box conveys clearly the parameters of the game, declaring the scale; turns are roughly twenty minutes long, the hexes are 100 yards across, the command-level is brigade, but the pieces are regimental, so with each activation you’ll likely be ordering two-to-four counters (again, putting an emphasis on manoeuvre). The back also clarifies not only the four battles represented, but that there are at least three scenarios to play for each battle (Antietam has four).

The box-back also gives us a teaser of the map-art and the counters, with the representative counters printed to their true size (¾-inch). We’ll circle back to these shortly.

Both the Rulebook and the Scenario book are printed on nice, heavier weight gloss paper, but not too shiny, so it’s eminently readable under lights. The rules for Brothers at War, 1862 well-presented and very readable, with worthwhile illustrations clearly spelling out perennially difficult issues for tactical games like line of sight. I’ve read through the rules once – I like to give the rules a second read before I try out a full scenario – and I didn’t hit any red-flag details. If it’s presented clearly enough for me to understand out of the gate, then in my opinion the designer, developer and any editorial folk involved have done an outstanding job.

Rulebook sample page: Line of Sight examples.

All five sheets of counters printed on good grey-core stock and not too thick to fit into my 2mm radius Oregon Laminations clipper Four of the sheets are ¾-inch used for units, brigade commanders, draw chits, off-board artillery tokens and other sundry pieces. Before I go any further, I should point out that the placement of the units in the sprues is an approximation of how they were printed. As I carefully lifted out the first couple of counter-sheets, nearly all the middle counter-strips fell out of the first two or three sheets. This isn’t a criticism; they’re just very well-cut. I was surprised they’d managed to all stay in place through the box’s various shipments. But when you come to unboxing your own copy, don’t be too cavalier with the counter-sheets. You’ve been warned. There is a fifth sheet of smaller (five-eighth, I think) markers which are all so well cut, but not so that they fall out of their frame.

Union forces

The units are clearly presented, and feature two states for the unit on the front and reverse sides, rather than a step-loss. Infantry units are either formed or unformed; cavalry either mounted or unmounted, and artillery batteries either limbered (prepared for movement or unlimbered (battle-ready). The brigades are marked clearly using a common colour bar across the brigade. The identifying colour bar also appears on the battalion commander’s marker, and on the draw-chits used in the activation of units in a turn.

CSA forces and other markers.

Smaller markers.

All in all, the counters are gorgeous, and feel nice to play with. I’ve recently moved up to working with a 3mm plexi sheet – something I never saw the need for until I got it – and 25cm tweezers with a fairly broad gait, so it will be interesting to see how well they accommodate the ¾” counters.

Game maps for the four battle covered.

The maps achieve a balance between artistic merit and usability. To my mind are fairly utilitarian, but still attractive to look at and play on, not at all stark or schematic. It’s my understanding that Chris Moeller did all of the art for the project, including maps, counters and play examples for the rulebook. The guy has some serious artistic chops, but he also has the designer’s understanding of both what is necessary, and what will work in a play surface.

Antietam map. This map accommodates all four scenarios.

I’m only featuring the Antietam map here; I’ll show more detail pics when I get to reviewing the game, but for now you’ll just have to take my word for it that they are all great. Elevations are shown in a colour scale and kept to a manageable four. Elevation affects things like line of sight and artillery deployment, so manageable is good. The way the maps have been prepared betray an emphasis on playability, which I can’t fault. I’m eager to start pushing around some counters. The hex-grid is a mere 14 by 20, with each hex coming in at 1½ inches, side to side. Stacking rules in Brothers at War, 1862 are two units to a hex, but this way you don’t have to stack them; you can have your units side-by-side, with all the important information available at a glance.

Set-up guides for scenarios 1 and 2.

The scenarios are presented in four chapters, coinciding with the four battles covered in the game. Each receives a brief introduction, along with some situation-specific rules for that set of scenarios. The details for the units at play are collected on the Scenario Charts for each side, for each battle. These will hep you track the regiments within each brigade as well as the other ancillary units, like independent cavalry, artillery batteries, and each brigade’s skirmishers. The cards should remove the need for some of the marker clutter inevitable in this kind of tactical game (I’ll look at this in more detail in my review).

Activation tracking and Brigade management cards.

Player Aid Cards.

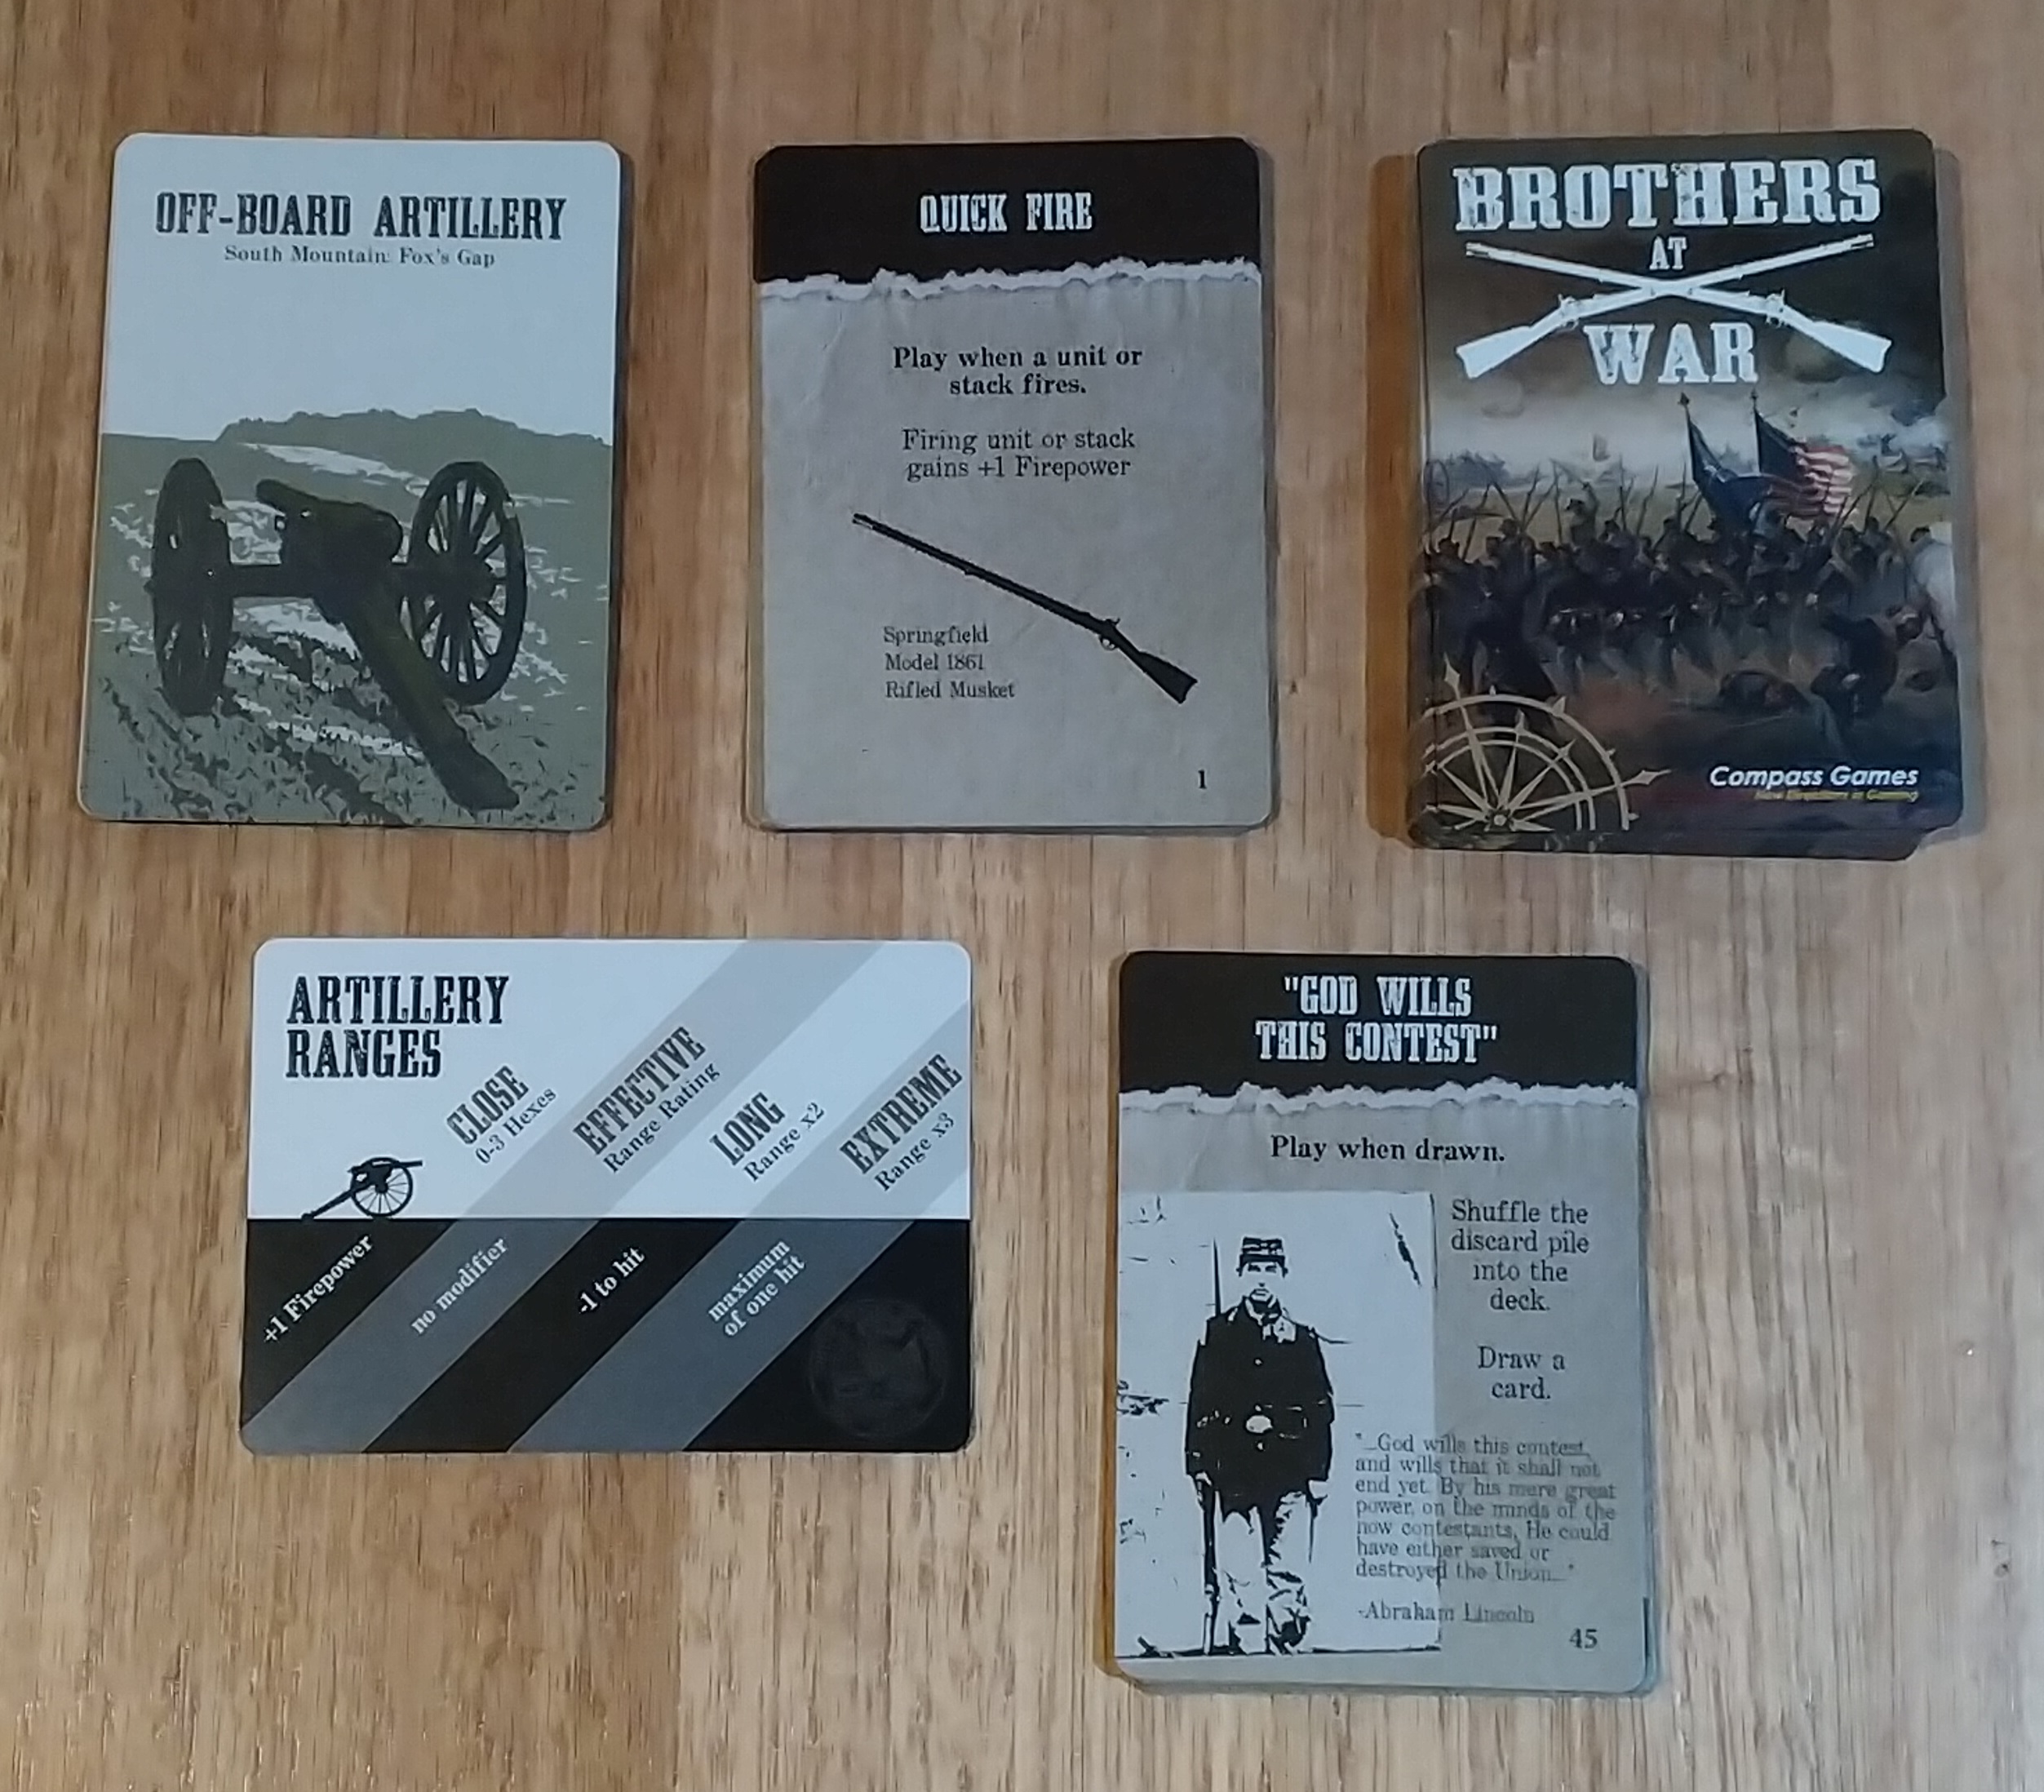
Cards play a big part in the game. Brothers at War, 1862 is a card assisted game; the cards held by the player may, in a given situation let them shake off a disordered penalty, or offer an extra dice in combat. Nothing game-breaking, but it makes for a nice feeling when you’ve got the right card at the moment you need it. The deck is used for all four games, so the there’s nothing too situation-specific. The cards are of the standard I’ve come to expect from Compass Games; some might argue they’re a little on the light side, but I personally don’t have a problem with them. They are also nicely and simply illustrated, in keeping with the overall feel of the game.

Card samples.

A handful of cards are also used for managing the Off-Board Artillery. Some batteries are located on the map – depending on the scenario – while others are held off-board. The fact that they’re off-board doesn’t mean they’re immune to hostile fire; that’s where the need for BBA management comes in. While I’m talking about artillery, I want to mention something that I would normally leave for the review, because it’s a mechanical point rather than a physical one. I just want to note something because I think it’s neat. The range rating for the artillery counters may seem a little short, usually # or so hexes. That’s the effective range; long range for artillery is double the range stated on the counter, and extreme range is triple. This is the first time I’ve come across this in a game, so maybe someone else did it first, but this just seems an elegant way of managing the potential difficulties of escalating ranges in tactical artillery.

Of course, it wouldn't be a Compass game without one erratum note
slipped in before shipping. This isn't a criticism.

By everything I’ve seen here, Brothers at War, 1862 promises to be an excellent tactical simulation of four separate and diverse situations that occurred during the second year of the American Civil War. The observant reader may have noticed that I’ve persisted on using the complete title – Brothers at War, 1862 – throughout this article. It’s my understanding that Mr Moeller has stated his intention to make this into a series of games, with new additions covering other years of the war (so he presumably has at least two more in mind). I’ve used the complete epithet to, in my own small way, encourage this endeavour. Based on this one, I’d really like to see, at least, a Brothers at War, 1863 (BaW ’61 and ’64 would also be most welcome).

This has been a by no means exhaustive look at what looks to be an entertaining  and educating game; I jst wanted to share some of my excitement overt it. Brothers at War was one of my most anticipated games of 2022 even before it received a Charles S. Roberts Award nomination. I’m really looking froward to getting this to the table. I want to dive into this as quickly as I can and get a review out for you for your consideration. From everything I’ve seen – and read – of it so far, I’m left with little doubt that it will meet my expectations.


* The back box-cover noted that the cover art is actually a nineteenth-century painting, The Battle of Antietam by the Swedish-born American artist and illustrator, Thure de Thulstrup, which he completed in 1887, 25 years after the actual battle.


Blog Note: a recent arrival

   I’ve been a little quiet on A Fast Game of late due to a combination of circumstances; my wife’s aunt and uncle are over from England at ...