The
Battle of the Bulge, as the German Ardennes offensive of December 1944 has come to be known, would
arguably be the most frequently gamed battle* (i.e., action limited in geography
and duration) of the Second World War, certainly one of the most thoroughly
researched. The German army’s desperate
counterattack and the subsequent rally and repulse by the Allied forces in the
last weeks of 1944, was first represented in game form in 1965 with Battle of the Bulge (Avalon Hill, 1965).

Bucking
the trend of borrowing a title from a Bulge history for his game, Dan Fournie’s
1944: Battle of the Bulge (Worthington Publishing, 2020) draws a
suggestive line to back to Larry Pinsky and Thomas Shaw’s original wargame. 1944:BotB (please forgive the awkward abbreviation)
is a division-level hex-and-counter wargame covering the period from the 16th
to the 25th of December, 1944.
Appearance
1944:BotB
comes in a sturdy 2” box in a nice matt finish, with muted grey cover art. On
the back is a brief description of the game and the box-contents, and some
details suggesting the games difficulty and solitaire suitability are both
around two out of five. I’d concur with this estimation; rules-wise, this is
not a hard game to pick up (though there is often a gap between learning how to
play and learning how to win). As for solitaire play, 1944:BotB is definitely
solo-able – I’ve done just that a couple of times – but it wouldn’t be a game I
reach for first for a solitaire experience.
.jpg)
The game, resplendent (I've been experimenting .with playing on
my wife's sewing table to keep the dinner table clear.
The
first thing you notice when you set up 1944: Battle of the Bulge is the map. 22’
x 34” and mounted, it’s a slightly schematised rendering of the Ardennes region
(compared to, say, the Avalon Hill Bulge map), concentrating on the road
network that was so crucial to the action. Personally, I like the map; I think
it is effective as a play-area, the terrain types are easy to differentiate
from hex to hex (these will affect movement and combat, and they’re not always
clear (no pun intended) in other games’ maps). The colour palette is toned down,
but evocative and effective. Towns, bridges, and entry-points – all crucial
features for game-play – are clearly defined.
While
game has a low counter density, the action plays out in a fairly constricted
space. The entire space is criss-crossed with a network of roads and trails
connecting towns and cities, and it’s along these paths that the meat of the
game takes place. But I’m getting ahead of myself.
The
game doesn’t have any player aids (except for the two order of battle cards
that I’ll come back to soon), but it doesn’t need them; everything you need to
play the game – Turn and Resource Point tracks, a Terrain Effects Chart, and a
handy step-loss guide for the multiple counter units – it all presented on the mounted
map-board.
The
counters are large, pre-rounded easy-punch tokens on good-quality, heavy cardstock,
and with good registration. These are a joy to use, easy to read and to manipulate
on the board, as are the much smaller circular status markers for recording
which units have moved or fired, and which are in or out of supply. The package is completed with a handful of bright red custom dice, and one lonesome pipped d6 for rolling some effects. Everything about the game says sturdy and built to last.

December 16th (set-up at Turn 1), It all begins at the Siegfried Line.
Play
1944:BotB,
like I think all Worthington games now, comes with a custom counter tray with
gutters wide enough to accommodate the (not quite) 1" counters. This is a blessing and a curse. There
is much more gutter space than is adequate for the counters that accompany the
game. Because I have to store my games edge-ways, there is inevitably some
shifting of counters within the gutters. I’ve put a lot of thought into this,
but I still haven’t come across the best way to store the counters in the gutters
without resorting to elastic bands to keep them in order. Here’s the reason why
keeping the counters in order is a good thing.
Each
side has an Order of Appearance card where you can set out all of the counters
(with the multi-counter units in descending order), then place the starting
counters as guided by the notes on the OoA card. Because of the movement of
counters between plays, what should be a ten-or-so minute takes up the better
part of half and hour. This is not a criticism of the game or the publisher –
the fact that the Wylies provide a counter-tray at all is laudable and far
exceeds what we expect from the industry. It’s one of those minor irritations
that by no means reflects on the game play.
.jpg)
Allies Order of Battle (note the alternative split-division
7th and 10th Armor, bottom).
The
rulebook comes to twelve pages, of which the first seven are core rules (the
eighth is a full-page terrain Effects chart; this is replicated on the board). The
next three pages are given over to Optional Rules (such as variable weather (historical
weather conditions are given on the turn track) and German fuel shortages), and
the Variable Objective cards. The final page-and-a-bit offers illustrated
examples of movement combat and supply-tracing.
A lot
of 1944:BotB will feel familiar to regular wargamers; movement is regulated by
a hex-grid and modified by terrain types, units exert Zones of Control, damage
taken by a unit is handled by step-loss, and drawing a line of supply for
individual units is crucial for movement and combat, but only necessary when
that bit it activated. One thing I haven’t seen all that often is the option to
move to a target then attack, or to attack an adjacent unit, and then move. Markers
are provided as mnemonic devices to keep track of which units have fought but
have yet to move, or vice versa. This opens up whole vistas of tactical options
to the unwary player.
.jpg)
German infantry, Para and armor divisions, including the notorious 150th SS
(using captured Shermans and American uniforms (edged green).
The box
assures us that victory is attainable in two hours or less, and the game runs
smoothly enough that this should be the case, but I’be bever played a game that
didn’t come out closer to three hours because of the mixture of possibilities and
constraints at play in eery turn of the game.
Anyone
who’s played a Holdfast series game from Worthington will be familiar with the
concept of Resource Points. Resource Points are the game’s currency, and like
any currency, they are limited; the balance of RP changes over the course of
the battle; at the beginning the Germans have the initiative, and they carry
that momentum into the first three or four turns; their Resource Points amount
to 20 for the first three turns, then begin to ebb from the fourth, at 18,
while the Allies begin with just 6 RP and slowly build up from there. This
proves t be an elegant way to impose the strictures the Germans were operating
under, while reflecting the Allied command being caught off-guard and
struggling to overcome their own inertia in the early days.
Resource
Points can be spent in a number of ways. They can be used to bolster damaged units
at a rate of one per step for Infantry and two per for mechanised. Activating a
unit to move costs one RP. As does initiating combat, but here’s the
interesting thing; attacking a single target with multiple units from the same
formation (units from both sides have colour-coded affiliations for combat and
tracing supply) will still only cost one RP.

Elements of the German Seventh Army tie up troublesome remnants of
the US Third army proving difficult to dislodge.
1944:
Battle of the Bulge uses custom dice to resolve combat. In a fight, each side adds
the fighting strength of the unit(s) involved, the attacker will add any
additional support – a leader attending will add one die, artillery support
will add another – and subtract any defensive bonuses the defender’s terrain
offers. Both sides roll and the results are considered to be simultaneous (though
even with the number of custom dice provided, sometimes you’re going to have to
take tuns). Each custom die has four blank faces and two with symbols, one with
an infantry cross, and the other with an oval representing armour. Each face
rolled is a hit, and the owning player gets to distribute the hits he takes,
but armour hits have to go on armoured units if they can. Armour on both sides
took a hammering in the Ardennes, and this simple rule reflects that
eloquently.
.jpg)
Variable Objective cards.
Another
nice touch that extends the replayability of 1844:BotB is the inclusion of
Variable Objective Cards. There are four of these, one representing the historical
objective, while the other three offer “what-if” options for other strategic
goals that were considered or at least floated in the planning rooms of the OKW.
The German player can choose a card or pick one at random, and it will fall to
the Allied player to decipher what the German’s ultimate goal is by where he prioritises
his efforts. Lots of room for feints and big plays.
The
roads are key to victory in 1944:BotB; you track your supply (and ensure your
units’ combat effectiveness) by roads. Cross-country movement is possible –
more so for infantry units and mechanised – but in a game lasting a mere ten
tuns, the board can already seem very long when you’re trying to reach the
other end without trudging through dense forest and snow. Moreover, a German
victory is almost certainly going to rely on Victory Points from captured towns.
It’s not impossible to gain a sudden-death win by exiting a full-strength
German armoured unit off the map at a preordained point – I’ve seen it happen
just once – but it’s nearly impossible, and requires a combination of
spectacularly good rolls from the German player and abysmally poor ones from
the Allies; not something you can rely on in a pinch. The more Control markers
the German player can lay down during the game, the better their chances for a
win.

The Moved and Attacked markers each feature a Finished backing: when
the second action is performed, you can flip the existing marker to note
the unit as done.
Appraisal
This blog
is called A Fast Game is a Good Game because the current circumstances in my
life dictate a need for games that offer a fulfilling experience in a few
hours. Most of my play opportunities fall on a school night, so two-and-a-half
to three hours is kind of my sweet-spot for a game (at this stage – retirement may
change that some). Obviously I’m not the only one in this situation, because
games like 1944:BotB are still getting published and remain popular.
In
recent years Worthington Publishing has carved out a niche in the wargaming
landscape, filling a desire for good quality games that play out in a limited
time but that still deliver a satisfying play experience. I’ve said here before
that I’ve never been disappointed by a Worthington game I’ve come across
remarks on Facebook and elsewhere that Worthington games are too simple to
be good wargames. I’m left wondering if the folks that make these kind of
comments have ever played a Worthington wargame. I get that some
people don’t like block games (like the Blue and Gray series, the Holdfast
series, just about anything by Columbia), or they don’t like low counter
density games, or they think a game can't be worth their while if it doesn't consume twenty or more hours of their lives. That's okay; wargaming is a broad church, and people can find succor where they may. I know what works for me.
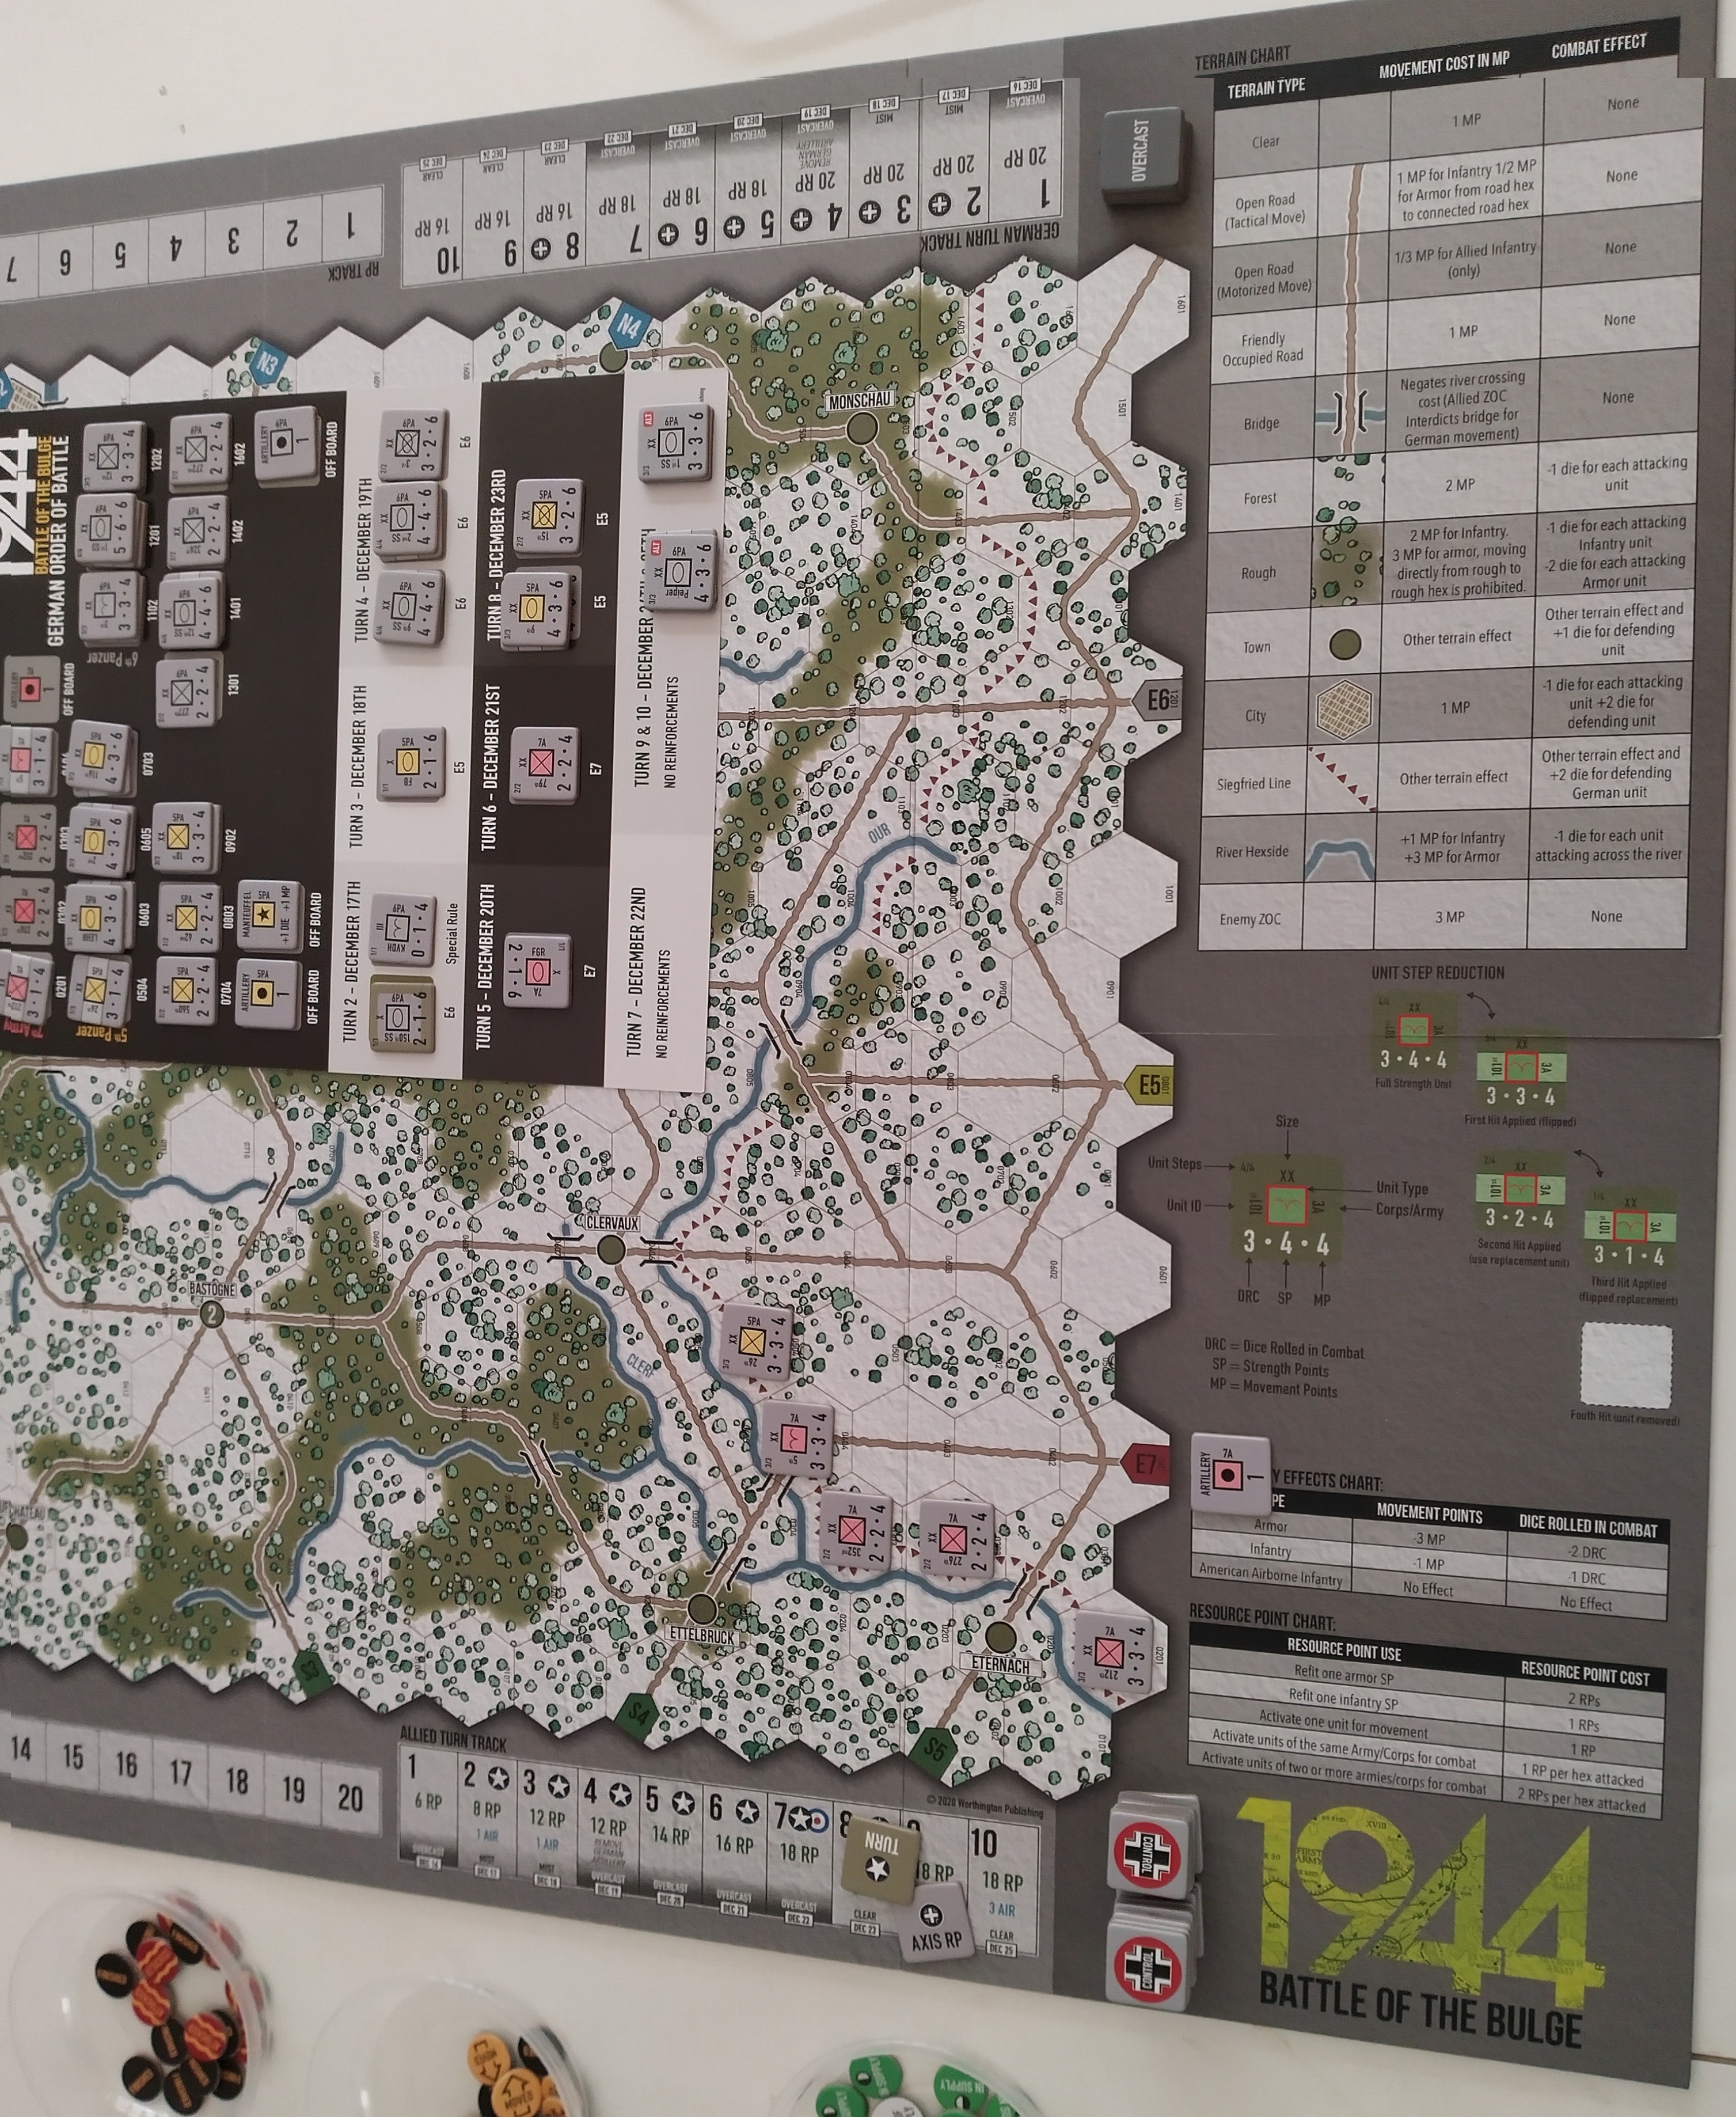
The board features a Terrain Effects Chart, RP spend-costs and other useful tools.
1944:BtoB
owes something to the Holdfast series of games. Its spiritual antecedent is
Drop Zone: Sothern France (Worthington Publishing, ~2024), a game Fournie had in development with GMT for a while.
About Operation: Rugby, the spearpoint of Operation: Dragoon – the second French landing on
the Mediterranean coast in August of 1944. At this stage, it was intended to be
a block game, reminiscent of Holdfast: Tunisia (Worthington Publishing, and others. For reasons undivulged, it was
taken off the P500 list, but not before Drop Zone had evolved from a block game
to a multi-counter unit representation game. This allowed for some units to
have five or even six steps, instead of the mere four a block would allow.
The DNA
of Drop Zone is conspicuous in 1944:BotB, and in its – not quite sister, more cousin
game, 1944: D-Day to the Rhine (Worthington Publishing, 2022). After hints of a
release in 2021 and 2022 (to no avail). It seems that Worthington is firmer on
getting Drop Zone to print – or at least to a Kickstarter campaign – in 2024.
One can hope.

In the upset of the season, the 9th SS exits entry-point N2
through Liege for a sudden death victory.
But
back to the game at hand. 1944: Battle of the Bulge received a second printing,
coinciding with the release of 1944: D-Day to the Rhine. It’s a popular game by
small-press standards. I’ve tried to catalogue the reasons for that popularity
here. To wit, it’s a solid, relatively fast-playing game (if you can minimise
the analysis paralysis), that is enjoyable and leaves you thinking about what
you could have done differently. It’s a that rewards repeated plays, and offers
lessons in logistics, co-ordination of units and marshalling of forces that
someone new to wargames can carry to other, deeper or more intricate games. In
short, this one’s a keeper.
* If we
were talking theatres, I’m sure the Eastern Front would edge out the Western
Front for most frequently portrayed in a game, though I my collection I think
they’d hit around the same number. That might be worth exploring sometime.


.jpg)

.jpg)


