Vuca
Simulations have gained a reputation for producing games of exceptional quality
in regard to both in components and play. Many of their games, such as Task Force: Carrier Battles in the Pacific (Vuca Simulations, 2023), and Traces of War (Vuca, 2023), have been reprints of classic Japanese games from the
eighties and nineties that have never had the exposure in the West that they
deserved. But Vuca isn’t simply a European language reprint company. In-house
developed games like 1914: Nach Paris (Vuca, 2022), Operation Theseus: Gazala 1942 (Vuca, 2022), and Donnerschlag: Escape from Stalingrad (Vuca, 2022), and have been gaining plaudits from reviewers and
players across the hobby.

The Chase of the Bismarck: Operation Rheinübung 1941 (Vuca, 2022), designed by Jack Greene and is another
original publication by Vuca, is a simulation of the Kriegsmarine’s attempt to disrupt
shipping to the United Kingdom with surface taskforces headed by the battleship
Bismarck. This is a big production; a two-board game incorporating a novel hidden
movement, search and discovery system, with a separate battle board for the almost
inevitable confrontation between capital ships. I scored a copy of The Chase for
the Bismarck and Task Force (you can get a look inside the Task Force box here). This is something I’ve been meaning to get to
since getting the game. There is a lot packed into this box, let’s dive right
in.
The
components

The cover-art
style will be familiar with anyone who has had experience with Vuca games. Personally,
I like the spare, almost lino-cut quality. It’s a severe look that declares right
off the bat that this is a serious game, not for the faint of heart.

The rulebook is a little confronting with its white-on-black cover, until you open it. The interior is lush, full colour, with lots of illustrative explanations, and all printed on good paper stock. It has obviously been put together with a view to assisting rather than challenging the new player, easing them the concepts of the game. The Rulebook runs to 28 pages, but only eighteen of these are actual rules. These are clearly written and laid out, in a sequence that makes sense.
.jpg) |
| Sample page from the Rulebook. Helpfully illustrated. |
I
always enjoy reading historical and designer notes, especially for situations
that I am less versed in. Jack Greene provides a short (single page) but very
informative Designer’s Notes essay, which Patrick Gerhardt adding some further
notes, and a bibliography for those of us who like to dig into the history
behind the game. This is followed by a thorough Glossary of terms used in the
game (another two pages), some size-comparison charts of the ships involved,
and silhouettes of the planes used in search and interception role by both sides.
This sort of thing, I think, is always a nice addition, and adds to the sense
of history being played out on the boards in front of you.
 |
| The Allied Operational Tracking board. |
The game features
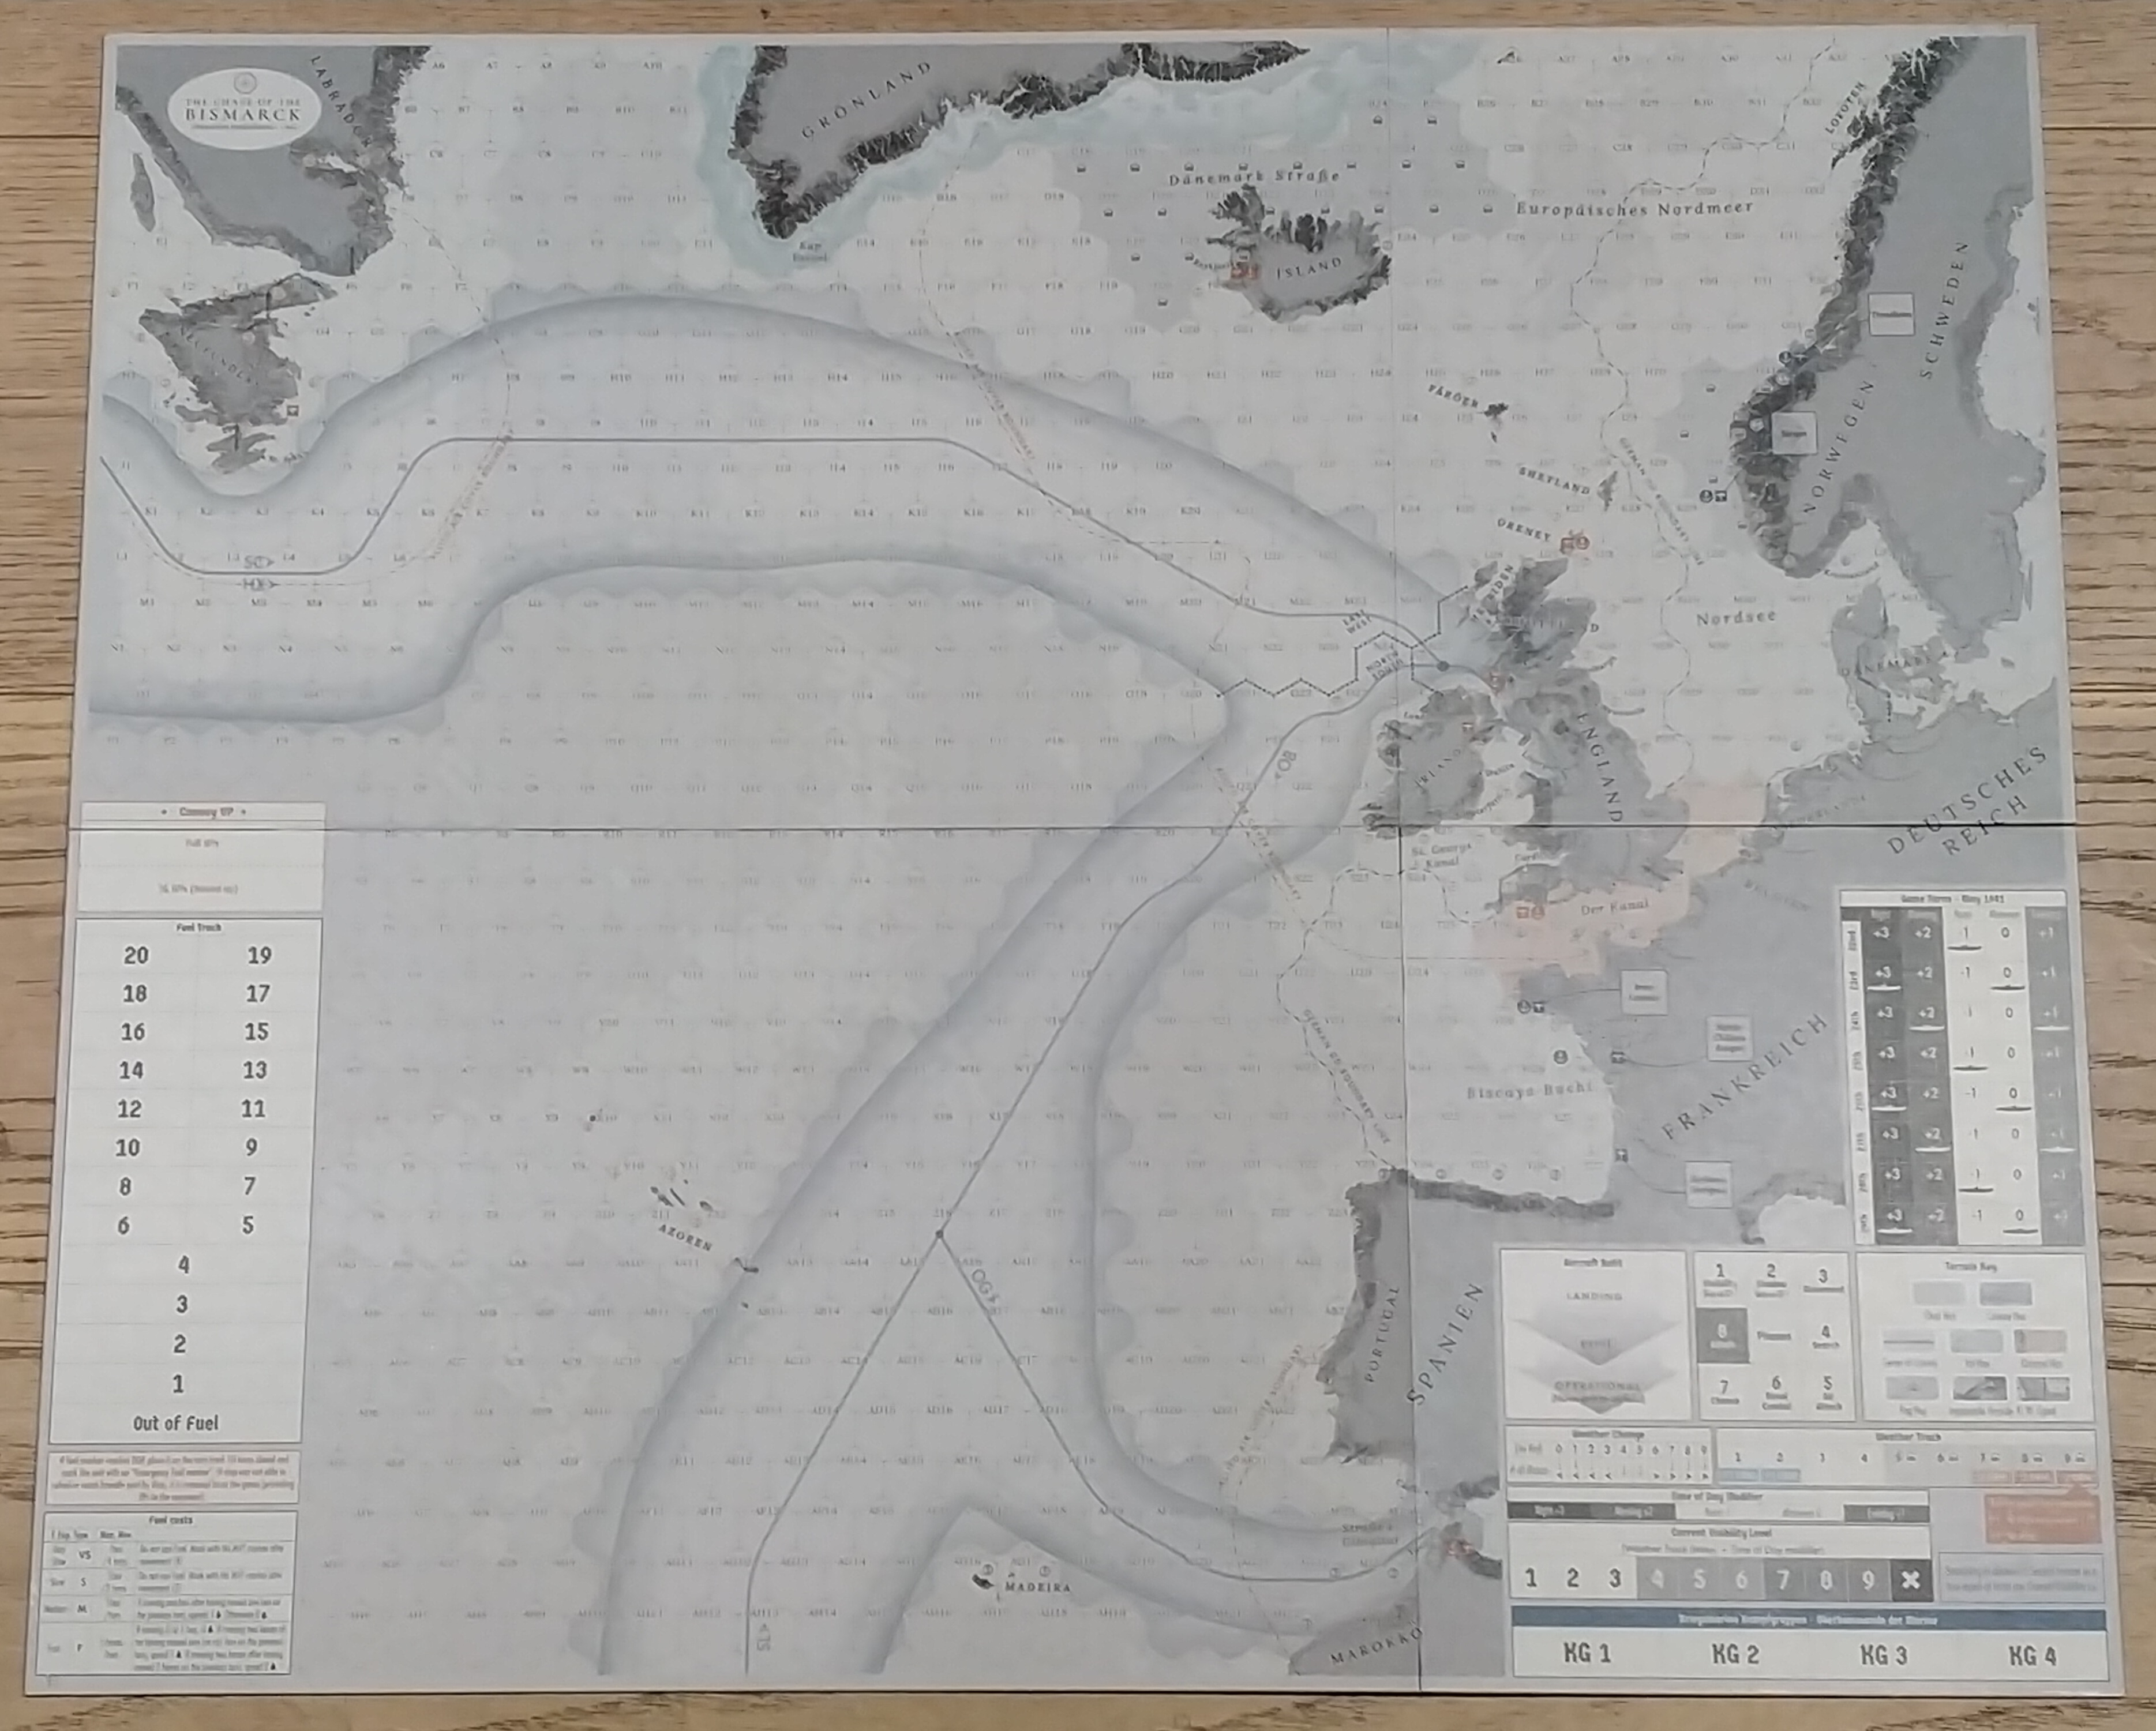
two near-identical maps, one each for the British and the German player. These are
the Operational Tracking boards and they are used to accurately track the location
and movement of your assets in play, and to make educated guesses and record
provisional and confirmed contacts with the enemy. The maps are on good board-stock
and, while monochromatic, are nonetheless very attractive, with the feel of
actual navigation charts.
 |
| Der deutsche Operational Tracking board |
The scale of the board is about 74 nautical miles (137 km)
to a hex, so acquiring a sighting of an enemy ship is no guarantee of being able to find it when
your ship gets there. The map detail is very close, but in a nice touch, the Kriegsmarine
board features German names for all identified positions and locations on the map,
with the British Navy map reflecting the English names. Each board also features tracks and other graphical aids to assist with play.
.jpg) |
| A top-right panel comparison. |
The boards are each screened from the
opposing player’s view with by identical, rather high screens. On the player-facing
side of the screen is a wealth of useful information and tables, including a
detailed turn sequence, as
well as concealing your assets’ locations and dispositions.
 |
| Screen (above) and Tactical Battle board. |
The majority of the play-time of The Chase
of the Bismarck will be spent for the Allied player on the cat-and-mouse search for the Kriegsmarine Kampfgruppe (if the mouse was a 41,000
long ton-displacement battleship bristling with armaments) and the German player's search for shipping convoys to target. Actual
confrontations play out on the Tactical Battle board, which is actually two slim
ladder-maps, mounted on the same weight board as the tactical maps, designed to
be placed together to form essentially a measurable distance between the antagonists,
and allow a simple, representation of their disposition (broadside or end-on).
The distance is broken up into a series of sea-zones to regulate combat distances (establishing range for for gun
and torpedo attacks between ships).
 |
| Player Aid Card (front and back). |
 |
| German set-up card. |
 |
| Allied set-up card. |
The game includes two matching Player
Aid cards, which pick up much of the detail not presented on the board screens,
and a set up card each for the German and Allied players. Each player also has his own set-up card for the game. These are all printed on the same thicker cardstock used for the counters.
 |
| Six counter sheets, all pre-rounded and easy-punch (apologies for the glare). |
This is a game with lots of counters
(582, in fact). The good news is, like the PACs and the Set-Up cards, the
counters are (to these old, squinty eyes) perfectly readable. The come in three
sizes. The majority of the counters are informational markers (search or ship
status). It’s worth noting here that you’ll need a couple of opaque cups for
drawing evasion markers (for when you’ve been spotted), and damage types (for
when you take a hit). I like this two-factor randomness in both cases; the
skill of the observer or the hand guiding the gun accounts for some measure of
success, but the chit-pull for the success of an evasion manoeuvre or the dumb
luck of where that successful hit connected captures some of the vicissitudes
of war.
.jpg) |
| British ship tokens, small ship markers (orange) and various markers. |
There are also markers to designate search
and interceptor aircraft (either land- or carrier-based), Milchkühe (Milk cows; the tankers used by the
Kriegsmarine to refuel their vessels), and Task Force markers to reduce the
number of tokens needed on the board. Most of the counters are 15mm in size (a
touch under 9/16”).
.jpg) |
| Bismarck? Fount it! |
The ship counters for use on the Tactical
Battle board are gorgeous; at 45mm long, a little shy of two full inches, with
a 15mm beam, and sporting a quite detailed birds-eye view of the individual ships
or destroyer flotillas represented.
There are also quite small (12mm)
counters representing. indicating
individual ships, one for each of the individual ships represented in the game.
These are presumably for marking Which ships are in which task force on the Operational Tracking
board, or to account for ships not assigned to a task force. (I’m taking a leap here because
I’m still working through the rules myself).
 |
| Ship cards (bundled), red and blue wooden cubes, and six (count 'em) d10s. |
Each capital ship has its own representative
card for recording damage, fuel expenditure and the general disposition of the
ship. Smaller ships (destroyers, etc.) share a card between two, to minimise
the space requirement.
Damage and Fuel use are recorded on
tracks on a card with the use of wooden cube markers (the game includes 100 of
these, in red and blue). These are placed on tracks on the ship status cards
singly to indicate that function’s current level. Cardboard markers are used to
indicate specific conditions, such as propeller, rudder, or radar damage.
One thing I found disappointing with this game was the misrepresentation on the box back of the number of dice included in the game. The box declares two ten-sided dice are included with the game. Imagine my surprise when, upon opening the box, I was confronted with no less than six ten-siders; three in black and three in red. In Vuca’s defence, I would point out that this is the only mistake I have come across in my exhaustive look at the materials included, but I will say that I hope it doesn’t indicate the company's adopting a more cavalier attitude toward meeting the customer’s expectations.
I am, however,
happy to note that I managed to fit the superior number of dice into the
box provided.
.jpg) |
| Chase of the Bismarck footprint |
The Set-up
That covers the contents. I’ll admit, when
I first opened the box, I was a little overwhelmed. This is a lot of game. What’s
more, when set up, Chase of the Bismarck has a big footprint. I wouldn’t normally
indulge in a set-up, preferring to depict the components and make some helpful
comments, but Chase fort the Bismarck deserves an exception to this.
 |
| Long Battle Board - short battles. |
This is not a game for the
faint-hearted, but at the same time you shouldn’t let the sheer size and scope
of it put you off. But you will need some table real-estate to accommodate Bismarck.
There is a lot going on, but it’s manageable, and Greene and Gebhardt have done
a lot of work aimed at smoothing your entry into the game.
My wife and I live in an apartment
that is probably a tad smaller than would be ideal. We do however have a nice,
big eight-seater, Tasmanian oak dining table. This is where the magic happens.
Our dining table is 2,400mm by 1,200mm (pretty damn close to exactly 8’ by 4’).
I did a practice set-up of Chase of the Bismarck just to make sure the two
stations (German and Allied) and the Tactical Battle board would fit. It does,
just, but it does take up about three fifths of the dining table (not a game I’ll
be able to leave set up overnight).
 |
| Kriegsmarine tactical station (note the ship cards to the left). |
Still, I regret nothing. This is a really beautiful game; every detail has been considered and refined. The production value is top-notch (as one would expect form Vuca Simulations), and just taking out the components, examining and shooting them for this essay, I got a sense of the narrative of the game unfolding. I know how wishy-washy that sounds, but it’s the best way I can think of to describe it. I saw Sink the Bismarck with Kenneth Moore when I was barely in double-digits, and I have a vague sense of how the story played out, but just looking at the Operations maps lends a sense of the enormity of the task before both the British and the German forces.
This
is going to be one hell of a game.


.jpg)

.jpg)


