Tuesday 30 May 2023

Stripped down for parts: Fire and Stone: the Siege of Vienna


Robert De Leskie’s Fire and Stone: Siege of Vienna 1683 (Capstone Games, 2022) is one of those games what will have the opinionated arguing for years to come: Is it a wargame? Is it a Euro? Is it trying to awkwardly straddle the two camps, pretending to be a wargame when it clearly isn’t because it has little cannon meeples and wooden fieldworks markers and… oh, wait…

For my money, Fire and Stone is clearly a wargame, even though it looks a lot like something that could take a prize at a German game industry convention. The theme is an episode in a much longer conflict between the Muslim Ottoman Empire and the Habsburg Empire. In 1683 an 90,000-strong Muslim army marched on and laid siege to the fortified city of Vienna, outnumbering the defenders nearly eight-to-one. Historically, the city held out for fifty-nine days, until it was relieved by a cavalry army lead by Polish king Jan III Sobieski, and the siege was lifted.

Fire and Stone is an abstracted treatment of that siege. One player takes the role of the besieging Ottoman Turks, the other the brave Habsburg defenders facing overwhelming odds.


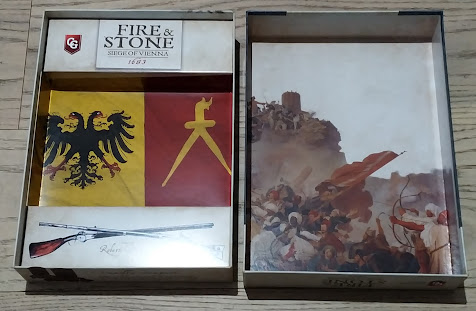
The box is a nice, solid with firm-fitting lid, but is still not too difficult to open. The box cover art is elegant in its simplicity, with the title appearing in a suitably archaic font, and embossed with the split sword insignia of the Ottoman Empire and the double-headed eagle of the Habsburgs.

The back of the box continues in the same thematic style, and advises that the game is for two players*, and that it recommended for players aged 14 and up, and should play in 60-90 minutes. These feel right, given the different play concepts introduced in the game (more about these in a review to come). It also reassures the player that knowledge of siege warfare is not require to play the game.


In fact, the whole package is so beautifully presented – the inside of the box-lid is illustrated with an image of the brutal nature of the fighting at the siege, while the travel insert (the shaped piece of card that stops the map-board and the components from moving around too much during shipping) shares some of the same graphic qualities as the box front, emblazoned with the tile panel and the crossed match-lock muskets, and a vivid splash of colour with the red Ottoman and Yellow Habsburg crests.


The rulebook is printed on glossy, fine-quality paper, and is very well laid out, with a decent-sized font and two-column format. Illustrations and descriptive examples make the whole package clear and easy to understand; despite some different concepts appearing in the game, you won’t need a degree in ludology to interpret these rules.


Along with the rulebook, a booklet of historical and designer notes is also included. I always appreciate the extra effort that goes into design notes and a good bibliography (part of the joy of a new wargame is learning about the period and events it highlights), and putting it all into a separate booklet is really a cut above the standard.


The board is about 23” by 16.5”, in muted tones of browny-greys and greens, representing the Ottoman camp, the staging area before the outer walls (glacis), the two sets of bastions and the Curtain Wall, which the Ottomans must breech to fulfill one of the paths to victory. It is divided into huge hexes that take up most of the play area, but are only four columns deep and three rows wide (4” hexes. This isn’t a game of manoeuvre and counter-manoeuvre, but one of slow advancement and dogged defence; a war of attrition.

Two player’s aid cards are included in the package (no expense spared). These are identical, except for the Ottoman split sword on a red background or Habsburg double-headed eagle on a vivid red background. The PACs are as clear and well laid-out as the rulebook, with turn structure, battle process and exceptions all spelt out concisely.


But for me the best part of the whole package is the components. There are wooden pieces representing cannons and fieldworks, thick cardboard area control markers and shovel tokens to draw for mine actions (and a pair of lush draw bags to put them in).

Everything as it comes in the box. You can't see them very well in this photo,
but the turn, morale and battle markers are all screen-printed wooden pieces.


Mine draw tokens and Control markers.


The cards are printed on good stock. Each side has three decks; one each of strategy cards and tactics cards, and a slimmer reck representing their side’s fighting forces. Each of the strategy cards has a note as the bottom tying that card’s action to a particular event or mundane occurrence during the siege, and there are more of both the strategy and the tactics cards than you will use in a single game, adding baked in replayability to the package.

Sample Strategy cards.

Sample Tactics cards.


The Army cards represent a spread of forces displaying a strength of 1, 2 or 3, but each is denoted with a particular troop type that participated in the siege. These are beautifully illustrated in a style reminiscent of the era.

.
Sample army cards.

A lot of care has gone into the design and production of Fire and Stone. It is a gorgeous game to look at with a nice, tactile experience of play. The brightly coloured pieces really pop on the muted-palette board, and the card illustrations add to the verisimilitude of the experience. The reality of the situation is perhaps restricted to the little historical notes on the base of the cards, and the historical notes that come with the game, which are well worth the time to read them.


* Given the nature of play (lots of concealed information), Fire and Stone is low on the solitaire-playability scale. That doesn’t mean you can’t do it – I got familiar with the game the same way a lot of people do, playing two-handed – but for the best experience, this is a game you want to play with a friend.


Monday 29 May 2023

State of Play: no 6x6 progress, but a siege at Vienna


With T overseas, I corralled B for an off-the-books Monday night game. I had proposed Great War Commander, but given the late hour we were starting, I thought better of it and brought Fire & Stone: Siege of Vienna 1683 (Capstone Games, 2022).

Nice art.

Fire & Stone was a fairly recent acquisition and a bit of an impulse buy. I’d read some good things about it and the small scale of the play area (three by four hexes) intrigued me. I basically bought it to bring an order up to free shipping. (Why is it we’ll happily spend an extra $60 or $70 to save $10 on postage? Tune in to my new psychology blog Why We Do Dumb Things Pretty Much All the Time.*)

Anyway, I was running late, and with the set-up of a still unfamiliar game, we agreed to play it through as a learning game. We ran through four of the five rounds (each round is up to five actions per side). B would have a different take, but I could see my Habsburgs loosing through army elimination withing another couple of actions to the withering onslaught of B’s Ottoman infidels, or from a complete collapse of morale, so we called it. Next time we’ll both be more familiar with how the gears of the game mesh, and I think I’ll be trying a fighting withdrawal strategy.

I'll be posting a Stripped Down for Parts of Fire & Stone later today or tomorrow, so there's something to look forward to. Until then, marvel at the little tiny cannons!


* Or read Thinking, Fast and Slow, by Daniel Kahneman, and/or You are Not So Smart, by David McRaney

Thursday 25 May 2023

Stripped down for parts: Task Force: Carrier Battles in the Pacific (Vuca Simulations)


I like YouTube for the wargame content that’s available these days. I don’t aspire have my own YouTube channel. I’ll leave that up to the extroverts. I am, however, really grateful for the unboxings, rules tutorials and playthroughs you find there.

So, here I want to try something different; a new article type that looks at the materiel of games. Kind of like an unboxing, but without the misguided commentary that sometimes accompanies an unboxing video. Just the best pictures I can manage with my cheap-ass phone, and maybe a few words about the quality of the components and such. If it works, I might even invest in a better camera.

So, without further ado, let’s take a look at Vuca Simulations’ Task Force: Carrier Battles in the Pacific (2023).

Now, that's some really lovely cover art.

Task Force is a reprint of a Japanese naval battle game designed by Ginichiro Suzuki and first published in that country in 1982. Vuca is starting to demonstrate that there is a strong market for updated versions of older games that haven’t necessarily had their moment in the sun for Western audiences.

I love the Vuca era-scale that features on all their games. 

Task Force comes in a three-inch box and it needs every bit of that space. With the exception of the map for the first Scenario, Attack on Pearl Harbor, all the map-boards are mounted (double-sided), as are the two player task force displays, and the land base display; even the player’s aids are printed on pretty solid card-stock. The game also comes with six counter sheets, all on thick card-stock (and all pre-rounded).


Lots of ships, lots of planes.

The ship counters are elongated rectangles boasting a bird’s eye view of the ship with its name in Roman and Kanji scripts, surrounded by its numerical values and letter-designation (BB for battleship, CV for Carrier, CL for heavy cruiser, etc.). A coloured corner swatch on the top right corner indicates the ship’s nationality. Along with the ships of the United States Navy (USN) and Imperial Japanese Navy (IJN), a respectable showing of vessels from the United Kingdom, the Netherlands, and Australia are presented.

The game comes with two books; the 20-page rulebook and a 28-page scenario book. Following what is (I think) best practice in games with innovative rules or novel ideas, the first three scenarios are solo teaching scenarios with the fourth being a two-player rules-teaching match.

Scenario 1 – Attack on Pearl Harbor, is basically a snapshot of the attack on the ships anchored by or near Ford Island, and serves to demonstrate in an instructive way how the air attack rules work. Because you’re unlikely to place this more than twice, the Vuca folks made the sensible choice to put this map on (very good quality) paper.

Attack on Pearl Harbor (obviously).

The remaining seven scenarios are a mix of historical and speculative situations, increasing in complexity. The Scenario book also has advice and tables for creating your own balanced scenarios using the available components.

Battle of the Java Sea


Combined Fleets scenario (kind of a speculative naval Battle Royale).

Sinking of the Prince of Wales and Repulse (Solitaire scenario).

The remaining maps are mounted on sturdy board-stock, one 11” by 17”, and two 17” by 22”. These are where the tactical game plays out. The scale of the ocean maps is 75 miles to a hex, and the task forces appearing in a scenario are represented on the board by a TF marker. The fog of war is represented by other dummy TF markers. Part of the fun of the game is trying to identify your opponent’s real task forces before they can identify yours.

Battle of the Eastern Solomons

Battle of the Coral Sea

Battle of Midway

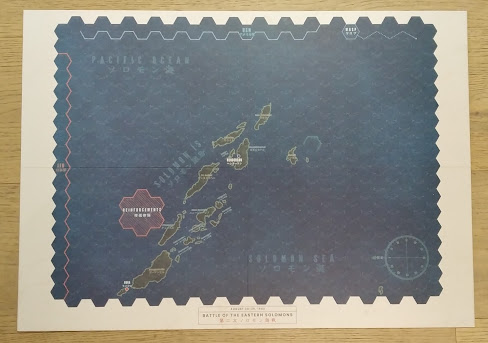
The maps are beautifully presented. The colour chosen for the ocean looks right for the Pacific, a richly dark, green-tinged blue that evokes the deep, deep water of the open sea.

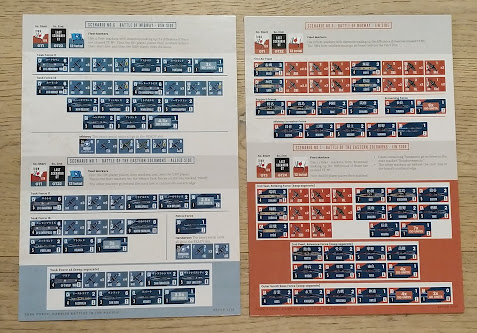
There are five double-sided scenario set-up charts to help you identify the ships. Planes and markers you’ll need for each scenario.


This isn’t a new thing, but I’m always happier to see it in a new game. While it’s double handling, I find it actually cuts down the prep time by a significant factor.


You set out all the units before transferring them to the Task Force Display boards. Turns are tracked on a slender two-day mounted turn-track.

From the top: USN TF display; IJN TF display; Turn tracker (eight day turns,
four night turns - most scenarios don't run more than a day or two)..

Land base display.

The counters have a shiny linen finish that make them pop on the board,
but they're terrible to try to photograph,

But the heart of the game is the PACs. These are, again, mounted on good, firm card-stock. They are double sided, easy to read, and the contain everything you’ll mee dot play the game. Once you get the hang of the rules, you should only have to refer to the PAC in the regular course of play.

Seriously, one of the most well-designed PACs I've ever seen.

These photos don’t do justice to the quality of the materials in Task Force. A lot of attention has been given to every aspect of the game’s presentation. The rules are well laid out, presented in a sensible order, and with only a little duplication. The same with the scenarios, which all come with brief historical notes and sensible advice. The only thing I could possibly gripe about would be the size of the font; it's a blocky serif font that is perfectly readable in the maybe nine-point it's been printed in, but I tend to complain like a restaurant critic if I have to reach for my reading glasses, so that one’s on me.

The ship counters are lush, with the battleships cruisers and carriers all getting their own individual representations. The destroyer counters all look the same but that is perfectly forgivable. The plane counters are a tad more functional, but the little silhouettes of the aircraft are clearly representative of the plane in question – you can tell a Zero from a Kate from a Val by the image alone. The markers are functional as well, but all have some small flourish that adds to the charm of the game. It’s a spectacularly gorgeous package.

The artwork on the box-lid and the two booklet covers also warrants a mention. The simple, screen-printed style evokes a poster style from the era. It’s becoming something of a trademark look for Vuca Simulations, and I think it really works for WWII games generally, certainly in this case.

I hope this has been an interesting tour through the contents of Task Force: Carrier Battles in the Pacific. It’s not something I intend to do with every game that passes through my hands, but I already have the next one or two in mind for this treatment.

Thanks for reading all the way to the end.


Tuesday 23 May 2023

Review: Aces of Valor


There is such a perception of romance and adventure regarding the fighting that took place in the skies over Europe in the First World War, it’s easy to forget that at the outbreak of war, heavier-than-air flight was a technology still in its infancy; the first successful powered flight had taken place only eleven years before the outbreak of hostilities. While several countries had been experimenting with arming winged aircraft, they were initially used only for reconnaissance; the first plane to shoot down by another didn't occur until October of 1914.

War is a great catalyst for technological advancement: at the beginning of the war, planes used in the roles of fighters and escorts weighed in the region of half- to three-quarters of a metric tonne with an air speed that might get near hundred kilometres per hour; by the end of hostilities, the average was around two tonnes (4,400 lbs), with a top speed approaching 240 kph (around 150 mph).

Eric Von Rossing’s Aces of Valor (Legion Wargames, 2023*) is a solitaire game depicting the air war on the Western Front. In it, the player takes command of a squadron of fighter pilots and their planes, and undertakes a variety of missions, while trying to bring the boys home, preferably with their aircraft still intact. Though clever design choices, Von Rossing manages to convey both the pace of technological advancement though the course of the war, and retain some of the romance and heroism of the airmen and the missions on which they were sent.


Appearance

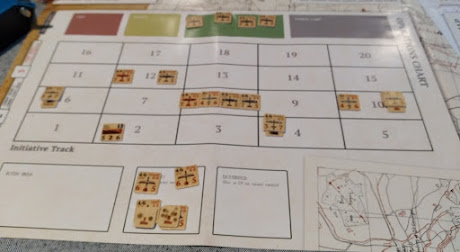
The map for Aces of Valor presents the Initiative table for arial combat to the left and the schematic battlefield to the right, along with tracks for recording Mission and Victory Points and your campaign progress across the top portion, with a marked section for the Mission deck and current/previous missions near the centre of the chart, and useful tables duplicated in the remaining spaces. The colour palette and fonts are evocative of the early war period, and the whole map is utilised effectively. It’s a full-sized map (default industry standard 22” by 34”), so it’s a biggish footprint to start with, but nearly everything has a place on the map, so it doesn’t get too unwieldy. It might have been nice to have a marked-out place for the optional After-Mission Events cards, but I managed with them sitting over the title and credits in the top right corner (no disrespect intended to those involved.


Qualities of good design carries through to the other components as well. The plane counters are of a uniform light brown (as are the target markers and most of the other counters), the nationality represented by the appropriate insignia. Each plane is personalised by the first name of the pilot (Billy, Manfred, Eddy, etc.), and duplicated over each generation of planes for that nationality, so you can upgrade your planes while keeping your pilot roster. The Mission cards are printed on good stock and feature some very nice artwork, each illustration tied to the mission in question.

There are four player’s aid cards of varying sizes, and here again, good design takes precedence. Each is designed to present their information clearly and with an eye to functionality. The first two cards are the Campaign and Pre-/Post-Mission PACs. As it may suggest, the Campaign PAC is designed to help you set the game up with a list of steps to that end. It also offers options for randomly choosing a nationality to play and a tier of aircraft to begin with, if you can’t decide for yourself (choices can be overwhelming). The Campaign PAC is also the only place where you can find the keys for the aircraft and ground target markers as well as the map key (these don’t appear in the rule book, which threw me initially, but it actually makes more sense to have it to hand). I found myself referring to this a lot through the first couple of missions.


The Pre-/Post-Mission PAC pretty much does what it says on the label. The Pre-Mission section offers a brief, step-by-step description of how to choose and set up for a mission, establish the weather (which can affect some missions as well as sighting by enemy AA), and the ordinance capacity of the planes involved, should bombing be on the agenda. The Post-Mission section give you the same step-by-step instruction for establishing the success of the mission in term of Mission Points (You’ll get a base level of points for the mission, but may get extra points if you manage to knock out an enemy plane or two, and conversely loose points for the loss of planes or pilots). These will be recorded on a running board on the map. This PAC also details the conversion rates for MPs. Mission Points are the currency of the game; they can be converted to Victory Points, but they can also be used to repair, replace (in the case of a lost plane), or even upgrade your flight’s aircraft to a higher tier.


The Flight Phase PAC is the one you’ll probably be spending the most time with. It’s a two-panel card, designed to be read opened (thankfully all the PACs for Aces of Valor are single-sided). Each mission will require your mission task force to fly to a selected point on the battlefield map and complete the instructed operation there, and then return once more to your home base. Each time you move your Flight marker to a new gird section of the battlefield map, you must roll 2d6 to establish if an event takes place and refer to the Flight Event Check table. If your roll an event (unlikely behind your own lines, more likely over enemy territory, of course), you then refer to the Flight Event Outcome. Events range from a change in the weather or one of your pilots experiencing engine trouble, through to anti-aircraft fire and possible targets of opportunity, through to getting bounced by an enemy flight (note: the Flight Event and AA hit tables are conveniently placed on the map sheet, above the Battlefield Map. A mid-flight event could see your ranks thinned before you even get to the target, or even be forced to cancel the mission and return to base. Conversely, you may have a dream run without a single adverse event. Then, after the mission is completed, you follow the same process until the flight marker makes it to your home field. The Flight Phase PAC also has tables for dealing with aircraft that have taken damage, forced landings and pilot fatality.

With three panels, the Combat Phase PAC might seem the unruliest of the player’s aids, but here the thoughtfulness of the design choices shines through once more. The first (left) panel offers the Procedure for establishing the nationality of the encountered enemy (if playing the Germans) and determining which side has the advantage of early detection, then sets out the steps for each combat round (maximum of three). It also presents the tables necessary to complete these initial tasks, including placement of your planes, those of your antagonist, and any ground targets on the Initiative Track.


The centre panel deals with the actions available to each plane on the Initiative Track in its turn, Initiative Priority for planes sharing the same initiative space, Air-to-Air combat, Aircraft Damage and Destroyed Friendly Fighter Check tables will also be found here.

The third panel is mainly concerned with Ground Targets (often the subject of your current Mission). Most of the time you are going to be dealing with either aerial combat or ground attack/photo recon both played out on the Initiative Track. Sometimes, however, you may be bounced at the mission location, and must deal with both their stated mission and enemy fighters trying to hinder said mission. This is where the clever design the trifold PAC comes into play; the left panel has been given enough room to (snugly) fit folded behind the third panel, to allow easy access to the two necessary panels flipping between without having to open the PAC out. (Some of you may have a big enough paly area to leave all the PACs out and visible, but with the kind of space constraints I play under, I appreciate the assist.)


Play

The player chooses the nationality they wish to play, and randomly select a squadron of eight early, middle, or late era planes from a pool of sixteen (the pilots, all historically based, are duplicated across the three eras, and depending on the length of the campaign (Eight, twelve or sixteen missions), they may have a chance to upgrade to superior planes, should they survive). The player locates their squadron’s home airfield on the battlefield map, and after some basic housekeeping, is ready to draw their first mission. The missions are depicted on cards (54 in all) for which there are on the map places for the shuffled deck and the current (upturned) mission card. Missions vary from escorting bombers or arial recon flights to strafing mobile or static targets like tanks or infantry, to interception of incoming enemy planes. Occasionally the enemy may even get the jump on you and your pilots must scramble to get off the ground in enough time to take on an incoming flight in the air above your airfield.

Generally, a Mission Card will give you a mission and a location (e.g., scouring the skies for enemy fighters or escorting bombers or a photo-recon plane over an enemy target). You will pick the pilots for your mission from the available pool (the mission will dictate how many planes you can send on the mission, as well as any auxiliary aircraft), and move them from the Ready box the Current Flight box (above the Initiative Track).


The action is abstracted, both for operational movement and tactical fighting, but both are models of elegance in design. For each mission you have 24 fuel points (maybe slightly less if your fighters are laden with ordinance).  One of these is expended for each section of the Battlefield Map the flight passes over. With each section, you roll 2d6 to see if you run foul of an event (events are less likely to occur over friendly terrain, more likely as you move over No-Man’s-Land and into the enemy rear). Progress is recorded with a Flight marker, with the prospective target section marked with a Target marker.

When you reach the target area – or if you encounter enemy planes on the way – the action moves to the Initiative Track. Again, a 2d6 is rolled for each plane involved in the action; the plane’s performance rating, the pilot’s air combat modifier, and any other modifiers are added to that number, and the total is the numbered position at which that plane is placed on the Initiative Track. Any ground targets are placed as per their Initiative Rating (usually low single digits). Once all the planes and targets are placed on the track, the first combat round begins. Starting with the numerically highest initiative plane, each plane will have a chance to fire at the next enemy plane or target on the track. If Pierre is at position 17 and his buddy Leon is a 15, but the rascally Fritz is at 12, both French pilots will have a shot at the German, who will in turn have a chance to shoot at Rene in the ninth position (Rene rolled particularly poorly. Moreover, the distance between the firing plane and its target will increase the odds of it taking some damage; Pierre’s position five initiative ranks above Fritz will give him four dice to roll for damage, whereas Rene will get three dice on the hapless Fritz. If Fritz survives the onslaught, he will, in turn, get three attack dice on Rene. If there isn’t anyone lower than Rene on the Initiative track, Rene misses out. Two-seaters and Bombers can shoot back (there is a little backward arrow at the tail-end of their silhouettes as a reminder). If the combat runs through a third round, the flight loses another fuel point and everyone breaks off.

This description may come across as a little dry and procedural, but the play builds a strong narrative, through each successive mission. The Mission Points help to keep a tally of how the squadron is fairing overall, lending a sense of the course of the war over a discrete duration, but what you remember is how one of your rookie pilots was shot up over the enemy rear, but managed to nurse his plane back behind friendly lines, walk away from the forced landing, and hitched a ride back to your home airfield, then earned a +1 upgrade to his air and ground attack skills (a random draw on the post-mission event deck, but such a perfect fit). 

I found Aces of Valor a little clunky at first, but that was on me; about half-way through the second mission, I realised everything was just happening; I was plotting moves and making checks, taking Ack-Ack fire and surviving, chasing away smaller enemy flights and shooting down observation balloons with rockets. The process was happening, but I was seeing the narrative. This is a game that will do that if you will let it.


Appraisal

There is so much to like about Aces of Valor. I found it a truly immersive experience. It doesn’t give you the seat-of-your-pants experience of something like Interceptor Ace (Compass Games, 2019), but I found myself tracking the progress of the squadron through a full sixteen missions (a long campaign; I’d only set out to do twelve, but it was hard to give up), rejoicing in the squadron’s triumphs and mourning their losses (three pilots in all – quite a low attrition rate, really).

I think I may have made this all sound easy. Don’t be fooled; while the functions of the game are simple and quite straight-forward once you get the hang of them, the missions are anything but. In my first couple of outings, I had some lucky breaks with the dice, not getting entangled too often in AA fire or bounced by enemy fighters. On my third or fourth mission – a photo-recon task – the flight was jumped twice by superior fighters in superior numbers, both attacks happening before they’d even reached our side’s trench-line. I didn’t lose any pilots in that instance, but after the second attack, I was already down two planes and deeming the mission unsafe to continue, turned the remainder of the flight back to the home airfield. Every mission holds new surprises and challenges. That’s what makes this game so much fun.

To my mind, Aces of Valor is a little masterpiece. It achieves what it sets out to do  creating an immersive and thoroughly satisfying play experience  and does it with minimal fuss and bother. As I’ve mentioned elsewhere, one of the aspects of this game that I appreciate most of all is the fact that, taking precautions to record what mission you’re up to and how many Mission- and Victory-Points you’ve accrued, it’s easy enough to break the game down and box it, then pull it out again when time permits and set it up without too much fuss and bother.* The lack of bookkeeping is also a boon. Everything needed is recorded on the board via tracks. No written records. No clutter. well, no clutter that the game doesn't bring itself (did I mention it has four player's aids?)

I think it took me about five or six weeks to complete my first campaign of Aces of Valor. Now I’m done, I want to start another one. I know I won’t be able to get to it for a week or two, but I’m already looking forward to it. If that’s not a recommendation for the game, I’m not quite sure what would be.


* At the time of writing, Aces of Valor is still available direct from the publisher, Legion Wargames, at the CPO (prepublication discount) price.

** I keep the completed missions bundled separately, and take a photo of the points status on my phone, although you could as easily write it down on a scrap of paper or a Post-It, and pop it in the box for next time.


Sunday 21 May 2023

State of Play: the slow drilling of hard boards


We’ve been back from our interstate jaunt for nearly two weeks but I haven’t made any progress on my self-appointed 6x6 challenge. Not quite at the point of despair yet, but there’s a kernel of nervous anticipation that I may not be able to pull it off, especially since my primary opponent, T, left late last week for nearly a month overseas. Gaming will be had in the ensuing weeks, but how much of it will be progress toward the outstanding twenty-nine game target I set for myself? We’ll see.

 I did get a game in with T before he left. Commands and Colors: AncientsExpansion 1: Greece and the Eastern Kingdoms (GMT Games, 2006); Scenario 6: Crocus Plain 352BC. T played the Phocians, and I took leadership of the Macedonians.

Superior numbers of cavalry

By the numbers, Philip of Macedon would have been the favourite, given his superiority in cavalry numbers, despite fielding roughly the same number of sandals-on-the-ground, plus he also had a favourable position, wedging the Phocians up against the shore and limiting their manoeuvrability.

On the night, T put up a valiant fight, taking out two of my leaders before the end, but with the help of a couple of lucky card draws, I was able to use my cavalry to good, replicating Philip’s tactics by probing T’s Centre with my heavy troops (Philip’s innovation of the long-piked phalanxes), rolling-up his left flank to take the game, 6-5. Being forced to retreat to the water’s edge cost T’s units a couple of blocks, making them easier prey. The game was over in about eight rounds (not to gloat – it really was a fast game AND a good game).

The aftermath

As for further play, I’m hoping to get together with B for a couple of games of Great War Commander (Hexasim, 2018) while T is away. He has actual play experience with this one – I’ve only read the rules and pushed a few counters around. It can be difficult to juggle our calendars a lot of the time, but I’m hopeful for a least one game before T returns.


Saturday 13 May 2023

Review: 1569: Siege of Malta (solo game)


1565: Siege of Malta (Worthington Publishing, 2022) is an instalment of Worthington’s Great Sieges series. The series began with 1765: Siege of Quebec (Worthington, 2019), which received a Second Edition revision with the publication of Siege of Malta and 414BC: Siege of Syracuse (Worthington, 2022), which I reviewed recently. Much of what I had to say about the series is covered in that previous review. I intend to follow this review sometime soon with a further review of Siege of Quebec. By rights, I probably should have begun with that one, but it seemed right at the time to approach them in chronological order; that ad the fact that I have played Syracuse most recently and I’d been turning aspects of that one over in my head for a few weeks before putting metaphorical pen to paper.


Like Dan Fournie with Siege of Syracuse, Maurice Suckling has taken the basic concepts and elements of form and play from Siege of Quebec and made Siege of Syracuse a familiar but very different beast. These changes may seem superficially simple, but they radically change the experience of the game. Siege of Syracuse, I’d argue, is a departure from its progenitor, but Siege of Malta is its own journey altogether.

Starting set-up for the Turkish player

Appearance

Siege of Quebec set the parameters of style and tone of play for the series; a card driven AI which also acts as a timer for the game, simple tactical map-board (contained to a manageable 17” by 22”) with abstracted movement and combat with plain wooden blocks for various units, and a limited colour pallet. This actually helps to focus the attention on the play of the game. The board remains both attractive and functional, and uses every part of its limited area.

The board features a map of the main port of Malta, including the harbour fort of St Elmo and the fortified cities of Birgu and Senglea (the bastion of the knights of the Order of St John and the sites of the Turkish siege). Inset maps track troops at the Mdina fort (elsewhere on the island) and the gathering of area for the Knights’ reinforcements’ staging area in Sicily.


Battle attrition. Not a game for the faint of heart.

The board also features a Morale Track identical to the one featured in Siege of Quebec, with the double spaces for the higher reaches of the track. Also featured are several short tracks to monitor the use of various resources available to the two sides, such as the Turks Ammunition levels and other resources available to each side.

As with the other games in the series, the components are simple wooden pieces, like elongated cubes, about three-quarters of an inch long (that’s an estimate; I haven’t measured them), with the Turkish ships represented by simple, boat-shaped blocks (one end shaped like a ship’s bow). One of the Turkish blocks is used to represent the siege tower when in operation, standing on its end; functional and surprisingly effective, visually.

Siege tower in place - for now.

Play

As with French and English in Siege of Quebec, it is possible to play either the besieging Turks or the besieged Knights in Siege of Malta. Each side has its own orders chart and a corresponding bot deck to provide the actions and countervailing orders of the opposing side. One radical difference is that in the other games in the series, you cannot duplicate orders consecutively; each order must be different from the previous one selected, but you could feasibly play the same two or three orders alternately through the entire game. In Siege of Malta, you must play each order once, in any sequence you wish, but every order must be given before the chart resets. There are even a set of seven cards for the two factions to place upon each order as it is played. There is a way around this for the Knights, but it comes at the cost of a Defiant Speech (more on these later).


Cards are provided to cover each played order - no doubling-up.

Each turn, the player will choose a hereto unplayed order, then draw a card. The card will (usually) present an event that it resolved immediately, and offer a counter-order; the counter-order will tell the player which of the four results tables on which to roll. To resolve the success or not of the order.

Essentially, the Turks have to capture the fort of St Elmo, the fort of St Angelo/city of Birgu, and city of Senglea (the fort at Mdina doesn’t count to the victory, but securing it makes some actions in the game easier for the Turks), and have at least one ship in the harbour to claim victory, whereas the Knights merely have to wait out the siege until the Turks ship out for Cyprus. This makes it sound easy for the Knights, but the Turks had superiority of numbers and access to supply lines off island (as reflected in the Turkish adversary deck).


Appraisal

Siege of Malta is, to my mind, the most complex of the three Great Sieges games (so far). That’s not to say it’s more difficult, but there are more things happening on the board than in either of its stable-mates. As with the other games, the player can double down on a crucial play by playing one of four Aggressive Commander actions for the Turks or one of two for the Knights. This difference is caused by the other two Knights’ spots being reallocated for Defiant Speech actions, of which there are also only two. A Defiant Speech action can be used in two ways; to immediately reset the orders display, making all the orders once again available to the player, or to burn the Bridge of Boats running between the walled cities of Senglea and Birgu.

A lot of historical events have been built into play, like the Turkish siege tower (allowing a +1 to some rolls, though the tower can be destroyed by the Knights in certain circumstances), and the way the Knights can destroy the bridge of boats for a one-point morale boost, but can no longer move troops between Birgu and Senglea, limiting their defensive options. Then there’s the diminishing Turkish ammunition, their musketry and Janissaries options (limited resources to apply and -1 or a re-roll respectively in certain situations) and the corresponding Greek Fire and Elite Knights for the order of Saint John. With only three each of these, the player has to weigh up the benefits of using each option carefully.


Birgu and Senglea, with the Bridge of Boats still intact.


Like the other games in the series, Siege of Malta is well balanced – read difficult but winnable. Out of around seventeen solo games, fairly evenly split between the two sides, I’ve won the solo game once playing the Turks and twice as the Knights. On balance, I think it’s a little tougher to win as the Turks; they are doing the heavy lifting – the Knights will win if they can deny a Turkish victory until the deck runs down (representing the point of time in which the Turks must set sail to avoid the winter storms). But both sides provide their share of challenges (and the occasional reprieve from the opposing deck).

After playing this game so often, I’ve got the set-up time under five minutes, and the playing time for a medium challenge game (24 cards) down to under an hour. If you have a couple of hours to kill, this is the perfect distraction; after you inevitably lose the first game, you will want to immediately play a second game to save your wounded pride. Or you can play through once as the Turks and once as the Knights and make your own judgement on who has the easier time of it.

In the roughly four months since I received Siege of Malta and Siege of Syracuse, I’ve played each about a dozen-and-a half times and neither game has got stale for me. They still offer challenges and surprises, and victory is never guaranteed. I have yet to play either in the difficult mode (reduced or increased deck size, depending on whether you are the aggressor or the defender), so there is that particular joy to look forward to. All in all, 1565: Siege of Malta is an elegant game that is quick to set up and play, and has built-in replayability rewards repeated play. I think it’s a good investment.


Stripped Down for Parts: The Lamps Are Going Out: World War I

       World War I, or the Great War (or The War to End All Wars), as it was referred to at the time, holds an abiding fascination for me as...