As of
just recently, Conflict Simulations Ltd will no longer be shipping their games
directly to overseas addresses. You can get CSL games though through Noble
Knight Games in the US, Hexasim (France-based, but they cover EU delivery) and Second
Chance Games in the UK. I managed to get in an order late last year for a
handful of games, including the first in a system I’ve been eager to try, the
Imperial Bayonets series.
Imperial Bayonets: We Were Not Cowards: Sedan, 1870 (Conflict
Simulations Ltd, 2020) is an operational-level examination of the pivotal
battle of the Franco-Prussian War. It comes in both boxed and unboxed editions.
For the sake of saving some cash, I opted for the unboxed version.
I’ve nearly finished reading Rick Atkinson’s superb An
Army at Dawn, and I’m planning to go onto Rachel Chrastil’s Bismarck's War: The Franco-Prussian War and the Making of Modern Europe, so the timing seems right to (finally) take a look at We Were Not Cowards.
 |
| The WWNC Exclusive Rules. Cover sheet matches the box art. |
Bagged
or soft-packed games usually get some kind of cover sheet displaying the same
image as you would find on the front of the box. In a game like Return to the Rock: Corregidor, 1945 (Take Aim Designs/Revolution Games, 2020), the cover
sheet does double-duty with a Player’s Aid Card on the verso.
The double
duty in We Were Not Cowards is performed by the Exclusive Rulebook, which runs
to sixteen pages. Only eleven of which are actual rules, along with a thorough
contents listing (in lieu of an index, but nobody seriously expects an index in
a rulebook these days, surely), a two-page Designer’s Notes essay, and a colour
counter reading guide on the back page. The rules here pertain to the
eccentricities of the situation presented in
the game, along with details for the game’s three scenarios. At first
blush, everything seems clear and understandable.
I’d normally speak to the series rules first in an unboxing (or in this case, unbagging), but I wanted to lead with Ivan Caceres’ striking box art. The cover of the series rules booklet is disappointingly mundane by comparison.
 |
| I confess I do like the crossed muskets of the series logo. |
The
same can’t be said for the contents of this booklet. The series rules come in
at twenty pages, but again, the rules themselves come to a forgiving seventeen
pages in a very readable 12-point font. The rules are quite bare-bones, with no
illustrations or visual explanations, merely text. But the whole system is
explained succinctly and thoroughly, and should play quite smoothly when I get
it to the table (We Were Not Cowards is one of my Ten Game Challenge choices
for 2025, so I should be getting it to the table in the next couple of months).
The rules feel familiar. The designer has said that the bones of the system can be found in Kevin Zucker’s Library of Napolenic Battles series. To anyone who has played Napoleon’s Last Battles (SPI, 1976, and more recently, Decision Games), the Imperial Bayonet rules shouldn’t be difficult to assimilate.
 |
| The crappy photo doesn't do this map justice. Muted palette and lots of detail, |
The 22”
by 34” play area represents the verdant region around the city of Sedan, the
scene of another crucial battle seventy years later. The map is quite
delightful, again the work of Ilya Kudriashov. The historical battle was one of
manoeuvre, strike and counter-strike; the network of roads and trails, the
undulating terrain, meandering water-courses and patchy forest groves promise
to deliver a fair challenge to both sides.
The map
is presented on medium weight, low gloss paper. My copy exhibits a little
puckering at the cross-fold points, but I’ll probably set this up under a plexi-sheet,
so I don’t anticipate any issues with use.
 |
| Prussian unit and leader counters. The unit counters really do look a treat. I haven't put up photos of all the units, but this gives you a good idea. |
 |
| French Depot counters and various situational markers for game effects (including "Asleep" markers - intriguing). |
Like all the more recent CSL releases, the game’s counters are pre-rounded, and printed on a lighter stock than you might be used to. They are still thick enough to manipulate with tweezers if that’s your thing, and the registration is very good.
The
game comes with eight half-sheets of counters. When I say half-sheets, they are
larger than a folded letter-sized sheet, but about the same width on the long
side. I’d say they are a half-foolscap (or legal pad) size. Anyway, there are eight
half sheets, each with seventy counters. The units make up roughly three and a
half of these, with various kinds of informational markers making up the rest.
The
counters are quite attractive. Leaders are marked with little portraits, while
the units themselves are identified with NATO symbology for type infantry, cavalry,
artillery, each unit’s size, and supply depots, as well as colour bars for the
unit’s formation (corps) and commander. The individual brigades within a corps –
the battle is played out at brigade level – are identified by the colour of the
unit-type symbol. All this makes identifying whether a given unit is still with
command range so much easier. The other markers are simple and clearly
understandable at a glance.
 |
| One thing worth noting is the counters come in their own separate Ziploc bag. I would recommend keeping the sheets in this bag until you’re ready to punch and sort the game. An artifact of the production process means that the counters in some of the sheets show a definite propensity for just popping out on a frolic of their own; keeping then sealed up until you’re ready for them will save heartache later. |

The game comes with two Payer’s Aid Cards. These are single sided, but packed with everything you’ll need to play the game, including an abbreviated Sequence of Play, Combat Results Table, and tables for Bombardment, Shock Combat and Cavalry Charges, all the things one might look for in mid-nineteenth century European warfare. The print is a little on the small side; I can make it out pretty clearly, but people with even worse eyesight than mine will probably struggle without their glasses. It shouldn't come as a surprise that I've taken to having a magnifying glass in reach when I'm soloing a new game. Age has it's compensations, but it kind of sucks as well.
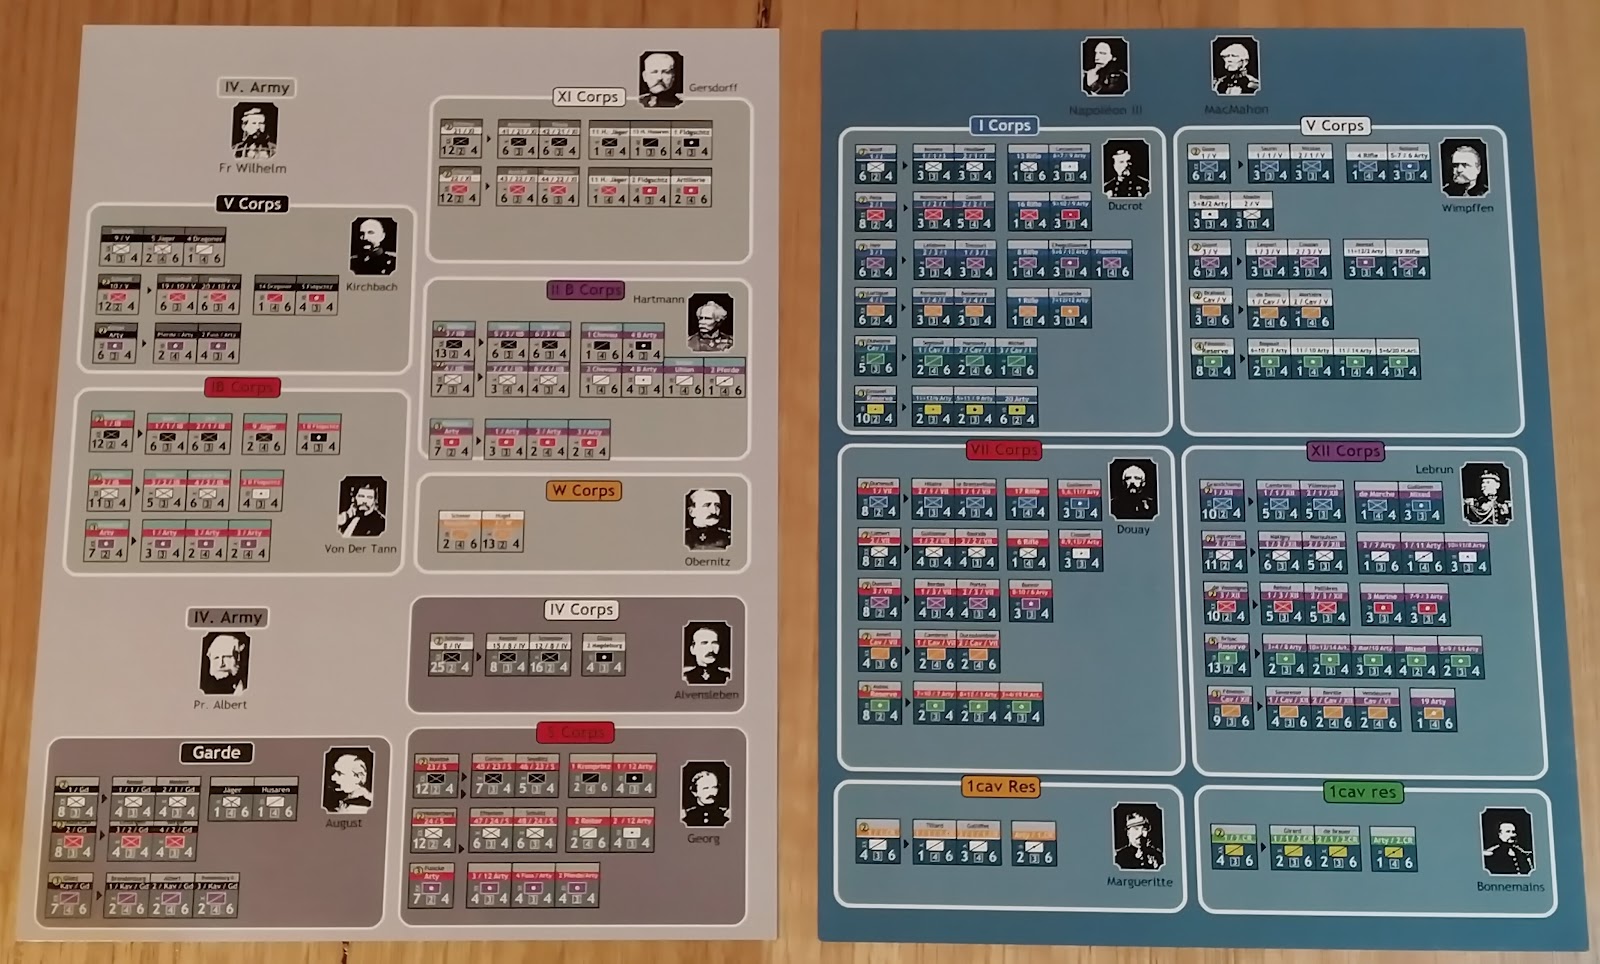 |
| Orders of Battle. The little arrows between counter pics indicate which divisions break down into separate brigades. |
Along
with a PAC, each player gets a formation card which lays out the command structure
of their available forces, and to keep track of just how many units sit under
each general. These cards also go a long way to explaining the relational structure
of each division within a corps. Each division is made up of two infantry
brigades, an attached Light (or Jager)
regiment for screening, and a cavalry squadron; some will also field their own
light artillery, while the corps will usually include a battery of field guns.
In most cases, the division’s core infantry can be fielded as a single entity
(counter) or split into two brigades (two counters), facilitating more options
for manoeuvre, but potentially making it harder in some situations to deliver
the hammer-blow of a full division. Either way, it should still make for a
lower counter density on the map.
 |
| A place for the disrupted and the dead. |
Combat may result in units being disrupted to the point of ineffectiveness, or even eliminated in hard contest. To keep confusion descending on the game, a handy Holding Box card is included to keep your recovering units separate from those which have been eliminated. This might have been incorporated int the map, at the cost of some inches of valuable hex-grid. I’m very grateful to CSL for choosing to add one more component into the mix for the sake of a better play experience. The card is about a half-sheet size, so the extra table land-grab is minimal and worth the sacrifice for the convenience.
---
So, there you have it, my first look at We Were Not
Cowards. I feel a little guilty for sitting on this for so long – several months
now – but I’m looking forward to getting some time with this one. The second
game in the Imperial Bayonets series, For
Liberty and Lombardy: Solferino, 1859 (Conflict
Simulations Ltd, 2024), is already out and available. That will probably make
up a part of my next Noble Knight order. In the meantime, stay tuned for an
After Action Report of We were Not Cowards for my Ten Game Challenge.


No comments:
Post a Comment