Tuesday 28 November 2023

State of Play: Freeman’s Farm 1777 (two-player game)


T and I met for a game on Monday night, as is our tradition of long standing. We’ve been doing this most weeks since the middle of 2010, when my wife was sick in hospital for a couple of months, and it started as a way for T & his lovely wife P to keep an eye on my wellbeing and make sure I got at least one home cooked meal a week. Just like income tax, what began as a temporary measure responding to an extreme situation went on to become a permanent fixture that nobody questions anymore.

At T’s request, we played Freeman’s Farm 1777 (Worthington Publishing, 2019) again this week, and I went to his house (which goes some way to explaining the poor lighting in a couple of the photographs). He requested the British again. T said he wants to keep playing the British until he wins with them. For a while it looked like the night might be his, but I’m getting ahead of myself.

The opening play.

One of the joys of Freeman’s Farm for me is the short set-up time. It really doesn’t take a lot of effort; no reading tiny starting-hex numbers on chits or referring constantly to an order of battle card. As I’m sure I’ve mentioned before, by the time one of us gets to the other’s place it’s getting up to 9:00pm, so our options to what to play are limited to what we can get through in two hours or less. Freeman’s Farm fits this description admirably and offers a diverting experience into the bargain.

The British always make the first move, and T opened with his Hessian mercenaries, a formidable bunch that consistently seem to give better than they take. This game was no different. Their first order saw them moved into their third position and attack Nixon’s formation, taking a block and reducing his morale. Riedesel struck twice more from that position before moving to his second position, overlooking Freeman’s Farm. Various of the Continental Army fired on the Third position but were unable to affect a casualty to blocks or morale.

Three of the five Colonial losses here were own goals.

The Colonials were the gang that couldn’t shoot straight. Nearly all my losses were own goals; I developed a talent for rolling double-ones on as few as four dice. I think overall I dismissed one more of my own unit blocks than I did the enemy’s. My artillery fired on that of the British battery, under the command of Phillips, twice, and twice it cost me a representative disc along with one of his. At that rate of exchange I may have been able to destroy the Union’s artillery formation, but it didn’t feel like I’d even be able to maintain that much luck, so I demurred.

Both of us made better use of the Tactics cards throughout the game. I was able to prop up Poor’s flagging morale with a Resupply (+2 to the moral of the ordered unit, but they cannot do anything that turn), while Fraser brought a whopping eight dice to bear on my beleaguered Learned formation, already down to two blocks, for the kill, using I know not which card, as I was too dazed and saddened to comprehend.

Hamilton and Nixon broken; Learned to follow shortly.

The game ran for it’s full, brutal fifteen rounds. It doesn’t sound like a lot, but it’s a pretty intense fifteen rounds. In the end, I’d lost two units (Learned and Nixon, my two extreme flanks) to T’s one (Hamilton, who succumbed to a failed Morale roll). As neither side met the required three formations destroyed, the game defaulted to a victory for the Americans.

Even with the set-up/pack-up time and some unrelated conversation between rounds, the whole exercise was completed within ninety minutes. The fact that such a relatively simple (though nuanced) game can still deliver such a satisfying experience is a testimony to the design.

The plan is to get the final (number 6) game of Napoleon 1806 (Shakos, 2019) done next week. I’ve started putting some notes together for the review, but I don’t want to complete that until we’ve had one last run at it, but I’ll be aiming to put that up by the beginning of the following week.


Monday 27 November 2023

By the Numbers: my Collection-to-Play ratio


I’ve never been very good with New Year’s resolutions, so this year I instead made a promise to myself. It was last year, a week or so before Christmas. I told myself that while collecting games might be a legitimate hobby for some, I derived the most pleasure from playing them, and so I should put more effort into taking the opportunities that present themselves to play games instead of merely thinking about playing them.

I did some sums in the middle of last year, and across all the games I owned (family games as well as wargames) I’d only played about 22% of them. Non-play has been a bugbear of mine since then, so when the time for reflection came around, I thought I should to something about it. My self-imposed 6x6 project and this blog grew out of my desire to get more games to the table, both by myself (solitaire and solo) and with others.

So, how am I doing? I’ve written broadly about getting more games to the table in my quarterly progress reports about my 6x6 efforts. Here I thought I’d take a snapshot of where I’m at generally. I am making some headway, but there is some distance to go yet.

Currently, I have 160 core titles in my wargame collection. I’ve left the definition of wargame fairly loose here; arguments abound around whether this or that game is a wargame. To take one example of a publisher of wargames that I have some familiarity with: GMT Games was the first publisher I bought from directly. I certainly don’t buy everything they produce, but I don’t think I’ve ever experienced buyer’s remorse over a single purchase of a GMT game. So, I’m counting in my wargame collection titles like Churchill: the Big Three Struggle for Peace (GMT Games, 2015), Twilight Struggle: the Cold War, 1945-1989 (GMT, 2005), and Versailles, 1919 (GMT, 2020), but not Welcome to Centerville (2017). By "core titles" I mean base games; I've got all six published boxed expansions for Commands and Colors: Napoleonics (GMT, 2010), but I've only counted the first title in his number. Basically, all stand alone games are included in this count. I've also left out some special cases, like Undaunted: Reinforcements (Osprey Games, 2021), which brings a new solitaire mode to the mix, but doesn't constitute a standalone game.

I did some quick and dirty arithmetic (percentages are rounded to the nearest whole number). At the end of last year, I owned (by my own definition) 117 wargames. I’d already started to make an effort to play games I hadn’t yet got around to, and there was a noticeable up-tick from the overall 22% at mid-year*.


Wargame collection

Core titles

Games played

% of total

To Dec 2022

117

29

25%

Acquired 2023

45

16

36%

Current total

162

57

35%


I was a little surprised to learn I’d acquired 45 new games (not all new; roughly a quarter were bought second-hand). About a third were pre-orders from GMT and Legion or Kickstarter fulfilments from Worthington.

Of those 45 new games for the year, I’ve managed to get more than a third played at least once, and most of them I’ve played several times (thought these are mostly solitaire games or multi-player games with good solitaire options). The played number might be higher if it wasn’t for the fact that at least eight of these games have arrived in the last three or four weeks, but circumstances haven’t allowed me the time to get to them yet (having said that, excuses are like assholes…).

Still, I’m happy with the overall progress. And it’s not just about the numbers. It’s not a chore to play a new game. Okay, sometimes the rules can be a chore, but I haven’t hit one yet that I said, this is a waste of time. I’ve actually had fun with every single one of them, even when I’ve lost. So the happiness quotient is probably a few percentage points higher than it might otherwise have been.

So, that’s the story so far. I think I can make sixty games played by the end of December (three more), maybe even bring the number of new games bought this year that I’ve played to twenty (four more). I don’t believe in setting unreachable goals. Game on.

  ----


* I’m a wonk at heart, and I was doing – updating, actually – an audit of the games we owned. I thought it would be interesting to put a tick against every game in the collection that we’d managed to get to the table at least once. The 22% of games played carried pretty closely from the overall number of games we owned to the subset of the wargames that I would never be able to get my wife to play (a little shy of 23%).

Note: while the illustration is a stock photo, we do own an original copy of Trivial Pursuit. We have friends interstate who we catch up with once or twice a year, and every time we do we have a "guys vs gals" grudge-match, using the original questions. In the interests of full disclosure, I'm the only one at the table old enough to remember some of the "current affairs" questions from the mid-eighties, but he womenfolk win two times out of three,


Saturday 25 November 2023

State of Play: Never Mind the Billhooks (the Italian Wars in glorious 28mm)


I haven’t been writing about our Wednesday night forays lately, and this has been noticed by some of our readers. There are are a couple of reasons for this seeming oversight. Firstly, our host, B, led us the through a game of Here I Stand: Wars of the Reformation, 1517-1555 (GMT Games, 2006). We played HIS over five turns, pone week per turn. This was quite the experience; we’ve played longer, more convoluted boardgames – like New Angeles (Fantasy Flight Games, 2016) over two weeks before, but never he same game for five weeks straight. I mentioned this in a previous post, and I was going to write something about the game, but I’ve been struggling with how to approach it. It’s such a mammoth exercise; I played the French, and I was so wrapped up in the goings-on within and immediately without my borders, I was oblivious to what was happening on the other side of the Continent between the Hapsburgs and the Ottoman Empire beyond the broadest of brushstrokes. I was barely cognisant of the wrestling between the Papacy and the Protestants, right on my doorstep.

I will try to put some thoughts together about HIS for a future post, but not today. Since completing that sumptuous feast of gaming, B has brought us a “palette cleanser” (his words), in Zombicide (CMON Global Ltd, 2021), which has been gracing the table these past several weeks. While I’ve enjoyed Zombicide much more than I'd anticipated, it’s not a wargame; the way we play it, it’s barely a co-op.


This week saw a return to the old ways; B broke out his wargame miniatures for us. Table resplendent, we were treated to our first run at a new (for the Wednesday group) miniatures wargame.

Never Mind the Billhooks (Wargames Illustrated, 2020) is– to my mind – a medium-scale skirmish miniatures wargame rules set. When I think if skirmish rules, my thoughts run to much smaller-scale combat rules like SAGA (Gripping Beast, 2018), Muskets and Tomahawks (Studio Tomahawk, 2012), or Force on Force (Osprey Publishing, 2009), where each figure represents a single combatant. Never Mind the Billhooks was originally designed to recreate the kinds of battles that took place in England and Scotland around the time around the fourteenth and fifteenth centuries, between armies numbering seven  or eight hundred to a thousand strong. The rules are simple and robust enough that resources are available to enact a number of theatres of war using the same basic ruleset. Our game was a consideration of a representative battle during the Italian Wars (late fifteenth to mid-sixteenth century).

Activation is conducted by card draw, which is essentially a chit activation mechanic, but with cards. The draw deck consists of leaders (formation commander), who get two orders each activation, a special card that triggers a roll-off for the two sides to gain a tactical advantage card (from a deck of a half-dozen or so), that the holder can use in that turn, or relinquish. The kicker is the last card of each round doesn’t get drawn; one unit doesn’t get an activation that round. That alone can be devastating to a side, but it helps to capture the ramshackle nature of medieval combat in a simple, if inelegant way.

Combat is straightforward, a fist full of dice based on what kind of unit is deployed and how many troops are left, with the defended being able to roll for saves against any hit (except hits from cannon, which also get one extra automatic hit on tight formations such as Scottish schiltrons, Swiss gevierthaufen* or Spanish tercios).

The battle was to be fought with an unidentified Italian state (fielded by D and myself) defending its sovereignty against French interlopers (H, with B mostly in an advisory role). The French forces were arguably superior, with a squadron of mounted knights (French nobility – the crème de la crème, if you will), two units of crossbowmen, a battery of cannon, and as its centrepiece, a formation of Swiss pikemen with attendant skirmishers. This is what the Italians feared the most. Nothing can stop a Swiss pike square, except its total destruction, and that wasn’t going to happen with our meagre force.

The Italians set a defensive line and tried to hold firm. We had our own spear square (a mere shadow of the much larger and more powerful Swiss gewalthaufen*), flanked by arquebusiers and sword-&-buckler skirmishers to their left (under D), with another formation of arquebusiers to the square’s right, facing the grain-field (under my direction). The Italian battery placed at the extreme right of the Italian lines. It was trained on the top of the road, the obvious path for the Swiss mercenaries. Inside of them were a squadron of heavy cavalry, a force to be reckoned with but not in the same league as the French nobles. A band of mounted squires (unarmoured) were held in reserve, to the rear of the Italian left. In spite of our numerical superiority in formations – the armies were probably roughly equal in represented numbers), there was apprehension among the defenders at having to face both the French knights – a devastating force against infantry – and the implacable Swiss warriors.

Battle was joined with the Italian cannon trying to thin the Swiss ranks, with some success but not enough to make a real difference. After some poor initial placement, the French crossbowmen were able to ablate diagonally over a couple of rounds) into a position to approach the Italian cannon battery unhindered. The crossbowmen’s deflection allowed the French cavalry to move up into a covering position. I’d positioned the Italian armoured cavalry to cross the line of cannon fire between barrages. This they did and were able to threaten the crossbow formations while staying out of their range for the moment. Meanwhile the Swiss gewalthaufen moved inexorably forward. D brought his sword-and-shield men forward to try to engage with the Swiss skirmishers.

The Italian artillery was taking a toll on the Swiss block, but the unit’s cohesion remained unchallenged. Another round and they would be close enough for the arquebusiers for engage with them.
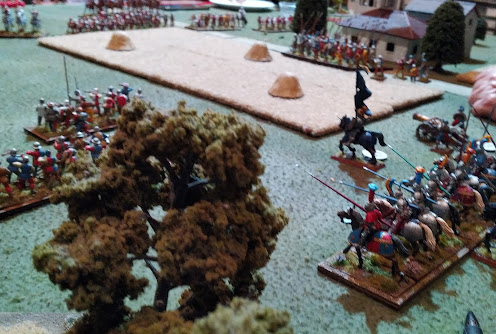
Meanwhile, on the Italian right, the Italian cavalry had approached the French lines, when the French Cavalry order was drawn. The trap (such as it was) was sprung. The French drove up to meet their Italian counterparts in a devastating confrontation that would see them vanquished from the field. Or that was the plan.

A bold attack.

In some rulesets, striking at an oblique angle would lend the attackers in this situation an advantage, allowing them to strike essentially a portion of the opposing formation and denying them the ability to defend with their full force. In Billhooks, a defending unit can pivot (within 45°) to meet an attacker. Also, the crossbows, being missile weapons, could not fire at the Italian cavalry because they were now engaged in melee with a friendly unit.

Still, this should have been easy work for the French knights, to see off their upstart Italian opposition. This was the biggest upset of the battle. Attack and defence is rolled simultaneously. Each side had 16 dice to roll, and each had the opportunity to roll saves on any hits made. The difference was that while the Italians hit on rolls of five or six, the French needed fours or higher to strike a blow.

Reversal of fortunes.

The French attack was blunted in the cast of the die; three hits from a possible sixteen, of which the Italians were able to roll saves for two. One palpable hit. Where did all those other anticipated hits go, you may wonder? Let me elucidate. The Italians scored no less than ten hits, of which, only three were denied by French saving throws. The remailing French cavalry withdrew, the Italians at their heels.

Yet to activate that round, the Italians pressed their advantage. The compagnie broke, and the Italians looked around for who to attack next. In their activation. The French battery, which had hereto had some success against the arquebusiers on their left (Italian right), saw the destruction of their cavalry and chose the better part of valour (failed their morale roll).

Reversal of squires.

The Swiss skirmishers took pot-shots at the swordsmen, while the gewalthaufen closed to engage with the Italian spearmen. When the Swordsmen tried to engage with the firearm-wielding skirmishers, they melted like a late snow into the main body of the pike formation.

Around this time, the crossbowmen, who had advanced forward enough to engage their static adversaries, broke their advance, their left unit firing at the Italian battery while their right swung around to pour a rain of shafts down on the arquebusiers on the Italian right. With the Swiss engaging imminently with the main force of the Italian defence – the spearmen – there was nothing more for the arquebusiers to do but defend themselves as best they could. They pivoted to face their assailants and returned fire, each side gaining a hit.

It was time for the Italian battery to look to its own defence, and it did so, pivoting to face the French threat and firing. While it may have given pause to the French, making them question the wisdom of attacking cannon, it gained no hits.

With a new round the Swiss met its (rather puny) Italian counterpart and smashed it, then advanced and smashed it once more. The spearmen could do nothing to stop the onslaught; they broke and fled. The gewalthaufen marched forward, no doubt more interested in the Italian baggage train than their paymasters’ cause.

The Swiss: bloodied but unstoppable.

Meanwhile, the Italian cavalry had reversed, redressed their lines, and saw an opportunity in the French crossbow unit attacking their supporting arquebusiers. With a single charge they were put to flight, ending the match with the third broken French unit.

Looking back on it, I really like Never Mind the Billhooks (though I don’t think I’ll ever get used to the British miniature gamers' insistence on making titles out of unfortunate puns). It lends a suitable amount of chaos to the activities, while forcing the players to consider the potential ramifications of their actions. The Italian squires I mentioned at the beginning never got to do anything really, because they were too close to the other units to be able to turn. In Billhooks you can move forward, pivot from one corner to turn (up to 45°, or further but taking a disordered token for the trouble), or ablate forward, maintaining direction but moving to one side at less than 45°. Or you can about face, but you’ll have to spend your next order reforming onto battle coherency again. I’m sure we’ll get to play this again soon. B is on an Italian Wars jag, and has been painting up some lovely Swiss and Landsknecht miniatures for truly epic gaming. Before the season is over, we may even get a game or two of Arquebus: Men of Iron Volume IV – The Battles for Northern Italy 1495-1544 (GMT Games, 2017). Here’s hoping.


The vanquished.

* Gevierthaufen, an earlier term for the tight Swiss polearm square, literally “square crowd”, and was used as an early designation of this formation. The term gewalthaufen (“crowd of force”) was adopted later, being a better descriptor of the new, powerful configuration.


Thursday 23 November 2023

State of Play: Freeman’s Farm 1777 (first two-player game)


So, last week I was running late to T’s place after helping run a public lecture; this week T was running late coming here because of something work-related, so I thought better of trying to cram in our last game of Napoleon 1806 (Shakos, 2019) and maybe not enjoying it as much, and opted or a game I knew would take a shorter time to work through. Having just played it only a couple of days earlier and wanting to reinforce the learnings from that experience, I set up Freeman’s Farm 1777 (Worthington Publishing, 2019), A recent acquisition that already written about as a solo experience. I was curious to see how T approached it. Freeman’s Farm is not your father’s wargame. It’s novel without sliding into novelty, but if you’ve been raised on a diet of hex-and-counter games, it might be a shock to the system.

Initial set-up, British view.

I needn’t have worried. Five years ago, T might have struggled with the foreignness of the game, but he took to it quickly. After a couple of halting rounds, we were scooting through it. I didn’t note when we started, but I think, with the explanatory notes ahead of play, we were still done in about an hour-twenty. Fast play isn’t the only criteria I judge games by, but needs must.

In my innocence, I thought the two-player version of Freeman’s Farm would be a little less brutal. In the two player format, just as in the solo-mode, you roll a handful of dice, as directed by the orders card for that particular unit. The difference is, when playing solo, a single six will be a hit on your target, a four or a five will cost them a morale point, and a single rolled one is an own-goal; you’ll say goodbye to one of your blocks. In the two-player version, the rolls are the same, but you’re looking for doubles. It sounds hard – how often are doubles going to come up on four or five dice, right? Well, I haven’t done the math on this, but more often than I would have expected.

Bad rolls happen.

I’m aware I keep comparing Freeman's Farm to Chancellorsville 1863 (Worthington Publishing, 2020), but it bares mentioning; in regard to combat, Chancellorsville is a slow grind, with corps butting up against each other and taking their licks. You have to spend your activations jockeying to engage the enemy in a favourable circumstance, then engage and pray for rain.  For all that, the game plays out quite quickly, about an hour-and-a-half for a solo game. In Freeman’s Farm, there’s less jockeying; the game puts you at the front of the action and hands you two ways to lose your units; by having you opponent hammer you repeatedly until you have no blocks left to represent your intact unit on the board, or to have your opponent hammer you repeatedly until you fail a morale test and your troops stalk off in disgust over your poor leadership and resource-husbanding skills.

One thing I left out of our game, at first accidentally, then on purpose, was the use of Momentum points to buy off Morale losses. It slipped my mind when I was briefly explaining the game mechanics. I remembered about eight activations in, but I decided not to complicate things further at that point. We did both use our generals to try to rescue units from Morale-roll failures, sometimes even successfully. We both bought a lot of tactics cards. T was better at using them at the opportune moment than me; I finished the game with maybe half a dozen unused Tactics cards staring up at me, although I did manage to save a unit in the last third of the game with a card that allowed me to change the face of one die after the opponent’s roll, turning a five into a one and costing Fraser a block. With more game-time I think we’ll both get better at using these.

Poor's regiment in the crucible.

At the end of the game – when both our orders decks had been exhausted – I had to revisit the victory conditions.  Either side wins a sudden death victory if three of the opponent’s formations are cleared from the board through block attrition and/or morale check failure. Technically, I had won the game two rounds earlier, with Hamilton’s unit’s breaking under the heat of battle (with his morale down to three points, it may have gone either way). I didn’t get off unscathed; Riedesel was a killing machine, and if he’d moved to his third position instead of trying to support Hamilton, then turned on Glover or Nixon, things may have gone differently.

At the end of a Monday night game, T and I will usually exchange a few words about the play of the game of a particularly good move or bad roll. The first thing T said at game’s completion was, “Can we play this again next week? I can see wat I did wrong and I want another go at it.” Which is pretty much what I’ve thought at the end of my first run at any Maurice Suckling game.


Sunday 19 November 2023

State of Play: Freeman’s Farm 1777


I recently acquired a couple of second-hand games, including John Poniskie’s Lincoln’s War (Multi-Man Pubishing, 2013), an old Strategy and Tactics issue 120 with an unpunched copy of Joseph Miranda’s first published game, Nicaragua! (3W, 1988), and the subject of this piece, Freeman’s Farm 1777 (Worthington Publishing, 2019). I’d been on the look-out for Freeman’s Farm ever since I started playing designer Maurice Suckling’s second release, Chancellorsville, 1863 (Worthington Publishing, 2020).

So, I got it, and I’ve played it. And it shouldn’t come as a surprise to anyone that I like it. I’ll post a proper review when I’ve spent some more time with the game – this is based on my first solo outing, but I felt a fire in the belly to share some first impressions. So, here are some initial thoughts on Freeman’s Farm 1777.

Elegant solo mechanics

Chancellorsville 1862 was a development of the same system used in Freeman’s Farm 1777, but included a hidden movement system to create a fog of war effect. This involved screened-off mini-maps for the plyers to manoeuvre their own units until they will come into contact with units already on the main board, at which point they are transferred to the shared map and bloodshed is sure to follow. In the solitaire version of the game the hidden movement is approximate by a hidden movement track that the out-of-contact units move down when activated by the prompts on the opponent side’s bot order cards. The whole thing is quite elegant, perhaps the apotheosis of this design thinking.

Freeman’s Farm captures a different kind of situation; it was much more of a set-piece battle stretching over a few miles, not the contest of manoeuvre and hold spread along an entire valley. The bot opposition isn’t a deck in Freeman’s Farm. Instead, the bot responds to the turn of an activation card with each game turn. Where a human opponent will draw three activation cards at the beginning of the game, and maintain that hand-size throughout, the nonplayer side activates each unit as its activation card appears.

Each unit has a unit record card that lists what orders can be given to a unit when it is activated. In a solitaire game, the cards are flipped to their reverse side, which shows the hierarchy or orders for that unit’s activation. Upon activation, Fraser’s redcoats will always do (a), unless (a) is for whatever reason is impossible to perform, or has already been accomplished, in which case Fraser will do (b), and so on. The units each have a list of around four orders, to perform. This might sound clunky and proscriptive, but it it’s a logical progression of that each unit would be attempting to do as their part in successfully executing the battle, and it fits the design of the game very well, and after the first couple of turns, begins to feel quite natural. After one game I can’t say it feels like the game is responding to your actions in the same way that Chancellorsville does, but that might be a familiarity thing; I’ve played Chancellorsville quite a bit, but only solo.

Limited choices

The thing that struck me about Chancellorsville was just how structured the play was in the game. Units can only be ordered if you happen to have an activation card for that unit. An activated unit can move a space or two, can move an engage with an enemy or it can stand their ground and develop defensive fieldworks (at no cost to their ever- is diminishing cohesion). The board movement is severely prescriptive. Each position has two or more links to other positions only, though it would be possible – should you ever want to – to march a unit from one end of the map to the other, barring interception.

Initial board setup. Colonial skirmishers hold Coulter's Farm and the Mill (blue cubes).

The board in Freeman’s Farm is even more prescriptive. There are coloured markings dictating where each unit’s pieces start the game, and arrows to show their objectives.

Hamilton (on the British side) has one job: clear the Mill of colonial skirmishers, then take and hold Freeman’s Farm, which will then act as the fulcrum for Burgoyne’s overall plan. Fraser’s job is to attack and roll up the American left flank. The options are to fight, or to move and fight. Some units have the option of using their own troops to plug holes in other frontline units, but each one has a role and are expected to fulfill that expectation.

This makes the game sound like its lacking in dynamism. Those who don’t think a wargame is a wargame if it doesn’t have a hex-grip overlaid on the map are going to balk at this as soon as they look at the back of the box. But to my mind, Freeman’s Farm is even more dynamic than the games in Worthington’s Great Sieges series. The combination of activating units only when they are available to activate and limited options of what to do with them when they opportunity arises makes every decision a crucial one. You know what the enemy intends, and you must use every opportunity to thwart their intentions. I can’t go into tactics, having only played a single game, but I’m reminded of the Johnson quote; “Depend upon it, sir, when a man knows he is to be hanged in a fortnight, it concentrates his mind wonderfully.”

Both a fast and a good game

I read the rules in a couple of hours over two nights a couple of days before I played the game. I took so long over them because I like to give rules a bit of time to filter through my head before re-reading them and making sure I’ve got it right (in itself, not guarantee). So, when I actually came to the game, I had a pretty good idea of what was happening. I’m sure my familiarity with Chancellorsville helped.

A bloody battle.

When I set up to play I got through two rounds before I realised I hadn’t set up the British cards on their solo side. That added a couple of minutes to reset the board and reshuffle the decks. In spite of this, I managed to set-up Freeman’s Farm, play through a whole game (finished three activations short due to the lack of forces left on the board after some particularly bloody fighting, and pack the whole thing up again in the under an hour-fifteen. And this wasn’t some simple distraction to pass the time, like filling a sudoku; the whole hour or so of play was an immersive – and extremely tense- experience.

I came away from Freeman’s Farm with the sense of needing to talk about it. I usually make it a rule to not talk about a game in any depth without playing it at least three or four times first. I’ve also tried not to say a lot about it. I want to keep most of it for the review, which you can probably expect in a couple of weeks. I can also report that, while Chancellorsville 1863 has indeed sold out, Worthington Publishing still has stock of Freeman’s Farm available.  


State of Play: Commands and Colors: Tricorne - Bunker Hill


Ah, the best laid plans. When I declared last week that we would get to the sixth game of Napoleon 1806 (Shakos, 2019) this week, I’d forgotten I had a prior Monday night commitment that meant I wouldn’t be home to set up. The prior commitment was a public lecture on space archaeology and the legacy of the various moon programs, presented by the History of Science, Ideas and Technology Group (HSITG), on which committee I sit (I contain multitudes).

Given this commitment, I asked T is he’d mind hosting the game that night, after the talk, and told him to surprise me. When I arrived, T had set up a game that, oddly enough, I’d been thinking about just recently; the Bunker Hill scenario of Commands and Colors Tricorne: The American Revolution (Compass Games, 2017). I’ve had my interest in that war rekindled recently with the receipt of Maurice Suckling’s Freeman’s Farm 1777 (Worthington Publishing, 2019), a sparse, clever, and fast-playing game I suspect I’ll have to write about very soon. Anyway, if we couldn’t close off another 6x6 game with the final run at Napoleon 1806, this was a welcome distraction.

If you know any Command and Colors game, Tricorne will look familiar, with the same stickered blocks, mounted hex-grid map, terrain tiles, and fancy symbol-faced dice. There are a few changes under the hood, though. The block cluster generally represent much smaller bands of fighters. This is reflected in the hit dice and the range; most units will at best roll two dice in melee and the elite ones will do that at a two-hex range. All units have a maximum range of three hexes, though at that distance, you’ll only be throwing a single die, so it will usually take several tries to reduce a unit to nothing. The points don’t come quite so easily in Tricorne.

Another change to the system is the Rally rule. When a unit is forced to retreat, it must roll dice equal to its block count (intact units get a one-die bonus). This is called the Rally roll, and you’re needing to roll a flag, just one, on your handful of dice; if not, that unit leaves the battlefield, and your adversary receives a victory banner for your trouble.

That's a lot of Redcoats.

Bunker Hill is historically the first force-on-force battle of the Revolutionary War, and it is the second scenario in the game. Like most C&C early scenarios, it is more or less designed to introduce or reinforce the key concepts of the game, and to highlight the differences form, say Commands and Colors: Napoleonics (GMT Games, 2010). It seems one-sided, but so did the actual battle. The British forces are a mixture of Regulars and elite forces, while the Colonials are Militia in the main, with a couple of Rifle units peppered in. Historically the British numbered around 6,000 men, while the Colonials probably had between 150 and 250 souls, but they held the advantages of high ground looking over a fairly clear, gently undulating field before them. General Gage ordered a frontal assault, probably thinking a strong show of force would put fear into the hearts of the rebels and they would be less inclined to engage a numerically superior force. The hopelessly outnumbered militia nonetheless held their nerve, under orders not to fire until they saw “the whites of their eyes.” The British attacked in waves, but the hereto untested militia held their ground, inflicting heavy loses on their assailants, before pulling back, if not in good order, at least not in complete disarray. The Redcoats claimed victory, but were in no fit state to press their advantage.

In our reconstruction, T took command of the British attackers, who have the initiative in the Bunker Hill scenario. He immediately pressed froward in his centre-left, bringing a line of Regular troops under the command of Pigot, up the rise toward the forward redoubts manned by my Militia, using the wooded hex as meagre cove for his soldiers. T’s troops held their fire; at that range (three hexes) each could roll a single die, but behind their fieldworks, the Militia could shake off a single ranged hit.

British main assault (round 1), Colonial centre-right. A stout defence.

There was no way I was bringing my Militia out to confront the redcoat onslaught, so I satisfied myself with sniping from cover. All my musket and rifle units were at extreme range (three hexes) for the full first half of the game, but I managed to get a couple of singles on different on T’s Light troops on his right (my left) and pushed a couple of his centre regulars back as they tried to probe forward. My first banner came when T tried to rush his Light troops on my left; both were pushed back (forced to Retreat), and one failed their Rally roll and dispersed. Nearly half of the casualties I inflicted were the result of failed Rally rolls, as well as one of my own losses. It’s a good rule that reflects the brittleness of the formations involved (though I can already hear some people complaining about it before they’ve ever played a game).

T’s attack was concentrated on the centre for the majority of the game. This was at least in part due to the cards he was dealt, judging by what he played. One complaint about the Commands and Colors system I’ve heard and read fairly often over the years, nearly as often as how unbalanced many of the scenarios are (but’s that’s a discussion for another time), is the lack of player agency, or more precisely the imposition of the order cards on player agency. It’s usually couched in terms of the cards limiting a player’s opportunities to exploit an opening or a favourable situation. Anyone who has played a good number of C&C family games will have met with the situation of simply not having the cards to hand to activate their troops in one or the other flank for a significant portion of a game. It can be frustrating to have massed French cavalry within striking distance of plump Spanish line formations but lack any orders to spark their attack. But this is just how commanders would historically face a real battle; inadequate or misleading intelligence, intercepted orders, officers misinterpreting or straight-out ignoring orders, these were all part of what made the execution of a battle so difficult, and this is what is mimicked by the vagaries of the card-draw order system. I think it’s actually a strength of the system; I believe it forces me to be bring my best game, having to compensate for the unforeseen difficulties that fate hurls in my way. That's it; sermon over.

Grenadiers under Howe pushed back.

Anyway, it remained a mystery to me why T didn’t activate his Grenadiers under the command of Abercrombie, preferring to lead the attack on his right with the light infantry at his extreme right (except may that bringing the Grenadiers forward would potentially put them under fire from three separate redoubts). They ignore the first flag rolled against them, and get an extra die to their Rally rolls, and they are devastating in melee. In the end, it seems to have come down to Abercrombie’s desultory leadership, that the Grenadiers didn’t get into the fight, until Howe himself rode over the take command of one of the units.

The Militia and Rifles of my left-most defences held their nerve under cannon fire and repeated attacks by the T’s probing Light Infantry. Play of Coordinated Advance, Assault Center, and Leadership (Center Section) orders in swift succession allowed Pigot to send forward a line of Regulars up to striking distance for melee combat, but my militia and single cannon battery held firm. In their return fire, the Colonials chewed though the British ranks, pouring withering fire down upon them, and and causing several units to break and flee.

It was another round or two before T could bring Pigot's remaining forces back up to line; I used this time to try to whittle away the Redcoats’ resolve. Remarkably the Militia on the Colonial right, under the steadying hand of Prescott, held firm in the face of a battle-hardened enemy.

Game-state, roughly mid-game (Americans four banners up). Pigot reroups.

By roughly the middle of the action, I was up four banners, having lost none. I was fortunate in that T’s card draws never revealed a Bayonet Charge or Line Command. As it was, I don’t think my hard-pressed citizen soldiers would have held up against repeated melee attacks, regardless of their superior breastworks. The bulk of the work in thinning the ranks of the British came down t the superior marksmanship of my Rifles, which had earlier in the action made short work of T’s left-probing Light infantry.

The spoils of victory? Pigot's second thrust.

While Pigot was still dressing his line, Howe had become so disillusioned with Abercrombie’s performance – or rather the lack thereof – that he personally took command of a unit of Grenadiers and pushed them up toward my centre-left works, but they were (thankfully) pushed back.

When the end came, it came quickly and like a hammer-fall. Pigot brought his men up to the breastworks and no quarter was given. One Militia unit broke after sustaining heavy losses but managed to Rally after retreating. The remaining rifles and cannon took a heavy toll on Pigot’s brave men, with one troop annihilated, and another two sustaining losses and being forced to retreat. One of these did not manage to Rally and were lost to command.

Sniping rifles reduced the British further, but the survivors now had a taste for blood. Pigot led a charge on the reduced cannon position and destroyed that unit, while another pushed the Militia out of the centre fortifications. Clearing the breastworks, they were in a fine position to sweep up my remaining Militia, were it not for Prescott’s indominable verve; he seized the moment, leading the remaining armed citizenry to the task of seeing off the hated Lobsters. In the fray that ensued, brave Pigot fell prey to an anonymous musket ball. The retreating survivors were allowed to carry their leader away from the carnage to the victorious cheers of the surviving Militia. The day was theirs.

The final score for the game was Americans 7 to British 4, for a six-banner scenario. The seventh came with the failure of Pigot to successfully roll for his survival in the action with Prescott. 

End-state. Comprehensive American victory, and a boost the the nation's morale..


Friday 10 November 2023

State of Play: Napoléon 1806 (5/6)


Gentle reader, an apology. After a drought of wargaming over the last several weeks, due to a perfect storm of preventative factors, I hope to now return to some regular reporting and reviewing. After a three-week hiatus (four if you count the week we played Fire and Stone: Siege of Vienna 1683 (Capstone Games, 2022 – game report here), involving two overseas trips and Hallowe’en celebrations for my adversary, and a mixture of technological failings and familial duties on my part, on Monday night T and I finally got together for game five of Napoléon 1806 (Shakos, 2019). This time out, we incorporated the last two components from the Rules for the Grognard that we hadn’t already adopted: the inclusion of cavalry units and free set-up. I’ll get back to these in a minute.

This was the penultimate game of my 6x6 excursion into the Prussian campaign, and if nothing else, the previous four games have highlighted for me just how little I know about Napoleon’s early campaigns into central Europe. The names of the battles sound familiar; Halle, Schleiz, Jena-Auerstedt. But I’m just not as familiar with this part of the Napoleonic era as I am with the Peninsula War. If anyone can recommend a good general history covering the rise of Napoleon through to about 1812, please leave me a note in the comments.

A neutral view of the antagonists facing-off.

Napoléon 1806 covers the period from the 8th to the 21st of October of that year, during Bonaparte's campaign against the Fourth Coalition. The game is only seven turns in full, so the action can move quite quickly, subject to the size of your formations and your luck with the card draws. As I’ve mentioned previously, the blocks represent the forces under the senior generals involved on each side during the campaign. The relative strength of each command is managed off-board, on a tally chart recording the disposition and exhaustion level of each unit on a side, information that is shielded from the other player. When moving a formation, the player declares the unit to be moved and draws a card, and the points-value of the drawn card dictates how far the unit can move. Blocks may move together in larger formations, but for each  

As mentioned, we used the free-setup rule for this game; the movement is point-to-point, with each point representing a town or city of the region, and the connections the road and path network connecting these places Some are superimposed with either a French or Prussian eagle; these mark the places at which formations may be placed. T played the French, as is his wont, and set up in an aggressive fashion; as the Prussians, I set up more defensively. It’s not really an option in the game for the Prussians to go on the offensive too strongly, too early. The odds are weighted on the side of the French, both in numbers (the French side fields one more formation than the Prussians) and in strength (most of the Prussian formations are under-strength, and while there are possible opportunities for reinforcements – two cards that can be played in the draw phase, if they happen to be drawn), these only add one infantry cube to a given formation, which in many cases won’t be enough to grant the unit an extra card in combat). 

I did place a double formation threateningly close to Bamberg in an attempt to tie-up some of T’s forces and limit his options. There are four cities on the board worth victory points – Erfurt, Halle and Leipzig (which begin the game under Prussian control), and Bamberg, which is the source of French supply, their anchor for the campaign. In the game these are referred to as citadels. Victory in Napoléon 1806 is points-based; one point for each enemy formation eliminated, with the four citadels worth varying numbers of points. Capturing all three northern citadels would all but hand victory over to the French, but the loss of Bamberg could draw a victory put of reach for the French player.  Not only did T keep two units close to Bamberg, but in a moment of analysis paralysis, he held another two or three units (I suspect one was a Cavalry token) in reserve at Münchberg, too distant to relieve the Bamberg protectors or to provide effective support for the Leipzig-Halle push.

Turn 3: Tauentzien's defiant stand.

As has happened in previous games, this one was dogged by rain (turns three and five). Rain is dictated by the draw of a card during the draw phase and only the; each turn begins with both players drawing three cards from their deck and placing them in their hand. If one or both draws a Rain card, that is placed in the Rain box for the turn. Rain adds an extra exhaustion point to every unit activated, whether they actually get to move or not, and adds an extra point cost to movement for the whole formation. If the rain card is drawn at any other time, it’s used only for it’s points or combat value, dependent on the draw.

It’s tempting to sit out the rain turns, especially with larger formations, but movement is crucial to the game for both sides, especially for the French, who have to bring their forces up nearly the full length of the map to traverse to challenge Leipzig and Halle if they are going to have a chance of winning.

Turn 4: a marked lack of progress on either side.

The free setup also worked against both of us to a degree. It’s been a month since we last played Napoléon 1806, and that distance worked against us. I think T had an overall ambition of racing to the Leipzig/Halle corner of the map and swiftly seizing them before I could reinforce the cities, then turning on Erfurt, but I don’t think he considered the logistics of that action too thoroughly before setting up. The French advance is often hindered by the lack of channels for forward movement. Moving a formation into a position already occupied by a friendly formation will halt your movement (though you only ‘pay’ for the distance achieved). Drawing a low-point card for the first formation in line will stymie anyone following, unless you can find them an alternate route, which I suppose is one of the joys of point-to-point movement games. From Münchberg there is only a single path north until you reach Hef, where the path branches into two paths. This is the most direct passage to Halle/Leipzig, and the only way to avoid the river crossings that may be dynamited by the uppity Prussians. Any stalling there due to a bad activation draw along there is going to slow you down for a turn, maybe two. That kind of delay will almost certainly cost the French player the game.

All the action at end of Turn 6. Blücher (activated, face-down) makes a
desperate run to slow the French progress toward Halle. The draw off a six-point
card - unlikely but possible - could put a French formation into the city in the next turn..

To be fair, I only sprung the free setup inclusion on him when he arrived. If T had been given more time to examine the situation, I think he would have placed things differently I should have put more thought into my placement as well. I was concerned about T pushing up through the forest in the south-west of the map, north of Bamberg (by orientation – upper right in most of the photos) and quickly closing the distance on Erfurt. I tended to pair-up my formations in an effort to make them more of a challenge, while pairing some weaker generals with Cavalry blocks to make them appear stronger. This backfired when T sent Murat and Brassiere against Tauentzien, who was backed only by a Cavalry token. The cavalry blocks don’t provide any assistance in combat; they are really there for bluff value only, to add a further measure of fog-of-war to a battlefield already soaked in it.

Tauentzien, to his credit, didn’t go down without a fight. The formation made its stand at Schleitz (as it appears on the game board), and held the town for the first round of combat in turn three (trading damage point for point, so no retreat required), and fell in the next turn. But his sacrifice meant that that two of T’s better units were tied up for two turns, and with only three turns left, he couldn’t draw a high-enough point card to bring the combined formation up to threaten Halle and Leipzig. Other forces came closer to threatening Erfurt, but I think that was a feint on T’s part; I suspect that of the two blocks one or both were cavalry tokens. T will normally not shy away from a fight, but he refused to engage combat on a couple of occasions with that formation. No so clever as he thinks.

State at end of Turn 7, from the Prussian side.
(Note the one  surviving Prussian Cavalry marker, to the left.)

This game saw a lot of jockeying for advantage, and a lot of false starts due to low card draws and inclement weather, but little actual confrontation. Tauentzien was the only casualty of the whole game, gaining T the only point shift, but his sacrifice probably saved the Prussian cause. There were other altercations (two near Bamberg), but nothing conclusive. Prussia won by default, maintaining control of Erfurt, Leipzig and Halle, but it didn't feel at all triumphant.

State at end of Turn 7, from the French side.

Next week, all things being equal, will be the last game in the Napoleon 1806 6x6 cycle. A considered review should follow soon after. Oh, and I now have both follow-up games; I ordered Napoléon 1807 (Shakos, 2020) from the good folks at Hexasim within days of receiving 1806, and couple of weeks ago, I managed to nab a copy of Napoléon 1815 (Shakos, 2022, and a nominee for the Charles S. Roberts Award for Best Napoleonic Wargame for 2022). I hope to get those to the table early in the new year, with reviews following.

End-game disposition of the French...


... And the Prussian formations. The two stray exhaustion markers are from
pretending to place them while moving Cavalry token, All part of the deception.


Stripped Down for Parts: The Lamps Are Going Out: World War I

       World War I, or the Great War (or The War to End All Wars), as it was referred to at the time, holds an abiding fascination for me as...